XPA instance creation wizard
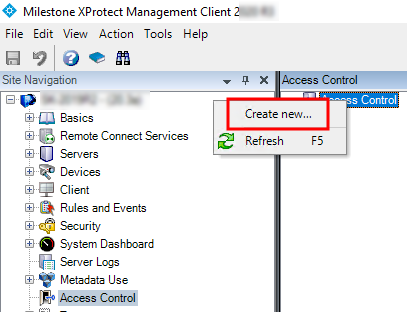
After the OnGuard XProtect Access MipPlugin is installed and configured on the XProtect Event Server, the Access Control instance can be created in the XProtect Management Client. Right-click on the Access Control root node and select Create new... to begin the wizard.
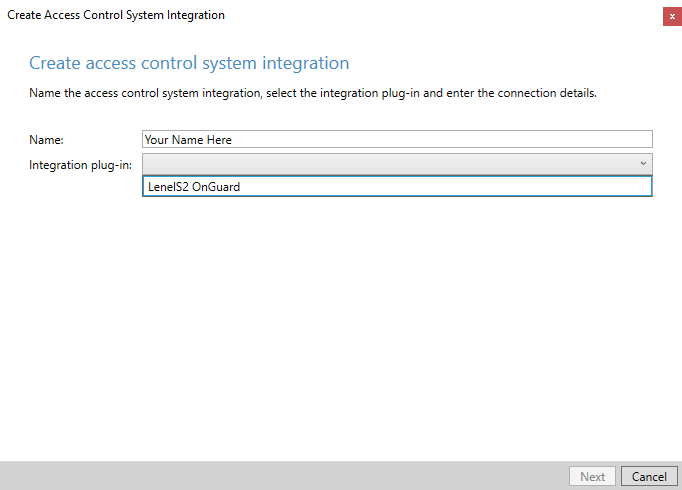
Enter a name for the instance and select the Integration plug-in. Note that you will find a plug-in named LenelS2 OnGuard.
After naming and selecting the plug-in there are a set of required credentials, parameters, and options to complete. These are required to define the connection to the OnGuard server. All the properties used for all versions of OnGuard are shown in the Management Client wizard.
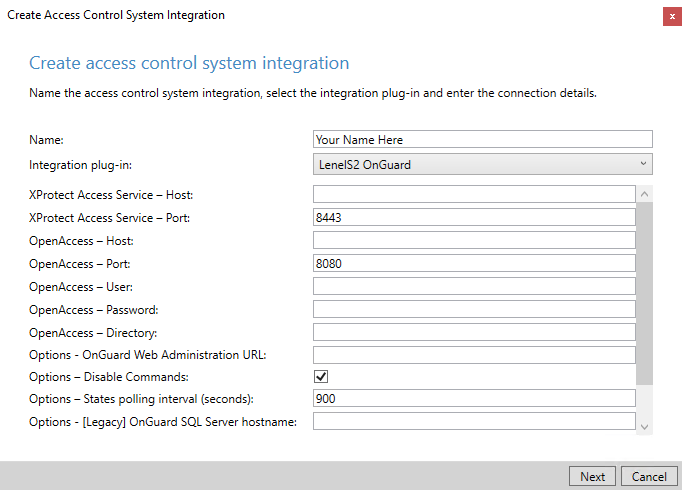
Fields required to establish the connection are listed below. It is possible to populate any field available at this step in the process, the fields listed are the minimum required and will allow successful connection.
|
Empty Field Names |
Required Values |
|
XProtect Access Service - Host: |
Hostname of the OnGuard server or the Integration server. |
|
XProtect Access Service - Port: |
Default port is 8443. |
|
OpenAccess - Host: |
IP address for the OnGuard server. |
|
OpenAccess - Port: |
Default port is 8080. |
|
OpenAccess - User: |
SSO user defined in OnGuard |
| OpenAccess - Password: | Password for the SSO user. |
| OpenAccess - Directory: | Directory for the SSO user. |
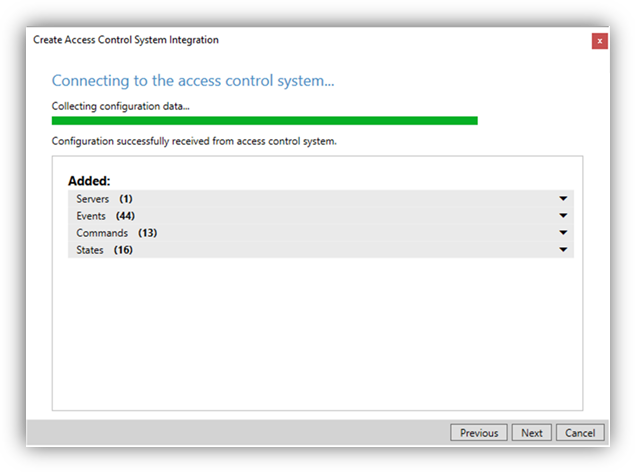
After the connection is created, the wizard will import data from the OnGuard server. This includes Doors, Units, Servers, Events, Commands, and States. Click Next.
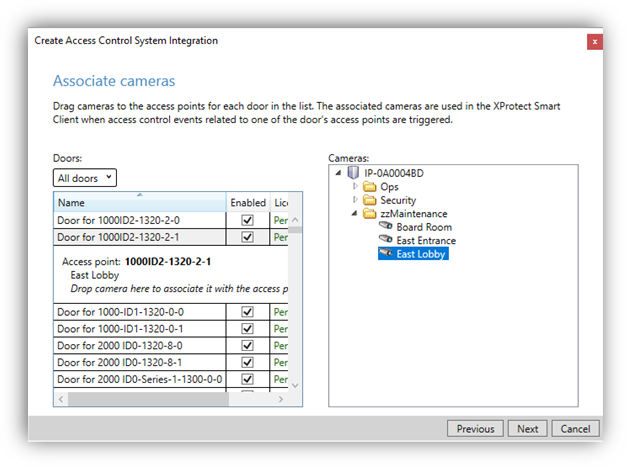
On the following page you can associate doors with cameras. This is done by selecting a camera and dragging it to one of the imported doors. Click Next after association of doors and cameras. The configuration will be saved, and the wizard is complete.