

Smart Client settings for the OnGuard Event Matrix plugin
The available settings that control the behavior of the OnGuard Event Matrix plugin are in the Settings menu of the Smart Client. Any behavior that is modified in this menu only impacts the behavior of the current user's Smart Client application.
-
Open the Settings menu in the Smart Client and go to the OnGuard Event Matrix menu.
-
There are three tabs that contain different settings, the General tab, the Workstations tab, and the Floating Window tab. Adjust the settings as required.
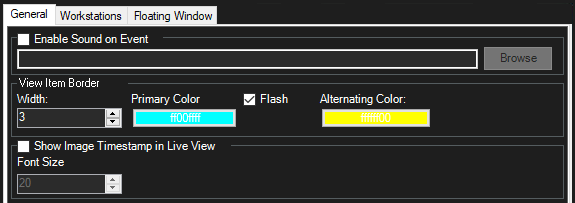
General tab:
| Setting | Description |
| Enable Sound on Event | Controls if the Smart Client workstation will make an audible notification when it receives and event from OnGuard. Not enabled by default. |
| View Item Border | The OnGuard Event Matrix plugin view item border is always enabled. This section contains several options to modify the appearance and behavior of the border. |
| Width | Pixel width of the border. |
| Primary Color | Color of the border, if the flash option is not enabled. |
| Flash | Optional setting used to alternate border color. Used to draw the operator's attention to the OnGuard Event Matrix. |
| Alternating Color | Alternating color used to create the flash effect. |
| Show Image Timestamp in Live View | Controls if the OnGuard Event Matrix view item will display a date and time associated with the event in OnGuard. |
| Font Size | Size of the font used to display the date and time. |
Workstations:

| Setting | Description |
| Current Workstation | This checkbox is selected by default. |
| All Workstations | The Smart Client can receive events from all OnGuard workstations. |
| User-Defined Workstations | The Add and Browse buttons become active when the User-Defined Workstations checkbox is selected. The single empty field next to the Add button can be used to enter the fully qualified domain name (FQDN) of any OnGuard workstation that you want the Smart Client to receive events from. The Browse button can be used to open a network selection dialog used to browse to the workstations you would like to receive events from. The FQDN of all workstations authorized to send events to the current user's Smart Client will be listed in the large field. Any OnGuard workstation that is not listed in this field is unable to send events via the OnGuard Event Matrix feature to this user. Select a workstation and click the Delete button to remove it from the list. |
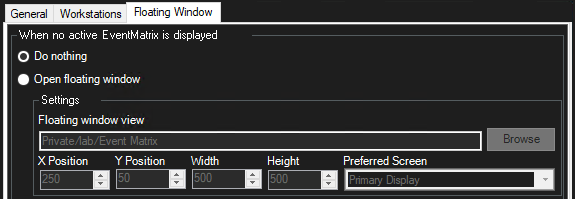
Floating Window:
| Setting | Description |
| When no active EventMatrix is dis-played | This tab allows you to choose what (if anything) the Smart Client should do in response to receiving an event if a view with the OnGuard Event Matrix is not actively selected. |
| Do nothing | Select this option to have the Smart Client take no action. |
| Open floating window | Select this option to have the Smart Client launch a floating window. |
| X Position | Horizontal location of the top left corner of the Smart Client floating window. The top left corner of the preferred screen is 0'0'. |
| Y Position | Vertical location of the top left corner of the Smart Client floating window. |
| Width | Width in pixels of the floating window. |
| Height | Height in pixels of the floating window. |
| Preferred Screen | Display screen the Smart Client will used to launch the floating window. |