

XProtect Smart Client – Player (configuration)
Managing views in XProtect Smart Client – Player
You create and manage views by clicking Setup on the XProtect Smart Client – Player toolbar. The panes on the left-hand side turn yellow.
Project pane (explained)
A project in XProtect Smart Client – Player is a collection of files that are created when video is exported in database format from XProtect Smart Client. Your user settings, including information about your views, are stored as part of a project.
The Project pane appears when you click Setup. In setup mode, you can:
- Change the name of the project.
- Create or open a project
- Assign passwords to projects - only people with permission can view a video. You can also assign passwords to devices when you export them. To avoid having to keep track of several database passwords, you can assign a single password to the overall project. If you do not assign an overall password and you have databases with passwords added to your project, you will be asked to enter a password for each database when you open the project. If you assign a password to a project, you cannot delete it. However, you can change the password or create a new identical project in the Project pane.
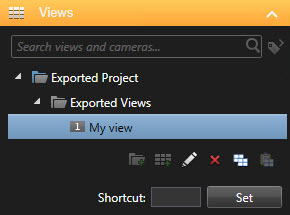
Views pane (explained)
In the Views pane in XProtect Smart Client – Player, you can add, edit, and delete views. You can also search for views and cameras.
Overview pane (explained)
The Overview pane in XProtect Smart Client – Player displays the cameras, microphones, speakers, webpages, images, and plug-ins assigned to the project. When you have selected a device, you can delete it and rename it. You can link speakers and microphones to cameras. Then associated audio is automatically selected when you view recorded video for a particular camera.
To open a database from an archive or previously exported material, click the  button. The Open database wizard appears.
When you delete a device, this does not delete the actual database files associated with the device, it just removes them from the project.
Digital signatures (explained)
This feature is only available in certain XProtect VMS systems. For information about the features in your system, see Surveillance system differences.
You can use digital signatures to verify the authenticity of your recorded video. This is useful, for example if you want to demonstrate that the video has not been tampered with.
There are two stages of verification. You can verify:
- whether the video has been modified after it was recorded. The recording server creates a digital signature for the recording. Later when you view exported video in XProtect Smart Client – Player, you can compare the recording signature with the one that was originally created by the recording server.
- whether video that you export in XProtect Smart Client has been modified after it was exported. During the export process, XProtect Smart Client creates a signature for the export file. Later when you review the exported evidence in XProtect Smart Client – Player, you can compare the export signature with the one that was created during the export.
If you find that there is a discrepancy, there is reason to question the reliability of the video evidence.
The original digital signatures are contained in the PublicKey.xml and Public Key Certificate.xml files in these locations:
- XProtect Smart Client - <export destination folder>\<export name>\Client Files\Data\Mediadata\<camera name>\<camera name>\Export signatures
- XProtect Management Client - C:\Program Files\Milestone\Management Server\Tools\CertificateIssuer
There are two scenarios where digital signatures are excluded during the export process:
- If there are areas with privacy masks
 A blurred or solid color that covers an area of the video in the camera view. The defined areas are blurred or covered in live, playback, hotspot, carousel, smart map, smart search, and export modes in the clients., digital signatures for the recording server will be removed in the export.
 - If the data you are exporting is very close to the current date and time, the digital signature for the recording server might not be included for the whole sequence. In this case, only part of the export will have digital signatures added.
The export process will complete, but when you verify the signatures, you will see that the digital signatures for the recording server were removed or partially OK.