Add rules
When you add rules, you are guided by the wizard Manage Rule which only lists relevant options.
It ensures that a rule does not contain missing elements. Based on your rule's content, it automatically suggests suitable stop actions, that is what should take place when the rule no longer applies, ensuring that you do not unintentionally create a never-ending rule.
Events
When you add an event-based rule, you can select different types of events.
-
See Events overview to get an overview and a description of the event types that you can select.
Actions and stop actions
When you add rules, you can select different actions.

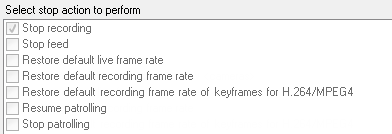
Some of the actions require a stop action. For example, if you select the action Start recording, recording starts and potentially continues indefinitely. As a result, the action Start recording has a mandatory stop action called Stop recording.
The Manage Rule wizard makes sure you specify stop actions when necessary:

Selecting stop actions. In the example, note the mandatory stop action (selected, dimmed), the non-relevant stop actions (dimmed) and the optional stop actions (selectable).
-
See Actions and stop actions for an overview of start and stop actions that you can select.
Create a rule
- Right-click the Rules item > Add Rule. This opens the Manage Rule wizard. The wizard guides you through specifying the content of your rule.
- Specify a name and a description of the new rule in the Name and Description fields respectively.
- Select the relevant type of condition for the rule: either a rule which performs one or more actions when a particular event occurs, or a rule which performs one or more actions when you enter a specific period of time.
- Click Next to go to the wizard's second step. On the wizard's second step, define further conditions for the rule.
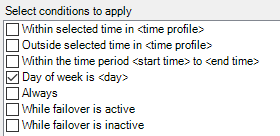
- Select one or more conditions, for example Day of week is <day>:

Depending on your selections, edit the rule description in the lower part of the wizard window:

Click the underlined items in bold italics to specify their exact content. For example, clicking the days link in our example lets you select one or more days of the week on which the rule should apply.
- Having specified your exact conditions, click Next to move to the next step of the wizard and select which actions the rule should cover. Depending on the content and complexity of your rule, you may need to define more steps, such as stop events and stop actions. For example, if a rule specifies that a device should perform a particular action during a time interval (for example, Thursday between 08.00 and 10.30), the wizard may ask you to specify what should happen when that time interval ends.
- Your rule is by default active once you have created it if the rule's conditions are met. If you do not want the rule to be active straight away, clear the Active check box.
- Click Finish.

