Configuring cameras for LPR
This article describes the steps to go through when you add and configure cameras used with XProtect LPR.
Requirements for LPR in the Management Client
Once cameras have been mounted and added in the Management Client, adjust each camera's settings so that they match the requirements for LPR. You adjust camera settings on the properties tabs for each camera device.
For the relevant cameras, Milestone recommends to:
-
Set the video codec to JPEG
If you use H.264 or H.265 codec, only key frames are supported. This is usually only one frame per second which is not enough for LPR. For higher frame rates, always use a JPEG codec.
- Specify a frame rate of four frames per second
- Avoid compression, so set a fine quality
- If possible, specify a resolution below one megapixel
- If possible, keep automatic sharpness at a low level
To learn about LPR fundamentals, make yourself familiar with the information in Preparing cameras for LPR (explained).
Snapshots (explained)
The system uses snapshots to optimize the configuration automatically and to visualize the effect of the recognition settings as they are applied.
You need to provide at least one valid snapshot in order to complete the initial configuration of a camera.
As a guideline, capture snapshots of vehicles in the real physical surroundings and conditions, in which you want to be able to recognize license plates.
The list below illustrates examples of the situations that you should consider when you capture and select snapshots. Not all may be applicable to your surroundings.
Milestone recommends that you select minimum 5-10 snapshots that represent typical conditions of:
-
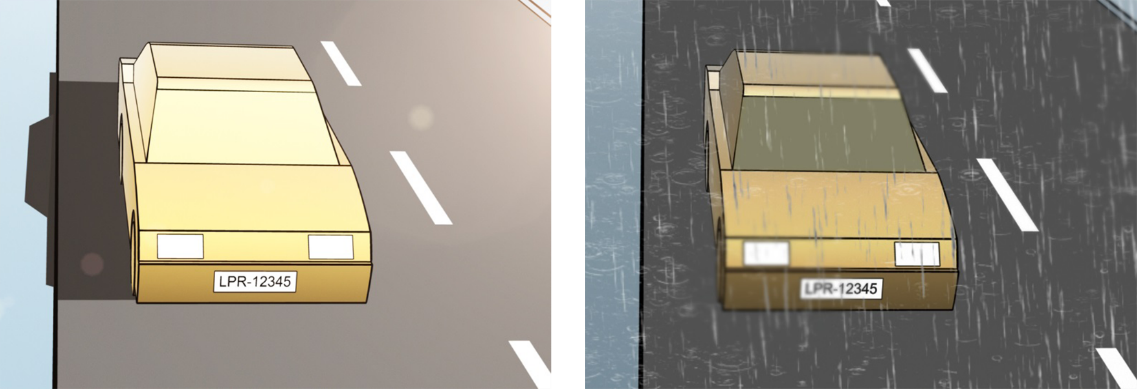
The weather; for example, sunlight and rain
-
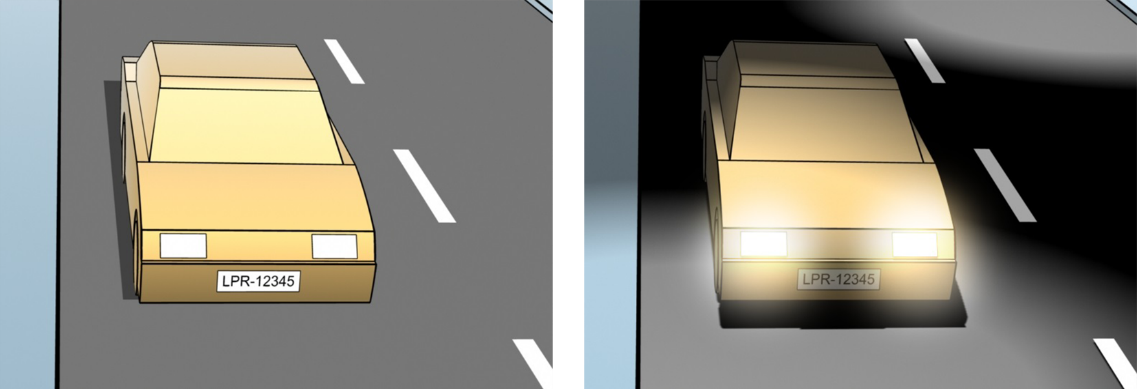
The light; for example, daylight and nighttime
-
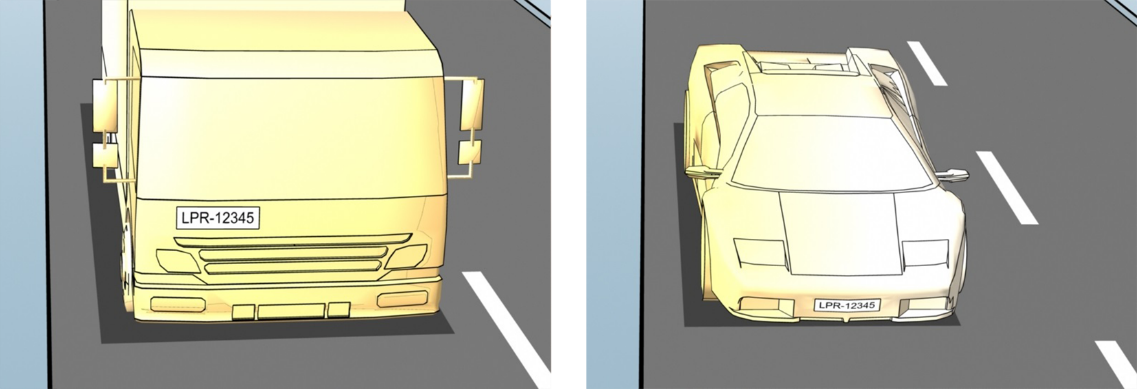
Vehicle types; to define the top and bottom of the recognition area
-
Position in the lane; to define the left and right of the recognition area
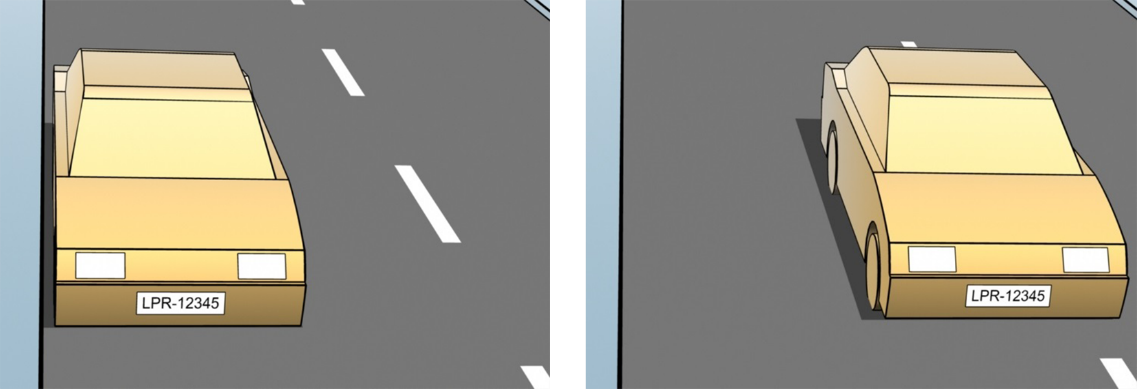
-
Distance to the car; to define the area where LPR analyzes license plates
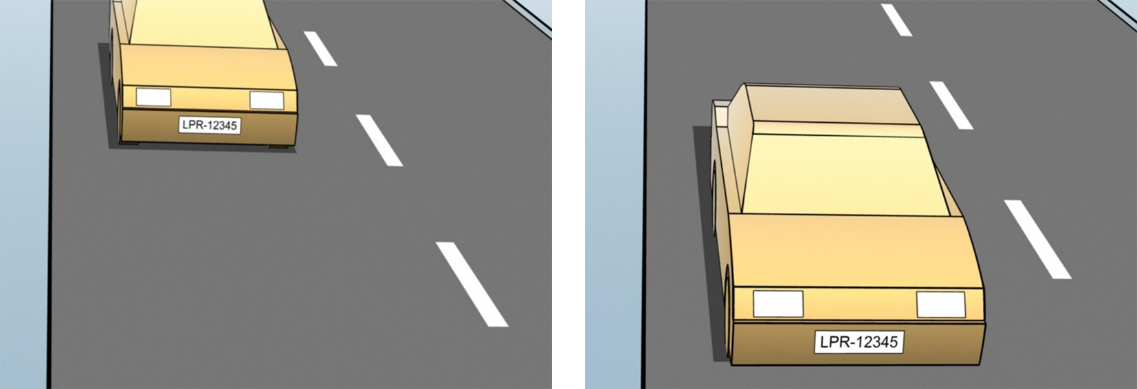
Add LPR camera
To configure cameras for LPR, you initially run the Add LPR camera wizard. The wizard takes you through the main configuration steps and automatically optimizes the configuration.
To run the wizard:
- In the Site Navigation pane, expand Servers, expand LPR servers, and select LPR camera.
- Go to the Overview pane.Right-click LPR camera.
- From the menu that appears, select Add LPR camera and follow the instructions in the wizard:
- Select the camera you want to configure for LPR
- Select which country modules you want to use with your LPR camera (see Country modules tab)
- Select snapshots to use for validating the configuration (see Snapshots (explained))
- Validate the result of the snapshot analysis (see Validate configuration)
- Select which license plate match lists to use (see License plate match lists (explained)). Choose the default selection, if you have not yet created any lists
- On the last page, click Close.
The LPR camera appears in the Management Client and based on your selections, the system has optimized the recognition settings for the camera (see Add LPR camera).
- Select the camera you have added and review its settings. You only need to change the configuration if the system does not recognize license plates as well as expected.
- In the Recognition settings tab, click Validate configuration (see Validate configuration).
Adjust settings for your LPR camera
The system automatically optimized the configuration of your LPR camera, when you added the LPR camera with the Add LPR camera wizard. If you want to make changes to the initial configuration, you can:
- Change the name of the server or change server (see Info tab)
- Adjust and validate the recognition settings (see Recognition settings tab)
- Add more license plate match lists (see Match lists tab)
- Enable additional country modules (see Country modules tab)
Info tab
This tab provides information about the selected camera:
|
Name |
Description |
|---|---|
| Enable |
LPR cameras are by default enabled after the initial configuration. Disable any camera that is not used in connection with LPR. Disabling an LPR camera does not stop it from performing normal recording in the surveillance system. |
| Camera |
Shows the name of the selected camera as it appears in the XProtect Management Client and the clients. |
| Description |
Use this field to enter a description (optional). |
| Change Server |
Click to change LPR server. Changing the LPR server can be a good idea if you need to load balance. For example, if the CPU load is too high on an LPR server, Milestone recommends that you move one or more LPR cameras to another LPR server. |
Recognition settings tab
Change recognition settings manually. Based on the snapshots you provided, the system auto-configured the recognition settings. Changing these settings can greatly affect the recognition success rate.
Action buttons
Change, update, and validate auto-configured settings.
|
Name |
Description |
|---|---|
| Validate configuration |
Test that license plates are recognized as expected (see Validate configuration). |
| Auto-configure |
Discard manual changes and auto-configure settings (see Auto-configure). |
| Snapshots |
Add or delete snapshots (see Select snapshots). |
Recognition area
To ensure best performance and avoid false recognitions, Milestone recommends that you select a clearly defined and "well-trimmed" recognition area. The area should cover only the part of the image where the license plate is visible and remains visible as the vehicle moves in and out of the image. Avoid irrelevant moving objects (people, trees, traffic) in the recognition area (see Positioning the camera).
License plates are not recognized in the red area.
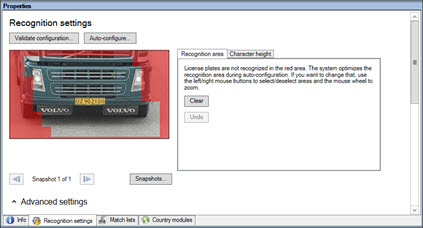
When specifying a recognition area, you can click:
- Clear to remove all selections and select new areas for LPR
- Undo to revert to your last saved recognition area
After changing the settings for your LPR camera, validate your configuration (see Validate configuration) to check if the system recognizes license plates as well as expected.
Character height
Define the minimum and maximum height of the license plate characters (in percent). Select character heights as close as possible to the height of the characters in the real license plate.
These character settings affect the recognition time and process. The smaller the difference between the minimum and the maximum character height:
- The smoother the LPR process
- The lower the CPU load
- The sooner you get the results
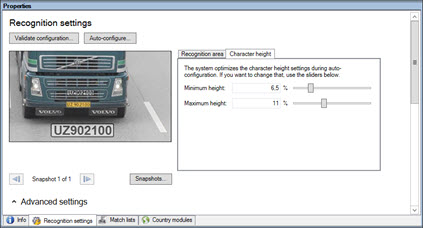
The overlay in the snapshot displays the currently defined character height setting. The overlay grows and shrinks proportionally to the character height settings to the right. For easy comparison, drag the overlay on top of the real license plate in the snapshot. Zoom with your mouse wheel for a closer look.
|
Name |
Description |
|---|---|
| Minimum height |
Set the minimum character height for including license plates in the recognition process. If the real license plate characters are smaller than the value you specify, the system will not start the recognition process. |
| Maximum height |
Set the maximum character height for including license plates in the recognition process. If the real license plate characters are bigger than the value you specify, the system will not start the recognition process. |
After changing the settings for your LPR camera, validate your configuration (see Validate configuration) to check if the system recognizes license plates as well as expected.
Advanced settings
The recognition process has two steps: 1) finding the plate(s) and 2) recognizing the characters in the plates. Click Advanced settings to define a trade-off between processing speed and recognition quality.
High recognition quality:
- Needs higher computational effort
- Increases CPU load
- Takes more time to return results
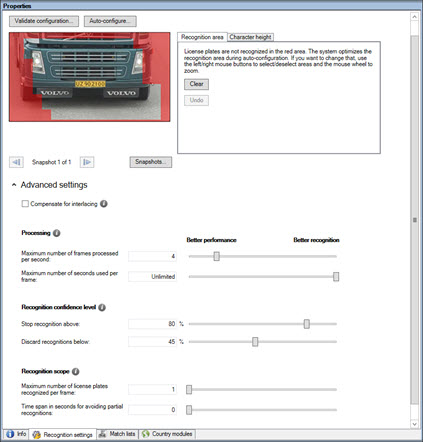
When the optimal results are met, the recognition process stops and returns the license plate it recognized at that point.
|
Name |
Description |
|---|---|
| Compensate for interlacing |
If your LPR camera records interlaced video, and you see a combing effect in the de-interlaced image in LPR, select this check box. This may improve image quality and recognition results. |
| Maximum number of frames processed per second |
Limit the number of frames your system processes every second. If you keep this setting low, you can increase the frame rate on your camera without adding unnecessary load to your LPR server. Unrestricted: Remove the top limit. You will risk increasing the processing time and the CPU load. |
| Maximum number of seconds used per frame |
Limit the number of seconds your LPR can spend on recognizing one frame. If adjusted, the recommended value is 0.2 seconds per frame. Unlimited: Remove the top limit. You will risk increasing the processing time and the CPU load. |
| Stop recognition above |
Stop recognition when a license plate is recognized with a confidence level equal to or above the value you specify. |
| Discard recognitions below |
Discard recognitions with a confidence level below the value you specify. Increase this value to get fewer but possibly more accurate recognitions. Decrease this value to get more but potentially less accurate recognitions. The smaller the difference between Stop recognition above and Discard recognitions below values, the lower the processing time and the CPU load. |
| Maximum number of license plates recognized per frame |
Recognize several license plates simultaneously. For example, relevant for cameras recording multi-lane roads, where many license plates must be recognized at the same time. Unrestricted: Remove the top limit. You will risk increasing the processing time and the CPU load. |
| Time span in seconds for avoiding partial recognitions |
Delay all recognitions for the time period you specify. This is to avoid that the same license plate is recognized several times as different license plates. The system will wait for a better recognition and only accept the most complete recognition. Before changing this setting, ensure no irrelevant moving objects (see Camera angles) block the view of your LPR camera. |
After changing the settings for your LPR camera, validate your configuration (see Validate configuration) to check if the system recognizes license plates as well as expected.
Match lists tab
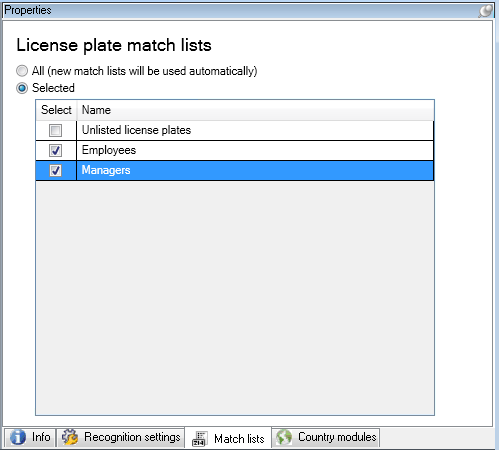
On this tab you select which license plate match list(s) you want a specific LPR camera to match license plates against. You can create as many lists as you need (see Add new license plate match lists).
|
Name |
Description |
|---|---|
| All |
License plates are matched against all available and future lists. |
| Selected |
License plates are matched against the selected lists only. Select one or more from the available lists. |
After changing the settings for your LPR camera, validate your configuration (see Validate configuration) to check if the system recognizes license plates as well as expected.
Country modules tab
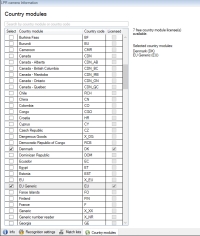
Here you select the country modules that you want to use with a specific LPR camera. The list that you can select from, depends on which modules you have installed and your licenses (see XProtect LPR licenses).
Milestone recommends that you select maximum 5 country modules per camera.
A country module is a set of rules that defines license plates of a certain type and form belonging to a certain country, state or region.
Already licensed modules appear with a check mark in the Licensed column. If the country module you are looking for is not on your list, contact your vendor.
|
Name |
Description |
|---|---|
| Select |
Click to select or deselect a country module. The list of selected country modules on the right-hand side updates automatically. |
| Country Module |
Lists the installed country modules. |
| Country Code |
Letters that identify a country module. |
| Licensed |
Shows if a country module is already licensed. You can select a licensed country module for as many cameras as you like. |
After changing the settings for your LPR camera, validate your configuration (see Validate configuration) to check if the system recognizes license plates as well as expected.
Extend time span for avoiding partial recognitions
If parts of the same license plate are recognized as separate and incomplete plate numbers, ensure no irrelevant moving objects (see Camera angles) block the view of your LPR camera. If the problem persists, give the system more time to avoid partial recognitions. Your recognitions will be more accurate, but they will all show up delayed.
- In the Site Navigation pane, expand Servers.
- Expand LPR servers and click LPR cameras.
- In the LPR cameras pane, find and click the camera to modify.
- On the Recognition settings tab, click Advanced settings.
- In the Time span for avoiding partial recognitions field, drag the slider to the right to give the system a maximum of five extra seconds to recognize the most complete license plate numbers and discard the rest.
Select snapshots
When you configured the LPR initially with the Add LPR camera wizard, you also added snapshots (see Snapshots (explained)). You can always add additional representative snapshots to improve the optimization of the configuration.
- Select the relevant camera.
- In the Recognition settings tab, click Snapshots.
- Capture snapshots from live video or import them from an external location. Click Next.
The system analyzes the snapshots you have selected for the camera.
- On the next page, approve or reject each of the snapshots. If the system could not recognize any license plates, click Previous to add new snapshots in a better quality. If the system still cannot provide correct recognitions, you probably need to change your configuration. Check that the camera is mounted and configured correctly (see Preparing cameras for LPR (explained)).
- When you have approved all snapshots, click Next and close the wizard.
- On the Recognition settings tab, click Validate configuration (see Validate configuration).
Validate configuration
You can validate your current configuration to see if you need to change any settings or provide more snapshots. The validation function informs you about how many license plates your system recognizes, and if they are recognized correctly.
It can help you decide if your confidence level is set correctly and if your system configuration is optimal.
- Select the relevant camera.
- From the Recognition settings tab, click Validate configuration.
Based on the current settings, the system analyzes the snapshots you have selected for the camera and provides a result summary:
- License plates detected: The number of recognized license plates, for example, 3 of 3
- Average confidence: The average percent of confidence with which the license plates have been recognized
- Average processing time: The average time it took to analyze a snapshot and return a reading measured in ms

- If the current configuration meets your requirements, click Close.
- If you want to investigate the results further, click Next, and you can review the results for each snapshot. This helps you to identify the situations that cause problems.
You can validate the configuration as many times as you like and on any LPR camera and with different settings.
Auto-configure
Auto-configuration of the LPR camera overwrites any manual changes you have made to the settings. You can select this option if, for example, you have made manual changes that have not given you good recognition results.
- From the Recognition settings tab, click Auto-configure.
A new dialog box appears.
- Confirm that you want to return to auto-configured settings by clicking Next.
The system optimizes the settings.
- Click Close.
- If prompted, confirm to save the configuration.
- Review and validate (see Validate configuration) the new settings.


