XProtect Smart Wall (configuration)
System administrators define the layout and behavior of a Smart Wall in XProtect Management Client. This includes:
- General properties, such as the name of the Smart Wall, and whether it displays status text, a title bar, or a live indicator
- The monitors that the Smart Wall consists of
- Presets that control the layout of the monitors, and possibly also default cameras that the monitors show video from
- The Smart Wall rights allowing operators
 A professional user of an XProtect client application. to view, operate, add content, or play back content, and when they are allowed to do so.
 - Events that can be combined with rules to trigger system actions, for example displaying an alarm or other content
What to configure in XProtect Smart Client?
-
Add Smart Wall overview to views - to dynamically control what content is displayed on the Smart Wall, first you must add the Smart Wall overview to a view
 A collection of video from one or more cameras, presented together in XProtect Smart Client. A view may include other content than video from cameras, such as HTML pages and static images.
A view can be private (only visible by the user who created it) or shared with other users.. The Smart Wall overview allows you to drag-and-drop or send cameras and other types of content to the Smart Wall monitors.
 - Change the layout of Smart Wall monitors - you can change the preconfigured layout of the Smart Wall monitors by changing the view layout or applying a different preset to a monitor.
Add Smart Wall overview to views
Before you can define what content should be displayed on your Smart Wall, first you must add the Smart Wall overview to one or more views. The overview is a graphical presentation of the Smart Wall.
- Click Setup to enter setup mode.
- Select the view where you want to add the Smart Wall overview.
-
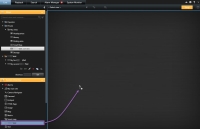
In the System Overview pane, drag the Smart Wall element to the relevant view item.
- Click Setup again to exit setup mode. Your changes are saved.
- Now you can start adding cameras and other types of content to your Smart Wall.
Change the layout of Smart Wall monitors
You can change the view layout of the monitors. This is useful if you need to display additional cameras or other types of content.
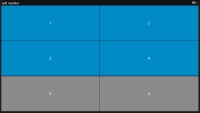
An incident has been recorded on five cameras, and you even have a picture of a suspect. You want to display the video and picture on the Smart Wall, so the security staff can view the incident and detain the suspect. Because the current monitors in your Smart Wall are pre-configured to only show 2x2 cameras, you need to change the view layout to 2x3 to add the fifth camera and the picture.
- On the Live or Playback tab, open the view that contains your Smart Wall overview.
-
Click the
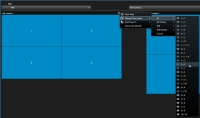
 icon for the monitor, select Change View Layout, select the display format, for example 4:3.
 -
Select the layout. In this example, select 2x3. Two grayed out view items are added to view layout.
- Now you add additional content. See Displaying content on Smart Wall.
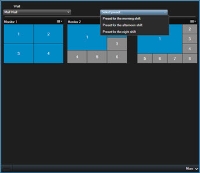
The presets defined by your system administrator are associated with individual monitors. When you change the preset, all monitors in the Smart Wall associated with the preset are updated.
- Open the view that contains the Smart Wall overview.
-
In the Select preset list, select the preset that you want to display. The affected monitors in the overview change.
- To view the content on the Smart Wall, see View Smart Wall content.
Other users can change the preset manually, or rules can change it automatically.


