Connect and customize a joystick, keypad, or jog dial
Most controllers—like joysticks, keypads, and jog dials—start working in XProtect Smart Client as soon as you plug them into your computer’s USB port. When you've connected a controller, you can change its default settings in XProtect Smart Client to match your preferences.
Note
To fully benefit from control boards, you must also install a plug-in. For details, see Install the AXIS T8310 and TU9001 Plugin.
To adjust the settings for a connected controller:
On the global toolbar, select Settings and more.
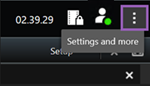
In the drop-down menu, select Settings, and then the Joystick tab.
In the Select joystick drop-down menu, select the controller you want to adjust the settings for.
Depending on which controller you've selected, you have different options for customization:
In the Axis setup section, you can define the different axis movements and dead zone setup for a joystick, or specify an action for the shuttle wheel on your jog dial.
In the Button setup section, you select the actions for the buttons on the controller.
For more details about the specific options for customization, see Joystick settings.
When you've finished making changes to the setup, select Close.