Create an incident project in real time
If you notice an incident while it is ongoing and you don't need to personally solve the situation on-site, follow the following method to add sequences and document the incident.
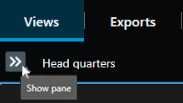
In live mode, select Show pane.
Under the MIP plug-ins pane and Incidents, select Start incident project, and XProtect Incident Manager starts collecting the sequences in the current view.
Optional. Change views to follow persons and objects related to the incident.
Optional. Call for assistance to solve the situation on-site.
When the incident has stopped and you don't need more evidence, select Save incident project.
Select the type of incident and give the incident project a description. Select Save.
To add more information to your new incident project:
Select the Incidents tab and double-click the incident project that you have just created to open it.

Fill in the needed data about the incident:
On the Main details tab, select a status for the management of the incident.
On the Categories tab, select and enter the different properties that the VMS administrator has defined for your organization.
On the Comments tab, enter free text information about the incident.
If possible, write your comments so that the incident project is complete even without any sequences from the VMS.
On the Sequence list tab, you can see all the sequences added to the incident project. Review if all sequences are relevant and remove those that aren't.
On the Calls tab, add information about the calls you have made or received in connection with the incident.
Select Save.
Note
If you need the sequences and information in your incident project for a longer time than the retention times your administrator defined for sequences and incident projects, export your incident project and generate a report. See Export an incident project and Create a report with incident project information.
If you prefer, you can use one of the other methods of creating incident projects. See Create an incident project after an incident occurred or Create an incident project without video.