Configure the Recording Server connection
To connect to a Milestone XProtect Management Server follow these steps:
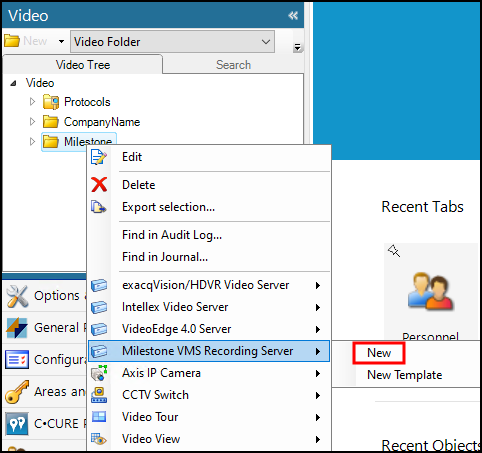
Right-click the newly created folder, expand the Milestone VMS Recording Server object, and select New from the shortcut menu.
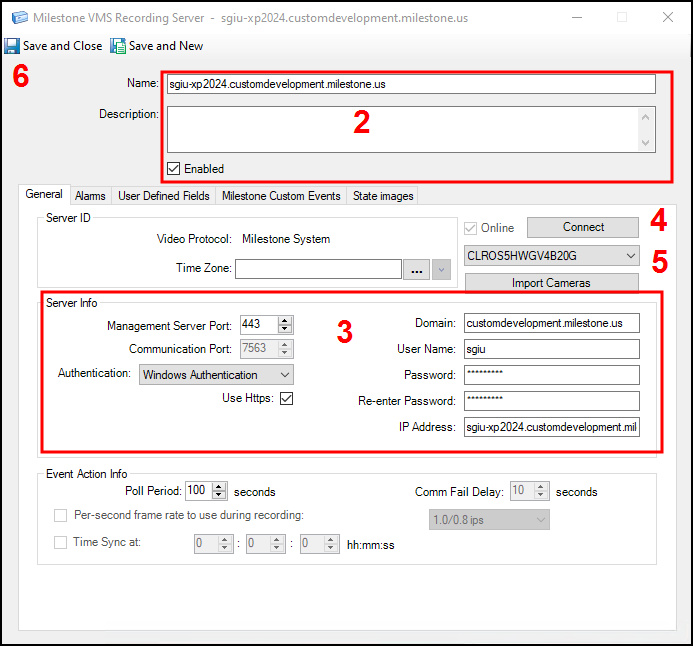
Enter a Name, Description, and select the Enabled option. See details for each option below these steps.
Name
Name the connection to identify the Recording Server if there are more than one.
Description
Add any description, useful details, or identifying information in this field.
Enabled
Select this option to make the connected Recording Server available.
Fill out the required Server Info.
Domain
The domain of the Milestone XProtect Management Server .
User Name
User credentials for an authorized XProtect VMS user.
Password / Re-enter Password
Password information for the user credentials entered above.
IP Address
IP address, DNS address (FQDN), or Hostname for the Milestone XProtect Management Server. When certificates are in use, the FQDN is normally the best option.
Management Server Port
443 if we are using HTTPS, otherwise it is 80.
Communication Port
Should not be modified. Value adjusts automatically to 7563 for Milestone XProtect.
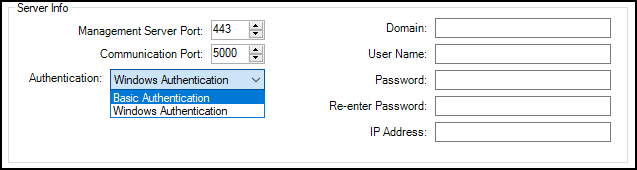
Authentication
Choose between Windows Authentication and Basic Authentication
Use Https
Enable or disable the use of HTTPS.
Important
Choosing which option to enter for the IP Address field depends on the network and encryption settings. If SSL certificates are in use, the FQDN is often the best option for connection.
Click the Connect Button. The system will connect to the Management Server and retrieve the list of Recording Servers. This list is available below the Connect Button after successful connection.
Open the Recording Server list to select a Recording Server from the connected VMS.
The first Recording Server found on the Management Server connects by default, choose the required server from the list.
If the chosen Recording Server is online the Import Cameras button is active.
If the Online check box does not show up as selected, edit the settings and click Connect again to re-attempt connection to the Management Server.
Save and Close the window to complete the creation of the Recording Server.