Axis Integration
Integration Summary
VMS Partner | Product | Version | Last Tested BriefCam Version | Integration Level | H.265 Support |
Axis | Axis ACS | 6.3 | 2024 R2 HF4 | Real time alerts integration (L2a) | No |
Axis | Axis ACS | 6.16 | 2025 R1 SP1 | Real time alerts integration (L2a) | Yes |
Axis | Axis ACS | 5.33 | 6.4 Hot Fix 1 | Real time alerts integration (L2a) | No |
Note that the name of the plugin is: BriefcamACSPlugin_[version number].exe.
Ports Required
The following port should be available when installing the plugin.
Axis Version | Port # |
Axis ACS v5.X | 55756 |
Axis ACS v6.X | 29204 |
For Axis ACS v6.X:
Open the
BriefCam.ACSIntegration.inifile, which is located by default at:C:\Program Files\BriefCam\BriefCam Server\plugins.Change the
DefaultPortparameter to29204and uncomment the row.
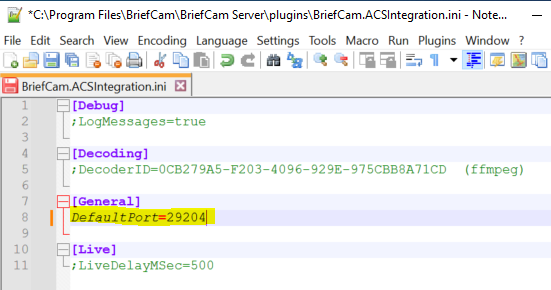
Sending Alerts to Axis
Alerts can be sent to Axis ACS. To enable this functionality, carry out the steps below.
BriefCam Configuration
In the Environment Settings section, there are three settings relevant for sending alerts outside of BriefCam (see the image below):
To send alerts outside of BriefCam, set the Respond.AlertsPublishingEnabled setting to true.
To send alerts to a VMS, check that the Respond.AlertsPublishingToVMSEnabled setting is set to true.
To change the polling interval, use the Respond.AlertsPublishingIntervalInMilliseconds setting.
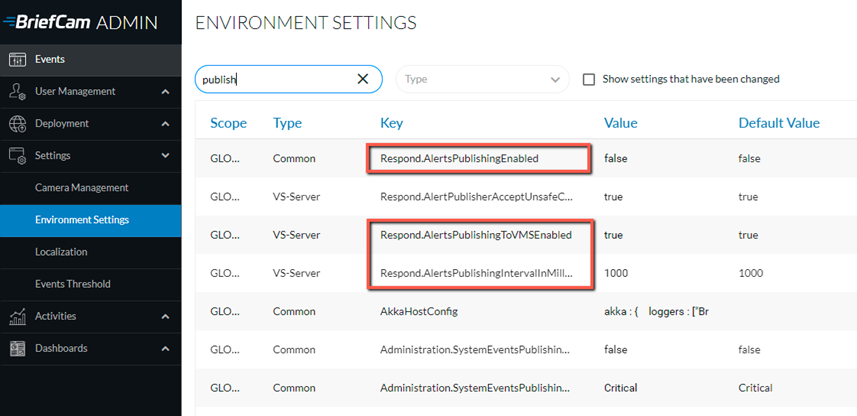
If you make changes to the settings, you need to restart or start the VSServer service.
Axis Configuration
On the Axis side you need a full admin user.
On the ACS server (incoming):
For Axis ACS v5.X, open UDP port 55756.
For Axis ACS v6.X, open UDP port 29204.
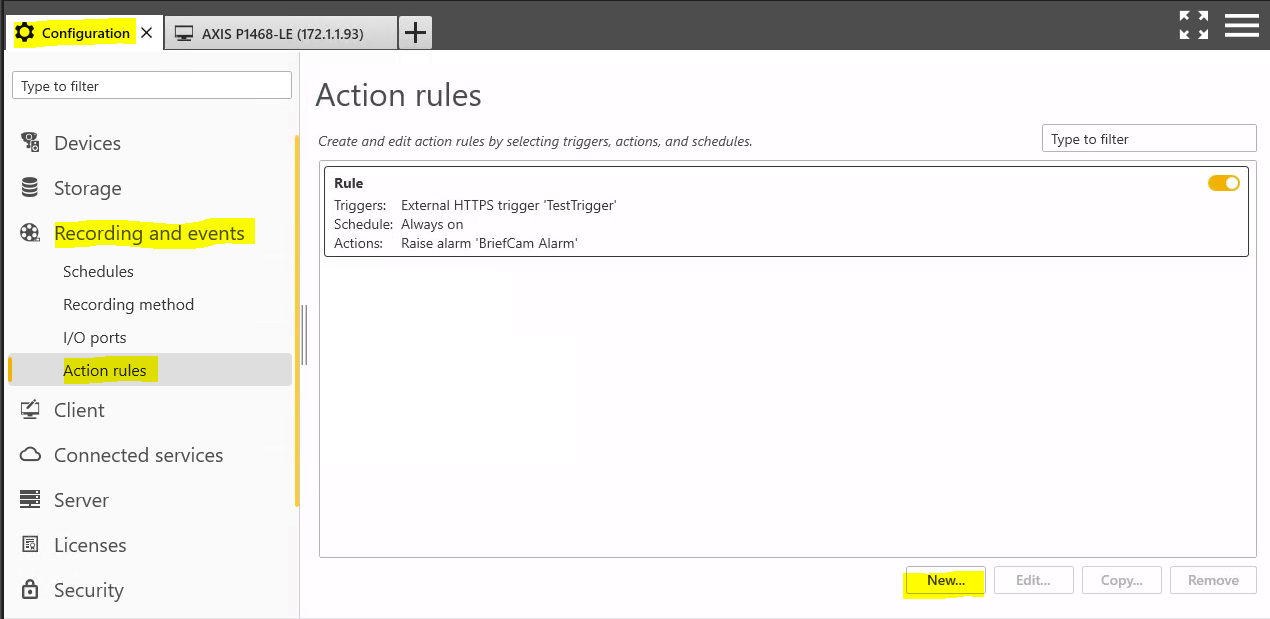
To configure the VMS side’s trigger, go to the Axis Camera System's Configuration tab, open the Recording and events folder and then the Action rules option.
Click New.
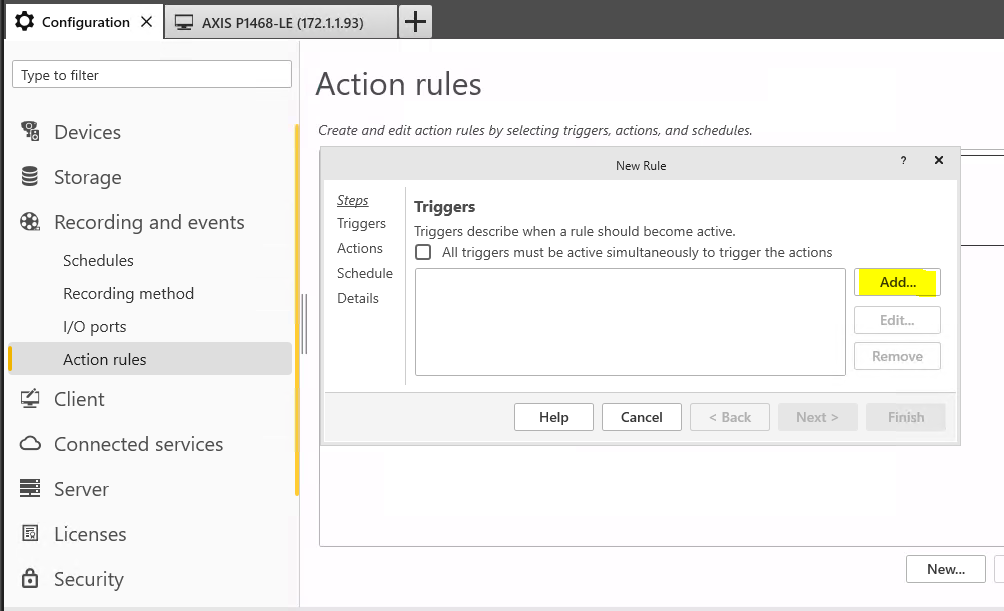
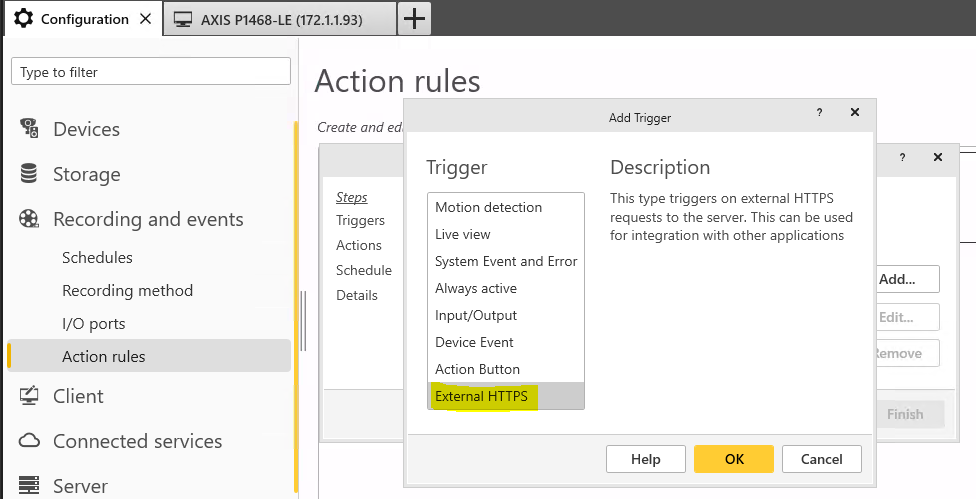
Add a new trigger by clicking Add.
Select External HTTPS and click OK.
Enter a trigger name. This name will be used in the json mapping file, described below.
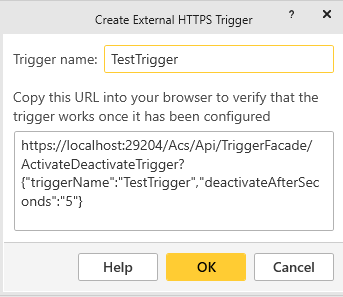
Click OK and then click Next.
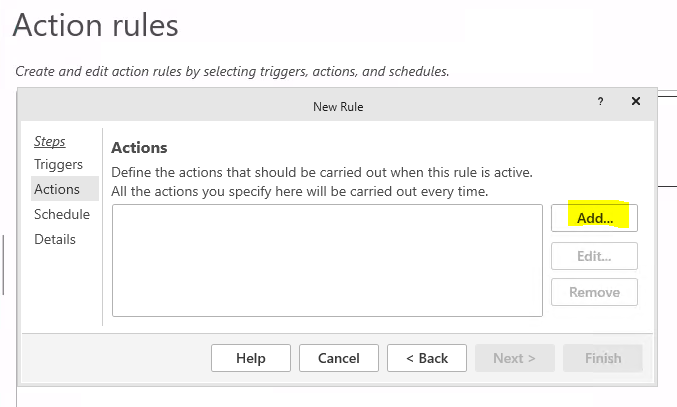
Add an action.
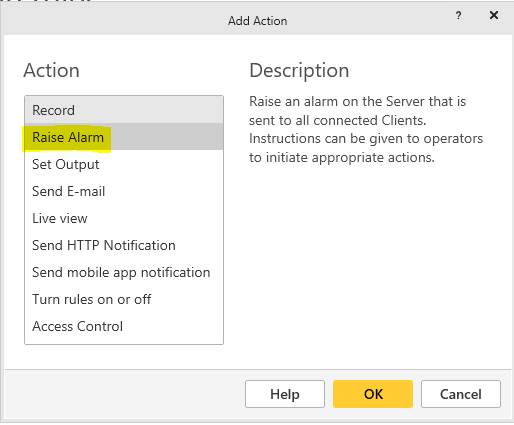
Select the required action (usually Raise Alarm) and click OK.
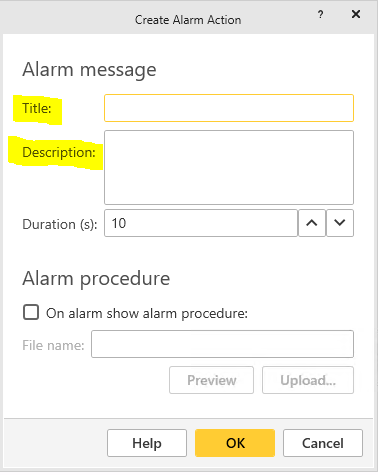
Fill in the alarm’s Title and Descriptionfields. This information will be shown to the operator once the alert is triggered.
Open the
AxisCamerasMap.jsonfile, located at:C:\Program Files\BriefCam\BriefCam Server\plugins. This file maps between the cameras and the alarms. Note that this file must always be in the same folder as the plugin’s dll file.In the
AxisCameraMap.jsonfile, enter the Trigger Name from step 6.Raise the trigger by filling in either the
CameraIdwith the External ID from ACS or by entering the Respond Rule Name.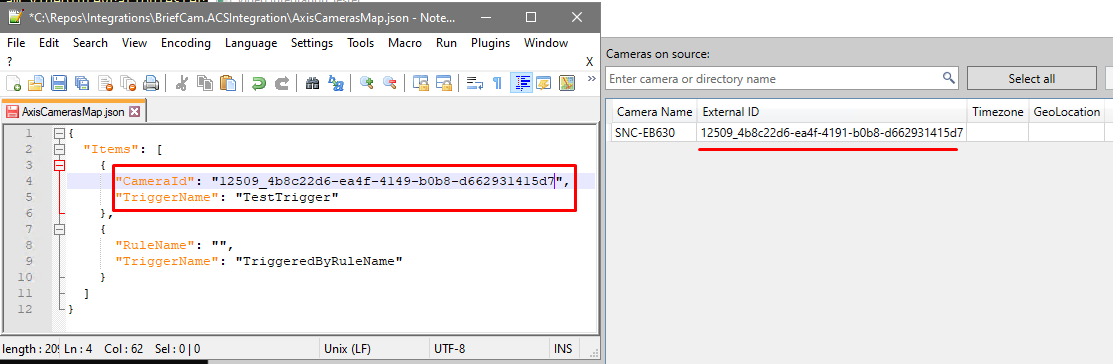
Repeat for any rules that you need.
Known Limitations
Bounding boxes when playing the original video are not supported.
Due to a limitation with the Axis API, no data can be sent to Axis ACS.