Upgrading from v6.4 or Above to v2024 R2
To upgrade from V6.4 or above to BriefCam 2024 R2, follow the instructions below:
It’s recommended to back up the existing database, especially if you turned off the automatic daily backup. For additional information, see the Backing Up the Databases section.
If your operating system language is set to a locale other than English, change the locale to English. After the upgrade you can switch back to the original locale.
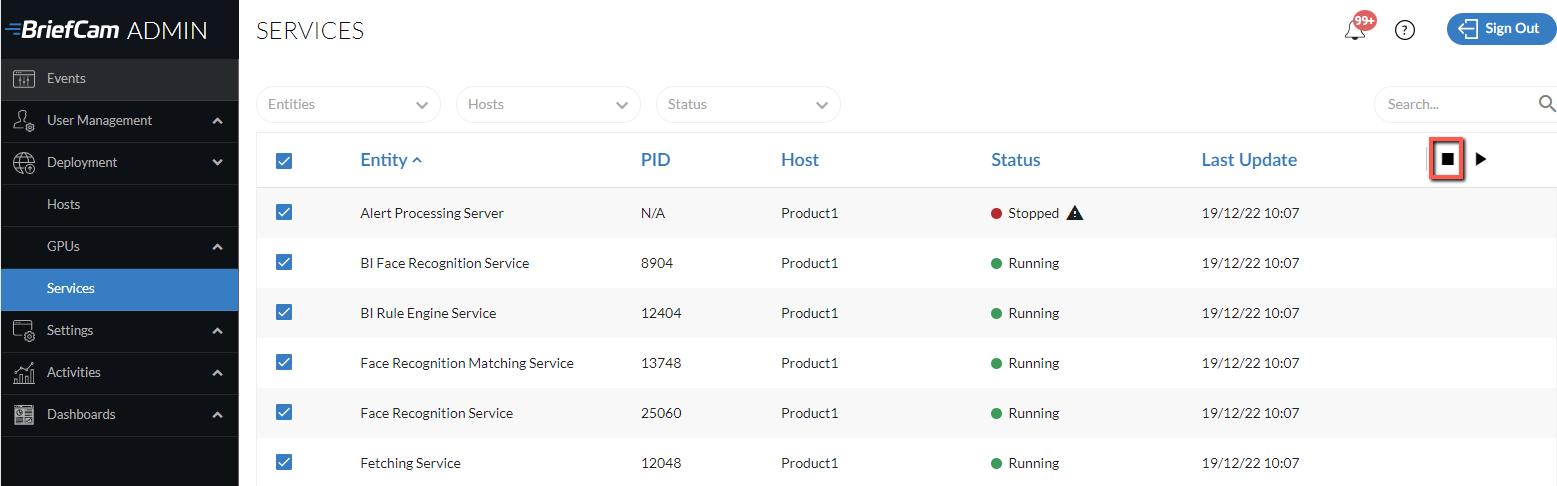
Launch the BriefCam Administrator Console and stop the BriefCam services.
Close all BriefCam applications.
Uninstall your VMS plugin/s (including any embedded client plugins).
Note
When upgrading, make sure to use the same user that was used when the system was previously installed.
Note that in version 6.4 HF3, the PostgreSQL version was updated to version 10.23. If you are updating from a version earlier than 6.4 HF3, contact the BriefCam Support team.
The upgrade process will upgrade PostgreSQL to version 15.5 and will first export the existing data. Make sure there is enough available space for the backup (which should be the size of the existing PostgreSQL data directory –
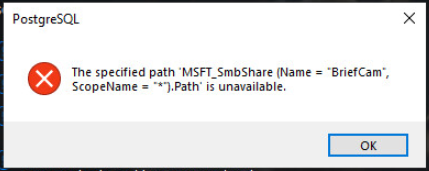
c:\postreSQL_Data). Note that if the database is larger than 150 GB, the upgrade will stop. In this case, contact the BriefCam Support team. In addition, if the database was installed in the previous version to a non-default directory, BriefCam will need double the free space for the backup.Run the latest version of the BriefCam PostgreSQL installer. The PostgreSQL upgrade may take some time, because data is exported from the old to the new database. For example, a 50 GB database takes about 30 minutes to migrate the data. If you see the following message, click .
Upgrade the following BriefCam 2025 R1 relevant components: BriefCam Server and Web Services.
If you use NGINX:
If you made changes to the
nginx.conffile (located by default at:C:/nginx/conf), back up the file.Uninstall and reinstall NGINX.
Merge the changes from your previous
ngingx.conffile to the new file.
If you use the RESEARCH module:
Run the RESEARCH installer.
Run the tool that splits the QVD file into daily files:
Open QMC by going to
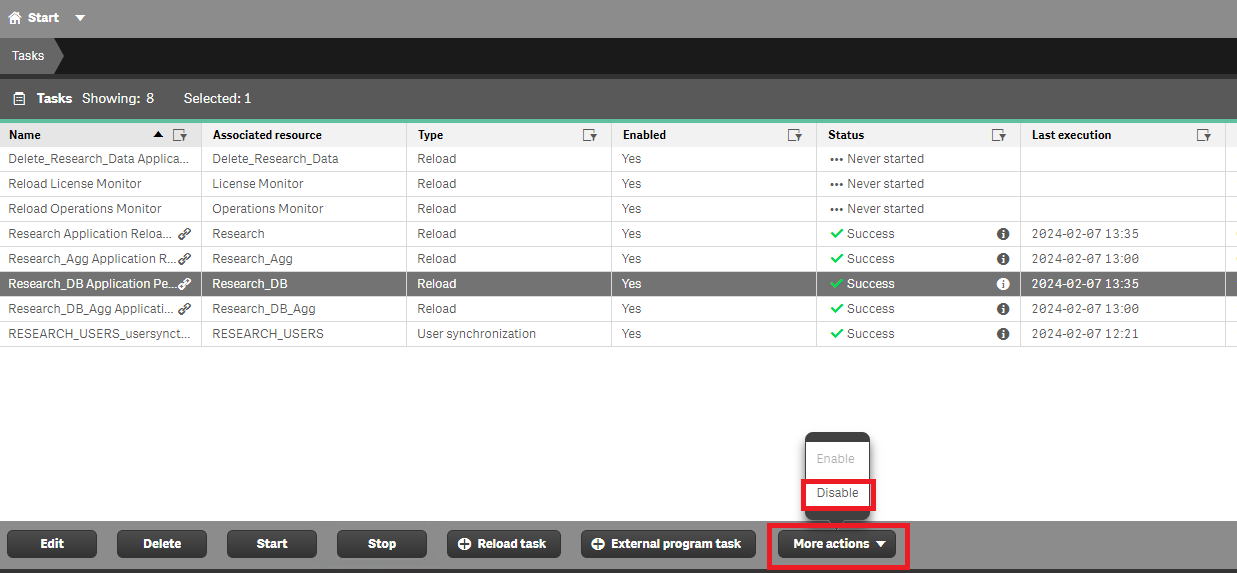
https://[servername]/qmc.From the Tasks tab, disable the RESEARCH_DB and RESEARCH_DB _AGG tasks.
Download the tool from BriefCam’s Downloads page (
qlik_migrate.zip) and unzip the file.Press , type
cmd, right-click on Command Prompt and select Run as administrator.Run the tool with the following syntax: qlik-migrate.exe --user {BriefCam user that runs the Qlik services} --password {password for the BriefCam user}
You can use the following optional arguments to customize the tool’s behavior:
-h, --help: Displays the help message.
--qlik_app_dir {Qlik applications directory}
default:
C:\Program Files\BriefCam\RESEARCH\Application--qlik_share_dir {Qlik shared directory (UNC)}
default:
\\SERVER_NAME\qlikshare--qlik_backup_dir {Qlik backup directory (UNC)}
default:
\\ SERVER_NAME\briefcam\ServerData\Backups--interval {task polling interval [sec]}
default: 20
Note that the migration process is time-consuming, and, depending on the size of the RESEARCH database. Based on lab testing (where an SSD drive was used):
# of Objects
# of Days
# of Objects/Day
Processing Time
5M
5
1M
~ 2 minutes
5M
365
13K
~ 1 hour
50M
50
1M
~ 1 hour
If the command prompt window running the script is closed, the Qlik migration task will remain running and can be tracked via QMC.
From the Tasks tab, enable the RESEARCH_DB and RESEARCH_DB _AGG tasks.
Update the
BI_Backup.batfile (located at:C:\Program Files\BriefCam\RESEARCH\BackupScripts\) by changing 12.5 to 9.6 in this line:SET PG_DUMP="C:\Program Files\BriefCam\RESEARCH\Qlik\Repository\PostgreSQL\12.5\bin\pg_dump.exe"If you are using an extended Research license, contact BriefCam’s Support team by logging into the BriefCam Portal at https://www.briefcam.com/support/ and opening a ticket.
Reinstall the latest versions of all the VMS plugins you used in the previous installation. Note that the plugin version may have changed from version to version.
If you are using the Genetec Embedded plugin, open the
BriefCam.GenetecEmbeddedViewer.dll.configfile (located by default inC:\Program Files (x86)\Genetec Security Center x\Plugins\BriefCam) and change the suffix of the serverAddress from /synopsis to /app.If you are using the Milestone Embedded plugin, note that the naming schema for user names has changed. Therefore, you will need to download the User Migration tool from the Partner Portal’s Downloads page. If the tool is not available there, contact the BriefCam Support team. Download the tool to the machine running the BriefCam server, place it in the BriefCam server directory, and run it from there.
How user accesses BriefCam
Migration required?
Notes
User always accesses BriefCam via the Milestone embedded client
Yes
User always accesses BriefCam directly (not via the embedded client)
No
Delete these users from the CSV generated by the migration utility.
User accesses BriefCam directly and via the embedded client
Yes
When logging into BriefCam directly, these users need to prefix their user name with the appropriate prefix, such as [BASIC]\. See below for additional information.
Note that the migration only needs to be run for users who access BriefCam via the embedded client. Users that access BriefCam directly do not need to be migrated. See the table below for more details.
To run the tool:
Export the existing users by running the following command. Note that this needs to be run by the user that is used to run the BriefCam Services: UserMigrationUtility.exe -m export
This will produce a csv file in the current directory with the following format:
[existing user name],[existing user name].
For example:
userA,userA
userB,userB
userC,userC
From the generated CSV file remove all users that access BriefCam directly (and not via the embedded client). If, however, the user will access BriefCam both directly and via the embedded client, the user should remain in the CSV file. When this type of user logs into BriefCam they need to prefix their username with the appropriate prefix, such as [BASIC]\.
Modify the generated csv file so that the second argument in every row is the user name in the new format. You’ll use the following guidelines for the new naming convention:
User type and name in the Milestone Smart Client
User created in BriefCam by the Milestone SSO Provider
Original Name
Name After the Upgrade
Basic user “Steve”
Steve
[BASIC]\Steve
Local user “Steve” running on a Windows host named “MACHINE”
Steve
MACHINE\Steve
Domain user “Steve” running in a domain called “DOMAIN”
Steve
DOMAIN\Steve
For example, if userA is a basic user, userB is a local user running on a machine named "Windows1", and userC is a Domain user in domain "Domain1", the migration csv file should contain these rows:
userA,[BASIC]\userA
userB,Windows1\userB
userC,Domain1\userC
In the directory where the tool is saved, create a subdirectory named
Migrate, and place the modified csv file in the newMigratesubdirectory.Migrate the user names by running the following command: UserMigrationUtility.exe -m migrate
If you are using the Milestone Embedded plugin and there are users with customized dashboards, you need to migrate the dashboards from the old user name to the new user name as follows:
Open Chrome as bcuser and navigate to QMC (
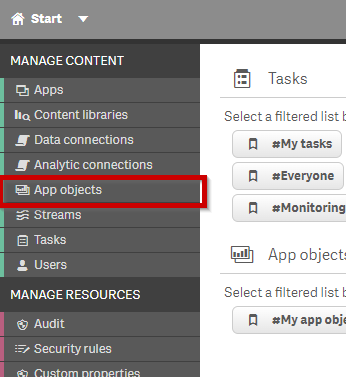
https://hostname/qmc).Go to App objects.
From the Owner column, click on the filter icon and select the old user.
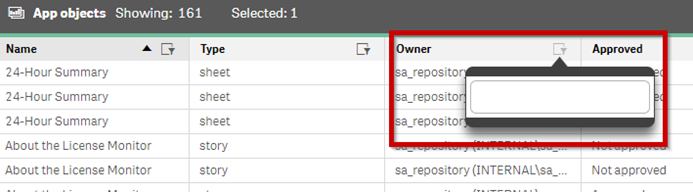
The table will display all the sheets that were created by the old user. Double-click on each row in the table.
Using the backspace, remove the value in the Owner field.
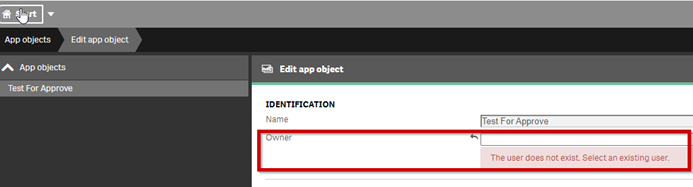
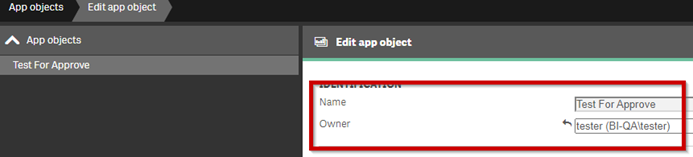
Search and select the new user. For example, see the image below.
Click .
Repeat the steps above for each sheet.
Upgrade the license as follows:
Open the Chrome/Edge browser and go to . http://localhost:1947.
Click on the Sentinel Keys option.
From the Actions column, click C2V.

Log into the BriefCam Portal at https://www.briefcam.com/support/ and open a ticket. You’ll attach the C2V file and request a V2C file with the new features.
The BriefCam Customer Success team will email you the requested V2C (vendor to client) file.
Open the Chrome/Edge browser and go to to http://localhost:1947.
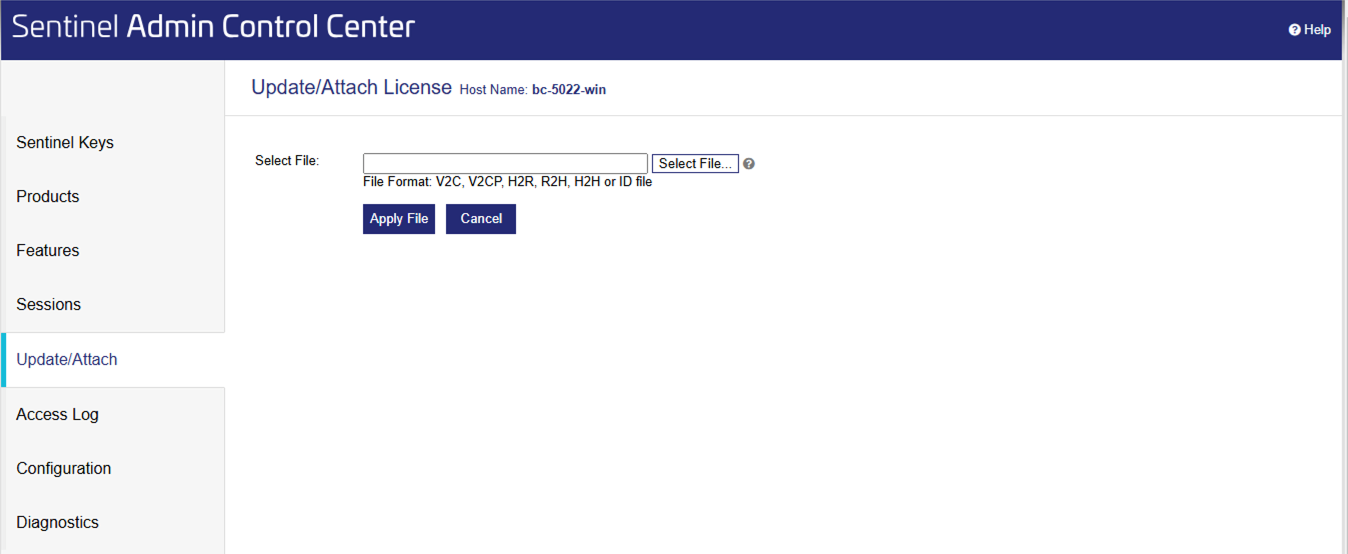
Click the Update/Attach option.
Click the Select File button and select the V2C file that you received from BriefCam.
Click the Apply File button.
Make sure that you are using a supported driver: NVIDIA Tesla family – version 535 or above.
Clear the browser's cache.
Launch the BriefCam Administrator Console and start the BriefCam services needed for each host.
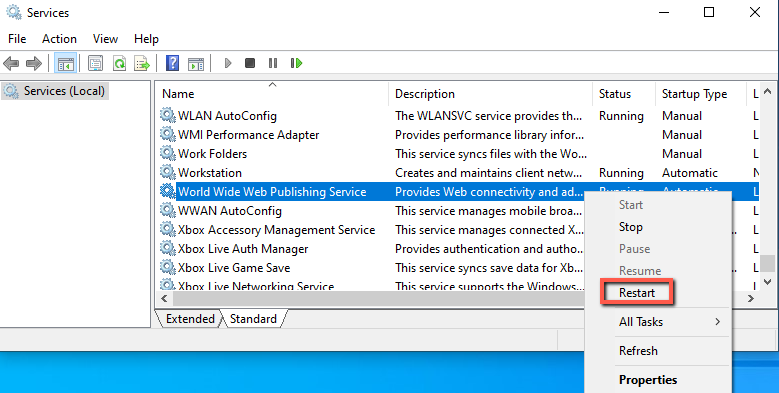
Restart the IIS services on the machine where the BriefCam Web Services are installed (by opening the Windows Services, right-clicking on the World Wide Web Publishing Service and clicking Restart).
Note
After restarting the IIS services, it might take a minute or two to get results when filtering objects for the first time after the restart.
To ensure that all the new features work as expected, reprocess previously processed videos.