Installing and Configuring NGINX
This section describes the steps to take to use NGINX.
Note
To work with SSL and BriefCam, using a load balancer is required. BriefCam recommends using NGINX.
Recommendations
It is recommended to install the load balancer on a separate machine.
If you are working in a virtualized environment, the load balancer must be on a separate machine.
If you are working in a non-virtualized (physical servers) environment, you can have the load balancer on the same machine as the Web Services (although it is not recommended). However, if you install the load balancer on the same machine as the Web Services, IIS has to work on a different port (not 80, since 80 is for NGINX).
Important
It is recommended not to make manual changes to the NGINX configuration file. However, if you do make changes, ensure that all modifications comply with valid NGINX syntax and all endpoint names are used exactly as defined, including case sensitivity.
Prerequisites
Make sure that ports 80 and 443 are not in use by another application.
If IIS is installed, make sure to stop it or change its default port.
Steps
To run the BriefCam NGINX Installation wizard, right-click on the
BriefCamNGINX_<Version number>.exefile and select Run as administrator.If you are using the latest Windows Update and a Windows Defender alert appears, click the More info link and click Run anyway.
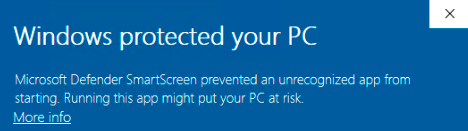
In the Welcome screen, click Get Started.

Accept the terms of the BriefCam license agreement and click .
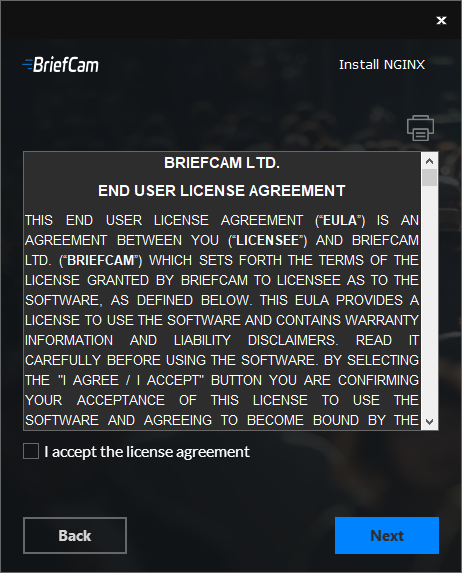
Read the license agreement and click .
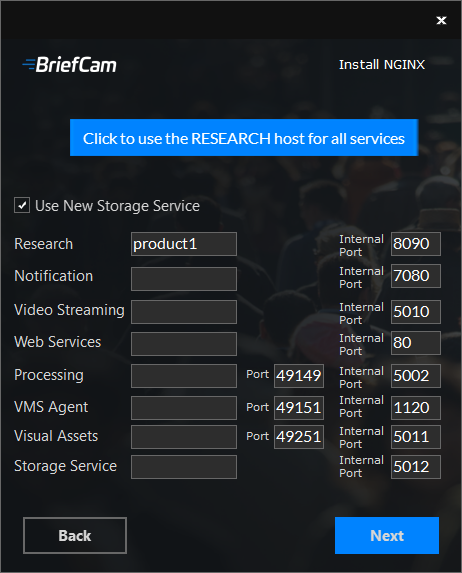
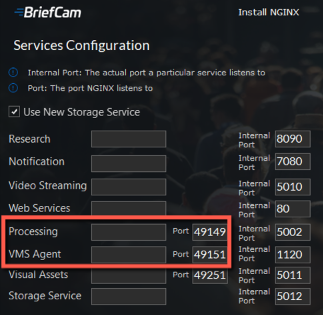
Enter the IP address or the hostname (if there is a DNS resolution) for each of the relevant services below, and click Next. Note that once you enter the Research host, you can click the “Click to use the RESEARCH host for all service” button to fill in all the fields with this value.
Decide whether to run with a secure communication.
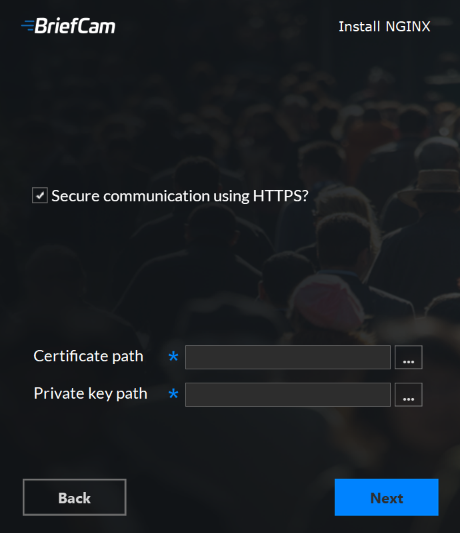
If you check the checkbox, enter the paths to the certificate and private key.
Note
You need to create or use an existing self-signed certificate separated into two files: .crt and .key.
If your SSL certificate is protected by a password, you need to configure NGINX to read a list of passwords that are stored in a separate file. If the private key is not in this file, NGINX will not start. You do this as follows:
Create a new text file named
ssl_passwords.txtand save it to a separate folder than where the SSL certificate is located.Set the file to be readable only to the user running NGINX.
Enter the certificate password into the first line of the
ssl_passwords.txtfile.In the
nginx configfile, add the following line above the existing certificate lines:ssl_password_file /var/lib/nginx/ssl_passwords.txt;Distribute this file separately from the configuration file.
Click Next.
The following screen appears.
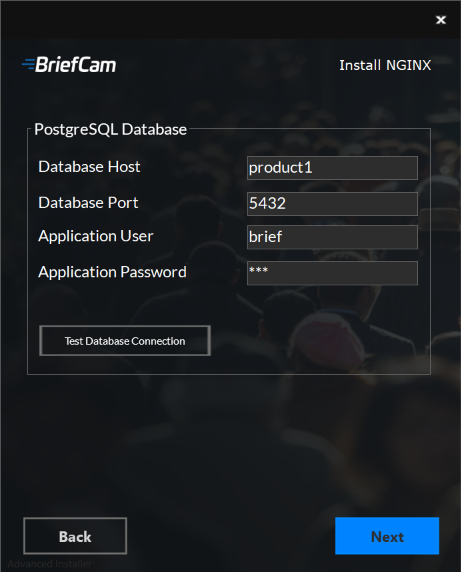
In the Database Host and Database Port fields, enter the name and port of the machine where you installed PostgreSQL.
In the Application User and Application Password fields, enter the username and password that you entered when installing PostgreSQL.
Click the button.
Click Next.
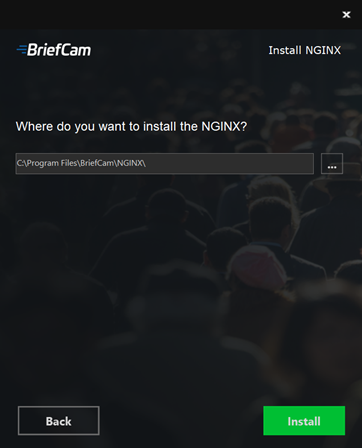
Confirm or select the drive where you want to install NGINX and click .
If you have more than one web service hostname, after installing NGINX, open the
nginx.conffile (located by default at:C:/nginx/conf) and in thehttpsection, copy and paste the existing rows and update the new rows with the additional hostnames.On any host that is running the application (browser) make sure the domains (or host name) can be resolved by the DNS. If no DNS is available, you can edit the hosts file and add the IP address of the load balancer using the following syntax:
10.x.x.x www.example.com example.comFor example:
10.0.0.143 www.example.comOpen the following three web config .js files on the BriefCam server (by default these three files are at
C:\Program Files\BriefCam\WebServices):\app\webConfig.js\ProWebAdminClient\web.config.js\ProWebClient\webConfig.js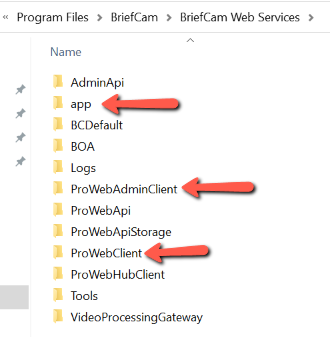
In each of the three web config .js files, set the endpoints (
endPointApi) to point to the load balancer. In the example below, you would just changePRODUCT1to the address of the load balancer. Make sure that “http:” does not appear in the path.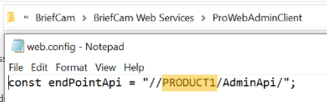
Open the QLIK QMC with the user that was used to install the RESEARCH module (
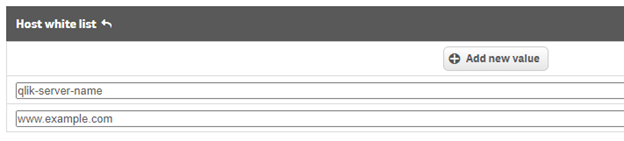
https://<hostname>/qmc).Browse to virtual proxies and add two new parameters using the hostname of each of the machines (for example, the QLIK machine and the NGINX machine host names as shown in the image below) to both proxies:
Virtual Proxies->bc->advanced->Host white list
Virtual Proxies->Central Proxy (Default)->advanced->Host white list
Note
On some systems, you might be required to add the host name, FQDN and IP address of the load balancer and all the web services instances into the virtual proxies white list in QMC.
In the User directory connectors screen, go to the Visible connection string and add the domain name to the
servervalue. For example, in the image below,Stress-DBwas the original value and now it isStress-DB.briefcamdev.com.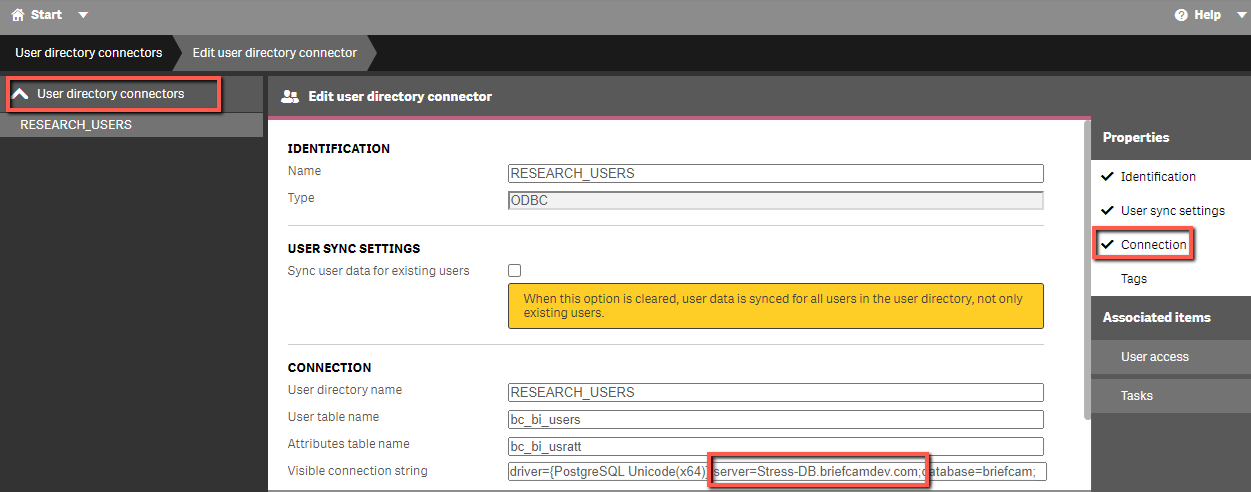
Open the BriefCam Administrator Console.
If you selected to use a secured connection (https), set the DefaultSiteProtocol environment setting to
https.Check that the following environment settings are set to the NGINX IP address or FQDN and make sure that the URLs begin with
http://orhttps://(if you selected to use a secured connection:BaseVideoUrl
clientNotificationEndPoint
CommonPlatformAPI.ServiceURL
DB.LocalStorageAddress
LoadBalancerAddress – This setting should be set to the NGINX hostname (FQDN)
ProWebApiAddress
ProWebClientAddress
QlikServer
Site.Url
StorageGatewayUrl
SSOEndpoint – If you want to use an embedded client, this value should be set to: http[s]://<NGINX-host>:8030/MilestoneSSO/
If you are installing a Linux-based OX engine, make sure that the value for the OX6.EngineOutputGatewayGrpcPort environment setting matches what you entered in the installer’s Processing box (default 49149).
If you are installing a Linux-based OX engine, make sure that the value for OX6.VmsAdapterGrpcPort environment setting matches what was entered in the installer’s VMS Agent box (default 49151).
Restart the BriefCam services.
If you selected to use a secured connection (https), browse to the application and check that it works with https requests. For example:
• https://www.example.com/app
• https://www.example.com/admin
NGINX Windows Service
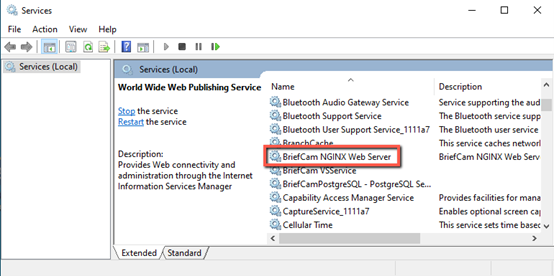
The BriefCam NGINX installer creates a BriefCam NGINX Web Server service in the Windows Services screen. This service is responsible for making sure the NGINX process is constantly running and the load balancer is ready to accept requests. The user that runs this service is the BriefCam Windows user.
Generic Configurations
For any other type of load balancer, such as Amazon ELB, Google Cloud Platform Load Balancer and so on, you need to configure redirect rules based on the URL. The following are the redirect rules:
1. Notification Service
Search for: /signalr
Redirect to: notification-server:7080
2. Video Streaming Gateway
Search for: /vsg
Use rewrite rule to remove /vsg from the URL
Redirect to: videostreaming-server:5010
3. Research (Qlik)
Search for: /bc/
Redirect to: www.example.com:8090
4. Web Services
Search for: /
Redirect to: briefcam-webserver
5. Storage Gateway (if used)
Search for: /StorageGateway
Redirect to: storage gateway server:5012
6. Hub BI Gateway (for multisite)
Search for: /hubbigateway
Redirect to server where the Hub BI Gateway is running, port 5007
7. Outbound API Gateway (for multisite)
Search for: /outboundapigateway
Redirect to server where the Outbound API Gateway is running, port: 5005
8. Common Platform API
Search for: /commonplatformapi/
Redirect to server where the Common Platform API service is running, port 5014
9. Task Management
Search for: /taskmanagement
Redirect to server where the Task Management service is running, port 5013