

Site Navigation: Security
This article describes how to create basic users and how to set up roles, specify user rights for a role and assign users.
Roles (explained)
Roles determine which devices users can access. Roles also determine rights and handle security within the video management system. First, you add roles, then you add users and groups and finally a Smart Client and a Management Client profile as well as other default profiles that belong to each role. Roles you can create in the system have their own view groups in XProtect Smart Client in which their views are created and stored.
It is important that all roles, to have access to the Management Server, enable the Connect security right, located in Role Settings > Management Server > Overall Security tab (roles).
You add users and groups to the Administrators role just as with any other role. See Assign/remove users and groups to/from roles).
In addition to the Administrators role, you can add as many roles as required to suit your needs. You may, for example, have different roles for users of XProtect Smart Client depending on which cameras you want them to access or similar restrictions. To set up roles in your system, expand the Security > Roles.
Rights of a role (explained)
Available functionality depends on the system you are using. See https://www.milestonesys.com/solutions/platform/product-index/ for more information.
When you create a role in your system, you can give the role a number of rights to the system components or features that the relevant role can access and use. You may, for example, want to create roles that only have rights to functionality in XProtect Smart Client or other Milestone viewing clients, with the rights to view only certain cameras. If you create such roles, these roles should not have rights to access and use the Management Client, but only have access to some or all functionality found in XProtect Smart Client or other clients. To address this, you may want to set up a role that has some or most typical administrator rights, for example, the rights to add and remove cameras, servers and similar functionality.
You can create roles that have some or most rights of a system administrator. This may, for example, be relevant if your organization wants to separate between people who can administrate a subset of the system and people who can administrate the entire system. The feature allows you to provide differentiated administrator permissions to access, edit or change a large variety of system functions, for example, the right to edit the settings for servers or cameras in your system. You specify these permissions on the Overall Security tab (see Overall Security tab (roles)). As a minimum, to enable that the differentiated system administrator can launch the Management Client, you must grant read permissions on the management server for the role.
It is important that all roles, to have access to the Management Server, enable the Connect security right, located in Role Settings > Management Server > Overall Security tab (roles).
You can also reflect the same limitations in the user interface of the Management Client for each role by associating the role with a Management Client profile that has the removed the corresponding system functions from the user interface. See Site Navigation: Clients: Management Client profiles for information.
To give a role such differentiated administrator rights, the person with the default full administrator role must set up the role under Security > Roles > Info tab > Add new. When you set up the new role, you can then associate the role with your own profiles must similarly to when you set up any other role in the system or use the system's default profiles. For more information, see Add and manage a role.
Once you have specified what profiles you want to associate the role with, go to the Overall Security tab to specify the rights of the role.
The rights you can set for a role are different between your products. You can only give all available rights to a role in XProtect Corporate.
Users (explained)
The term users primarily refers to users who connect to the surveillance system through the clients. You can configure such users in two ways:
- As basic users, authenticated by a user name/password combination
- As Windows users, authenticated based on their Windows login
Windows Users
You add Windows Users through the use of Active Directory. Active Directory (AD) is a directory service implemented by Microsoft for Windows domain networks. It is included in most Windows Server operating systems. It identifies resources on a network in order for users or applications to access them. Active Directory uses the concepts of users and groups.
Users are Active Directory objects representing individuals with a user account. Example:

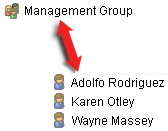
Groups are Active Directory objects with several users. In this example, the Management Group has three users:
Groups can contain any number of users. By adding a group to the system, you add all of its members in one go. Once you have added the group to the system, any changes made to the group in Active Directory, such as new members you add or old members you remove at a later stage, are immediately reflected in the system. A user can be a member of more than one group at a time.
You can use Active Directory to add existing user and group information to the system with some benefits:
- Users and groups are specified centrally in Active Directory so you do not have to create user accounts from scratch
- You do not have to configure any authentication of users on the system as Active Directory handles authentication
Before you can add users and groups through the Active Directory service, you must have a server with Active Directory installed on your network.
Basic users
If your system does not have access to Active Directory, create a basic user (see Users (explained)). For information about how to set up basic users, see Create basic user (see Create basic users).
Add and manage a role
- Expand Security and right-click Roles.
- Select Add Role. This opens the Add Role dialog box.
- Enter a name and description of the new role and click OK.
- The new role is added to the Roles list. By default, a new role does not have any users/groups associated with it, but it does have a number of default profiles associated.
- To choose different Smart Client and Management Client profiles, evidence lock profiles or time profiles, click the drop-down lists.
- You can now assign users/groups to the role, and specify which of the system’s features they can access.
For more information, see Assign/remove users and groups to/from roles and Roles settings.
Copy, rename or delete a role
Copy a role
If you have a role with complicated settings and/or rights and need a similar or almost similar role, it might be easier to copy the already existing role and make minor adjustments to the copy than to creating a new role from scratch.
- Expand Security, click Roles, right-click the relevant role and select Copy Role.
- In the dialog box that opens, give the copied role a new unique name and description.
- Click OK.
Rename a role
If you rename a role, this does not change the name of the view group based upon the role.
- Expand Security, and right-click Roles.
- Right-click required role and select Rename Role.
- In the dialog box that opens, change the name of the role.
- Click OK.
Delete a role
- Expand Security, and click Roles.
- Right-click the unwanted role and select Delete Role.
- Click Yes.
If you delete a role, this does not delete the view group based upon the role.
Assign/remove users and groups to/from roles
To assign or remove Windows users or groups or basic users to/from a role:
- Expand Security and select Roles. Then select the required role in the Overview pane:
- In the Properties pane, select the Users and Groups tab at the bottom.
- Click Add, select between Windows user or Basic user.
Assign Windows users and groups to a role
- Select Windows user. This opens the Select Users, Computers and Groups dialog box:
- Verify that the required object type is specified. If, for example, you need to add a computer, click Object Types and mark Computer. Also verify that the required domain is specified in the From this location field. If not, click Locations to browse for the required domain.
- In the Enter the object names to select box, enter the relevant user names, initials, or other types of identifier which Active Directory can recognize. Use the Check Names feature to verify that Active Directory recognizes the names or initials that you have entered. Alternatively, use the "Advanced..." function to search for users or groups.
- Click OK. The selected users/groups are now added to the Users and Groups tab's list of users who you have assigned the selected role. You can add more users and groups by entering multiple names separated by a semicolon (;).
Assign basic users to a role
- Select Basic User. This opens the Select Basic Users to add to Role dialog box:
- Select the basic user(s) that you want to assign to this role.
- Optional: Click New to create a new basic user.
- Click OK. The selected basic user(s) are now added to the Users and Groups tab's list of basic users who you have assigned the selected role.
Remove users and groups from a role
- On the Users and Groups tab, select the user or group you want to remove and click Remove in the lower part of the tab. You can select more than one user or group, or a combination of groups and individual users, if you need to.
- Confirm that you want to remove the selected user(s) or and group(s). Click Yes.
A user may also have roles through group memberships. When that is the case, you cannot remove the individual user from the role. Group members may also hold roles as individuals. To find out which roles users, groups, or individual group members have, use the View Effective Roles function.
View effective roles
With the Effective Roles feature, you can view all roles of a selected user or group. This is practical if you are using groups and it is the only way of viewing which roles a specific user is a member of.
- Open the Effective Roles window by expanding Security, then right-clicking Roles and select Effective Roles.
- If you want information about a basic user, enter the name in the User name field. Click Refresh to display the roles of the user.
- If you use Windows users or groups in Active Directory, click the "..." browse button. Select object type, enter the name, and click OK. The user's roles appear automatically.
Roles settings
Info tab (roles)
Available functionality depends on the system you are using. See https://www.milestonesys.com/solutions/platform/product-index/ for more information.
On the Info tab of a role, you can set the following:
|
Name |
Description |
|---|---|
| Name |
Enter a name for the role. |
| Description |
Enter a description for the role. |
| Management Client profile |
Select a Management Client profile to associate with the role. You cannot apply this to the default Administrators role. Requires permissions to manage security on the management server. |
| Smart Client profile |
Select a Smart Client profile to associate with the role. Requires permissions to manage security on the management server. |
| Default time profile |
Select a default time profile to associate with the role. You cannot apply this to the default Administrators role. |
| Evidence lock profile |
Select an evidence lock profile to associate with the role. |
| Smart Client login within time profile |
Select a time profile for which the XProtect Smart Client user associated with this role is allowed to log in. If the XProtect Smart Client user is logged in when the period expires, he or she is logged off automatically. You cannot apply this to the default Administrators role. |
| Allow Smart Client login |
Select the check box to allow users associated with this role to log in to XProtect Smart Client. Access to Smart Client is allowed by default. Clear the check box to deny access to XProtect Smart Client. |
| Allow XProtect Mobile client login |
Select the check box to allow users associated with this role to log in to XProtect Mobile client. Access to XProtect Mobile client is allowed by default. Clear the check box to deny access to XProtect Mobile client. |
| Allow XProtect Web Client login |
Select the check box to allow users associated with this role to log in to XProtect Web Client. Access to XProtect Web Client is allowed by default. Clear the check box to deny access to XProtect Web Client. |
| Login authorization required |
Select the check box to associate login authorization with the role. It means that XProtect Smart Client or the Management Client asks for a second authorization, typically by a superuser or manager, when the user logs in. To enable administrators to authorize users, configure the management server's Authorize Users right on the Overall Security tab. You cannot apply this to the default Administrators role. |
| Make users anonymous during PTZ sessions |
Select the check box to hide the names of users associated with this role when they control PTZ sessions. |
User and Groups tab (roles)
On the User and Groups tab, you assign users and groups to roles (see Assign/remove users and groups to/from roles). You can assign Windows users and groups or basic users (see Users (explained)).
|
Name |
Description |
|---|---|
| Name |
Displays the name of the user or group assigned to this role. |
| Description |
Displays the description that you entered when the basic user was created. |
Overall Security tab (roles)
Available functionality depends on the system you are using. See https://www.milestonesys.com/solutions/platform/product-index/ for more information.
On the Overall Security tab, you set up overall rights for roles. For every component available in your system, define access rights for the roles by setting Allow or Deny. When a role is denied access to a component, that component is not visible in the Overall Security tab to a user in that role.
The Overall Security tab is not available in the free XProtect Essential+.
You can define more access rights for XProtect Corporate than for XProtect Expert, XProtect Professional+, and XProtect Express+. This is because you can only set up differentiated administrator rights in XProtect Corporate, while you can set up overall rights for a role that uses XProtect Smart Client, XProtect Web Client, or XProtect Mobile client in all products.
The overall security settings only apply to the current site.
If you associate a user with more than one role and select Deny on a security setting for one role and Allow for another, the Deny right permission overrules the Allow right permission.
In the following, the descriptions show what happens on each individual right for the different system components if you select Allow for the relevant role. If you use XProtect Corporate, you can see which settings are available only to your system under each system component.
For every system component or functionality, the full system administrator can use the Allow or Deny check boxes to set up security permissions for the role. Any security permissions that you set up here are set up for the whole system component or functionality. If, for example, you select the Deny check box on Cameras, all cameras added to the system are unavailable for the role. In contrast, if you select the Allow check box, the role can see all cameras added to the system. The result of selecting Allow or Deny on your cameras is that the camera settings on the Device tab then inherit your selections on the Overall Security tab so that either all cameras are either available or unavailable to the particular role.
If you want to set security permissions for individual cameras or similar, you can only set these individual permissions on the tab of the relevant system component or functionality if you have not set any overall permissions for the system component or functionality on the Overall Security tab.
The descriptions below also apply to the rights that you can configure through the MIP SDKs.
If you want to switch your base license from XProtect Corporate to one of the other products, make sure that you remove all security rights that are available to only XProtect Corporate. If you do not remove those rights, you cannot complete the switch.
|
Security right |
Description |
XProtect Corporate |
|---|---|---|
| Full control |
Enables the right to manage all security entries on this part of the system. |
|
| Connect |
Enables users to connect to the Management Server. This permission is enabled by default. You can temporarily deny connection permission on roles for maintenance purposes, and then reapply access to the system. This permission must be selected to allow access to the system. |
|
| Read |
Enables the right to access a wide range of functionality, including:
It also enables access to:
|
Only available |
| Edit |
Enables the right to modify data in a wide range of functionality, including:
It also enables users to create, delete, and edit the following:
Enables the right to configure local IP ranges when configuring the network on the recording server. |
Only available |
| System Monitor |
Enables the right to view the data of the System Monitor. |
Only available |
| Status API |
Enables the right to perform queries on the Status API located on the recording server. This means that the role with this right enabled has access to read the status of the items located on the recording server. |
|
| Manage Federated site hierarchy |
Enables the right to add and detach the current site to other sites in a federated site hierarchy. If you set this permission to allowed on the child site only, the user can still detach the site from the parent site. |
Only available |
| Backup Configuration |
Enables the right to create backups of the system configuration using the system's backup and restore functionality. |
Only available |
| Authorize users |
Enables the right to authorize users when they are asked for a second login in XProtect Smart Client or Management Client. You define if a role requires login authorization on the Info tab. |
|
| Manage security |
Enables the right to manage permissions for the Management Server. It also enables users to create, delete, and edit the following features:
|
Only available |
The following settings are only available in XProtect Corporate.
|
Security right |
Description |
|---|---|
| Full control |
Enables the right to manage all security entries on this part of the system. |
| Edit |
Enables the right to edit properties on the recording servers, except for network configuration settings that require edit right on the management server. |
| Delete |
Enables the right to delete recording servers. To do this, you must also give the user delete permissions on:
If any of the devices on the recording server contains evidence locks, you can only delete the recording server if it is offline. |
| Manage hardware |
Enables the right to add hardware on recording servers. |
| Manage storage |
Enables the right to administrate storage containers on recording server, that is, to create, delete, move, and empty storage containers. |
| Manage security |
Enables the right to manage security permissions for recording servers. |
The following settings are only available in XProtect Corporate.
|
Security right |
Description |
|---|---|
| Full control |
Enables the right to manage all security entries on this part of the system. |
| Read |
Enables the right to see and access failover servers in the Management Client. |
| Edit |
Enables the right to create, update, delete, move, and enable or disable failover servers in the Management Client. |
| Manage security |
Enables the right to manage security permissions for the failover servers. |
The following settings are only available in XProtect Corporate.
|
Security right |
Description |
|---|---|
| Full control |
Enables the right to manage all security entries on this part of the system. |
| Read |
Enables the right to see and access mobile servers in the Management Client. |
| Edit |
Enables the right to edit and delete mobile servers in the Management Client. |
| Manage security |
Enables the right to manage security permissions for the mobile servers. |
| Create |
Enables the right to add mobile servers to the system. |
The following settings are only available in XProtect Corporate.
|
Security right |
Description |
|---|---|
| Full control |
Enables the right to manage all security entries on this part of the system. |
| Edit |
Enables the right to edit properties on hardware. |
| Delete |
Enables the right to delete hardware. If any of the hardware devices contains evidence locks, you can only delete the hardware if the recording server is offline. |
| Driver commands |
Enables the right to send special commands to the drivers and thereby control features and configuration on the device itself. The Driver commands right is for special developed MIP plug-ins in the clients only. It does not control standard configuration tasks. |
| View passwords | Enables the right to view passwords on hardware devices in the Edit Hardware dialog box. |
| Manage security |
Enables the right to manage security permissions for the hardware. |
|
Security right |
Description |
XProtect Corporate |
|---|---|---|
| Full control |
Enables the right to manage all security entries on this part of the system. |
|
| Read |
Enables the right to view camera devices in the clients and the Management Client. |
|
| Edit |
Enables the right to edit properties for cameras in the Management Client. It also enables users to enable or disable a camera. |
Only available |
| View Live |
Enables the right to view live video from cameras in the clients and the Management Client. |
|
| Playback |
Enables the right to play back recorded video from cameras in all clients. |
|
| Retrieve remote recordings |
Enables the right to retrieve recordings in the clients from cameras on remotes sites or from edge storages on cameras. |
|
| Read sequences |
Enables the right to read the sequence information related to, for example, playing back recorded video in the clients. |
|
| Smart search |
Enables the right to use the Smart search function in the clients. |
|
| Export |
Enables the right to export recordings from the clients. |
|
| Create bookmarks |
Enables the right to create bookmarks in recorded and live video in the clients. |
|
| Read bookmarks |
Enables the right to search for and read bookmark details in the clients. |
|
| Edit bookmarks |
Enables the right to edit bookmarks in the clients. |
|
| Delete bookmarks |
Enables the right to delete bookmarks in the clients. |
|
| Create and extend evidence locks |
Enables the right to create and extend evidence locks in the clients. |
Only available |
| Read evidence locks |
Enables the right to search and read evidence locks in the clients. |
Only available |
| Delete and reduce evidence locks |
Enables the right to delete or reduce evidence locks in the clients. |
Only available |
| Start manual recording |
Enables the right to start manual recording of video in the clients. |
|
| Stop manual recording |
Enables the right to stop manual recording of video in the clients. |
|
| AUX commands |
Enables the right to use auxiliary (AUX) commands on the camera from the clients. AUX commands offer users the control of, for example, wipers on a camera connected via a video encoder. Camera-associated devices connected via auxiliary connections are controlled from the client. |
|
| Manual PTZ |
Enables the right to use PTZ functions on PTZ cameras in the clients and the Management Client. |
|
| Activate PTZ presets or patrolling profile |
Enables the right to move PTZ cameras to preset positions, start and stop patrolling profiles, and pause a patrolling in the clients and the Management Client. To allow this role to use other PTZ functions on the camera, enable the Manual PTZ right. |
|
| Manage PTZ presets or patrolling profiles |
Enables the right to add, edit, and delete PTZ presets and patrolling profiles on PTZ cameras in the clients and the Management Client. To allow this role to use other PTZ functions on the camera, enable the Manual PTZ right. |
|
| Lock/unlock PTZ presets |
Enables the right to lock and unlock PTZ presets in the Management Client. This prevents or allows other users from changing preset positions in the clients and in the Management Client. |
Only available |
| Reserve PTZ sessions |
Enables the right to set PTZ cameras in reserved PTZ session mode in the clients and the Management Client. In a reserved PTZ session, other users with higher PTZ priority are not able to take over the control. To allow this role to use other PTZ functions on the camera, enable the Manual PTZ right. |
Only available |
| Release PTZ sessions |
Enables the right to release other users' PTZ sessions from the Management Client. You can always release your own PTZ sessions - without this permission. |
Only available |
| Delete recordings |
Enables the right to delete stored video recordings from the system via the Management Client. |
Only available |
| Lift privacy masks |
Enables the right to temporarily lift privacy masks in XProtect Smart Client. It also enables the right to authorize other XProtect Smart Client users to lift privacy masks. Lifting privacy masks only applies to privacy masks configured as liftable privacy masks in the Management Client. |
|
| Manage security |
Enables the right to manage security permissions in the Management Client for the camera. |
Only available |
|
Security right |
Description |
XProtect Corporate |
|---|---|---|
| Full control |
Enables the right to manage all security entries on this part of the system. |
|
| Read |
Enables the right to view microphone devices in the clients and the Management Client. |
|
| Edit |
Enables the right to edit microphone properties in the Management Client. It also allows users to enable or disable microphones. |
Only available |
| Listen |
Enables the right to listen to live audio from microphones in the clients and the Management Client. |
|
| Playback |
Enables the right to play back recorded audio from microphones in the clients. |
|
| Retrieve remote recordings |
Enables the right to retrieve recordings in the clients from microphones on remotes sites or from edge storages on cameras. |
|
| Read sequences |
Enables the right to read the sequence information related to, for example, the Playback tab in the clients. |
|
| Export |
Enables the right to export recordings from the clients. |
|
| Create bookmarks |
Enables the right to create bookmarks in the clients. |
|
| Read bookmarks |
Enables the right to search for and read bookmark details in the clients. |
|
| Edit bookmarks |
Enables the right to edit bookmarks in the clients. |
|
| Delete bookmarks |
Enables the right to delete bookmarks in the clients. |
|
| Create and extend evidence locks |
Enables the right to create or extend evidence locks in the clients. |
Only available |
| Read evidence locks |
Enables the right to search and read evidence lock details in the clients. |
Only available |
| Delete and reduce evidence locks |
Enables the right to delete or reduce evidence locks in the clients. |
Only available |
| Start manual recording |
Enables the right to start manual recording of audio in the clients. |
|
| Stop manual recording |
Enables the right to stop manual recording of audio in the clients. |
|
| Delete recordings |
Enables the right to delete stored recordings from the system. |
Only available |
| Manage security |
Enables the right to manage security permissions in the Management Client for microphones. |
Only available |
|
Security right |
Description |
XProtect Corporate |
|---|---|---|
| Full control |
Enables the right to manage all security entries on this part of the system. |
|
| Read |
Enables the right to view speaker devices in the clients and the Management Client. |
|
| Edit |
Enables the right to edit properties for speakers in the Management Client. It also allows users to enable or disable speakers. |
Only available |
| Listen |
Enables the right to listen to live audio from speakers in the clients and the Management Client. |
|
| Speak |
Enables the right to speak through the speakers in the clients. |
|
| Playback |
Enables the right to play back recorded audio from speakers in the clients. |
|
| Retrieve remote recordings |
Enables the right to retrieve recordings in the clients from speakers on remotes sites or from edge storages on cameras. |
|
| Read sequences |
Enables the right to use the Sequences feature while browsing recorded audio from speakers in the clients. |
|
| Export |
Enables the right to export recorded audio from speakers in the clients. |
|
| Create bookmarks |
Enables the right to create bookmarks in the clients. |
|
| Read bookmarks |
Enables the right to search for and read bookmark details in the clients. |
|
| Edit bookmarks |
Enables the right to edit bookmarks in the clients. |
|
| Delete bookmarks |
Enables the right to delete bookmarks in the clients. |
|
| Create and extend evidence locks |
Enables the right to create or extend evidence locks to protect recorded audio in the clients. |
Only available |
| Read evidence locks |
Enables the right to view recorded audio protected by evidence locks in the clients. |
Only available |
| Delete and reduce evidence locks |
Enables the right to delete or reduce evidence locks on protected audio in the clients. |
Only available |
| Start manual recording |
Enables the right to start manual recording of audio in the clients. |
|
| Stop manual recording |
Enables the right to stop manual recording of audio in the clients. |
|
| Delete recordings |
Enables the right to delete stored recordings from the system. |
Only available |
| Manage security |
Enables the right to manage security permissions in the Management Client for speakers. |
Only available |
|
Security right |
Description |
XProtect Corporate |
|---|---|---|
| Full control |
Enables the right to manage all security entries on this part of the system. |
|
| Read |
Enables the right to receive metadata in the clients. |
|
| Edit |
Enables the right to edit metadata properties in the Management Client. It also allows users to enable or disable metadata devices. |
Only available |
| Live |
Enables the right to receive live metadata from cameras in the clients. |
|
| Playback |
Enables the right to play back recorded data from metadata devices in the clients. |
|
| Retrieve remote recordings |
Enables the right to retrieve recordings in the clients from metadata devices on remotes sites or from edge storages on cameras. |
|
| Read sequences |
Enables the right to read the sequence information related to, for example, the Playback tab in the clients. |
|
| Export |
Enables the right to export recordings in the clients. |
|
| Create and extend evidence locks |
Enables the right to create evidence locks in the clients. |
Only available |
| Read evidence locks |
Enables the right to view evidence locks in the clients. |
Only available |
| Delete and reduce evidence locks |
Enables the right to delete or reduce evidence locks in the clients. |
Only available |
| Start manual recording |
Enables the right to start manual recording of metadata in the clients. |
|
| Stop manual recording |
Enables the right to stop manual recording of metadata in the clients. |
|
| Delete recordings |
Enables the right to delete stored recordings from the system. |
Only available |
| Manage security |
Enables the right to manage security permissions in the Management Client for metadata. |
Only available |
|
Security right |
Description |
XProtect Corporate |
|---|---|---|
| Full control |
Enables the right to manage all security entries on this part of the system. |
Only available |
| Read |
Enables the right to view input devices in the clients and the Management Client. |
|
| Edit |
Enables the right to edit properties for input devices in the Management Client. It also enables users to enable or disable an input device. |
Only available |
| Manage security |
Enables the right to manage security permissions in the Management Client for input devices. |
Only available |
|
Security right |
Description |
XProtect Corporate |
|---|---|---|
| Full control |
Enables the right to manage all security entries on this part of the system. |
|
| Read |
Enables the right to view output devices in the clients. |
|
| Edit |
Enables the right to edit properties for output devices in the Management Client. It also enables users to enable or disable an output device. |
Only available |
| Activate |
Enables the right to activate outputs in the clients. |
|
| Manage security |
Enables the right to manage security permissions in the Management Client for output devices. |
Only available |
The following settings are only available in XProtect Expert and XProtect Corporate.
|
Security right |
Description |
XProtect Corporate |
|---|---|---|
| Full control |
Enables the right to manage all security entries on this part of the system. |
|
| Read |
Enables the right to view Smart Walls in the clients. |
|
| Edit |
Enables the right to edit properties for the Smart Wall in the Management Client. |
Only available |
| Delete |
Enables the right to delete existing Smart Walls in the Management Client. |
Only available |
| Operate |
Enables the right to activate and modify Smart Walls, for example, to change and activate presets or apply cameras on views in the clients and in the Management Client. |
|
| Create Smart Wall |
Enables the right to create new Smart Walls in the Management Client. |
Only available |
| Manage security |
Enables the right to manage security permissions in the Management Client for the Smart Wall. |
Only available |
| Playback |
Enables the right to play back recorded data from within Smart Walls in the clients. |
|
Security right |
Description |
XProtect Corporate |
|---|---|---|
| Full control |
Enables the right to manage all security entries on this part of the system. |
|
| Read |
Enables the right to view View Groups in the clients and in the Management Client. View groups are created in the Management Client. |
|
| Edit |
Enables the right to edit properties on the View Groups in the Management Client. |
Only available |
| Delete |
Enables the right to delete View Groups in the Management Client. |
|
| Operate |
Enables the right to use View Groups in XProtect Smart Client, that is, to create and delete subgroups and views. |
|
| Create view group |
Enables the right to create View Groups in the Management Client. |
Only available |
| Manage security |
Enables the right to manage security permissions in the Management Client for View Groups. |
Only available |
|
Security right |
Description |
XProtect Corporate |
|---|---|---|
| Full control |
Enables the right to manage all security entries on this part of the system. |
|
| Read |
Enables the right to view user-defined events in the clients. |
|
| Edit |
Enables the right to edit properties on user-defined events in the Management Client. |
Only available |
| Delete |
Enables the right to delete user-defined events in the Management Client. |
Only available |
| Trigger |
Enables the right to trigger user-defined events in the clients. |
|
| Manage security |
Enables the right to manage security permissions in the Management Client for user-defined events. |
Only available |
| Create user-defined event |
Enables the right to create new user-defined events in the Management Client. |
Only available |
The following settings are only available in XProtect Corporate.
|
Security right |
Description |
|---|---|
| Full control |
Enables the right to manage all security entries on this part of the system. |
| Read |
Enables the right to view analytics events in the Management Client. |
| Edit |
Enables the right to edit properties on analytics events in the Management Client. |
| Manage security |
Enables the right to manage security permissions in the Management Client for analytics events. |
|
Security right |
Description |
|---|---|
| Full control |
Enables the right to manage all security entries on this part of the system. |
| Read |
Enables the right to view generic events in the clients and the Management Client. |
| Edit |
Enables the right to edit properties on generic events in the Management Client. |
| Manage security |
Enables the right to manage security permissions in the Management Client for generic events. |
|
Security right |
Description |
XProtect Corporate |
|---|---|---|
| Full control |
Enables the right to manage all security entries on this part of the system. |
Only available |
| Read |
Enables the right to select and send video to the Matrix recipient from the clients. |
|
| Edit |
Enables the right to edit properties for a Matrix in the Management Client. |
Only available |
| Delete |
Enables the right to delete a Matrix in the Management Client. |
Only available |
| Create Matrix |
Enables the right to create a new Matrix in the Management Client. |
Only available |
| Manage security |
Enables the right to manage security permissions in the Management Client for all Matrix's. |
Only available |
The following settings are only available in XProtect Corporate.
|
Security right |
Description |
|---|---|
| Full control |
Enables the right to manage all security entries on this part of the system. |
| Read |
Enables the right to view existing rules in the Management Client. |
| Edit |
Enables the right to edit properties for rules and to define rule behavior in the Management Client. It also requires that the user has read permissions on all the devices that are impacted by the rule. |
| Delete |
Enables the right to delete rules from the Management Client. It also requires that the user has read permissions on all devices that are impacted by the rule. |
| Create rule |
Enables the right to create new rules in the Management Client. It also requires that the user has read permissions on all devices that are impacted by the rule. |
| Manage security |
Enables the right to manage security permissions in the Management Client for all rules. |
The following settings are only available in XProtect Corporate.
|
Security right |
Description |
|---|---|
| Full control |
Enables the right to manage all security entries on this part of the system. |
| Read |
Enables the right to view other sites in the Management Client. Connected sites are connected via Milestone Federated Architecture. To edit properties, you need Edit permissions on the Management Server on each site. |
| Manage security |
Enables the right to manage security permissions on all sites. |
The following settings are only available in XProtect Expert and XProtect Corporate.
|
Security right |
Description |
|---|---|
| Full control |
Enables the right to manage all security entries on this part of the system. |
| Read |
Enables the right to view system monitors in XProtect Smart Client. |
| Edit |
Enables the right to edit properties for system monitors in the Management Client. |
| Manage security |
Enables the right to manage security permissions in the Management Client for all system monitors. |
The following settings are only available in XProtect Expert and XProtect Corporate.
|
Security right |
Description |
|---|---|
| Full control |
Enables the right to manage all security entries on this part of the system. |
| Read |
Enables the right to view the Metadata Use functionality in Management Client and its related settings, but does not enable the right to change the settings. |
| Edit the metadata search configuration |
Enables the right to enable or disable metadata search categories, for example metadata for people or vehicles, in the Management Client. |
| Manage security |
Enables the right to manage security permissions for metadata searches. |
The following settings are only available in XProtect Expert and XProtect Corporate.
|
Security right |
Description |
|---|---|
| Read public searches | Enables the right to view and open saved public searches in XProtect Smart Client. |
| Create public searches | Enables the right to save newly configured searches as public searches in XProtect Smart Client. |
| Edit public searches | Enables the right to edit the details or the configuration of saved public searches in XProtect Smart Client, for example the name, description, cameras, and search categories. |
| Delete public searches | Enables the right to delete saved public searches. |
| Manage security |
Enables the right to manage security permissions in the Management Client for search. |
The following settings are only available in XProtect Corporate.
|
Security right |
Description |
|---|---|
| Full control |
Enables the right to manage all security entries on this part of the system. |
| Manage |
Enables the right to manage alarms in the Management Client. For example, change priorities of alarms and re-delegate alarms to other users, acknowledge alarms and change the state, for example, from New to Assigned, of several alarms at the same time iew alarm definitions, alarm sounds, and alarm data settings. Only when you set this to allowed does the Alarms and Events tab in the Options dialog appear. |
| Edit |
Enables the right to view alarms and print alarm reports. |
| Disable alarms |
Enables the right to disable alarms. |
| Receive notifications | Enables the right to receive notifications about alarms in XProtect Mobile clients and XProtect Web Client. |
| Manage security |
Enables the right to manage security permissions for alarms. |
| Create |
Enables the right to create new alarm definitions in the Management Client. |
The following settings are only available in XProtect Corporate.
|
Security right |
Description |
|---|---|
| Full control |
Enables the right to manage all security entries on this part of the system. |
| Read system log entries | Enables the right to see system log entries. |
| Read audit log entries | Enables the right to see audit log entries. |
| Read rule-triggered log entries | Enables the right to see rule-triggered log entries. |
| Read log configuration | Enables the right to read log settings in Tools > Options > Server Logs. |
| Update log configuration | Enables the right to change log settings in Tools > Options > Server Logs. |
| Manage security |
Enables the right to manage security permissions for alarms. |
The following settings are only available in XProtect Corporate.
|
Security right |
Description |
|---|---|
| Full control |
Enables the right to manage all security entries on this part of the system. |
| Edit |
Enables the right to edit properties for the Access Control systems in the Management Client. |
| Use access control | Allows the user to use any access control-related features in the clients. |
| View cardholders list | Allows the user to view the cardholders list on the Access Control tab in the clients. |
| Receive notifications | Allows the user to receive notifications about access requests in the clients. |
| Manage security |
Enables the right to manage security permissions for all Access Control systems. |
If your system runs with XProtect LPR, specify the following rights for the user:
|
Security right |
Description |
|---|---|
| Full control |
Enables the right to manage all security entries on this part of the system. |
| Use LPR |
Enables the right to use any LPR-related features in the clients |
| Manage license plate match lists |
Enables the right to add, import, modify, export, and delete license plate match lists in the Management Client. |
| Read license plate match lists |
Enables the right to view license plate match lists. |
| Manage security |
Enables the right to manage security permissions in the Management Client for all Transaction definitions. |
|
Security right |
Description |
|---|---|
| Full control |
Enables the right to manage all security entries on this part of the system. |
| Read |
Enables the right to view properties for the Transaction sources in the Management Client. |
| Edit |
Enables the right to edit properties for the Transaction sources in the Management Client. |
| Delete |
Enables the right to delete Transaction sources in the Management Client. |
| Create |
Enables the right to create new Transaction sources in the Management Client. |
| Manage security |
Enables the right to manage security permissions in the Management Client for all Transaction sources. |
|
Security right |
Description |
|---|---|
| Full control |
Enables the right to manage all security entries on this part of the system. |
| Read |
Enables the right to view properties for the Transaction definitions in the Management Client. |
| Edit |
Enables the right to edit properties for the Transaction definitions in the Management Client. |
| Delete |
Enables the right to delete Transaction definitions in the Management Client. |
| Create |
Enables the right to create new Transaction definitions in the Management Client. |
| Manage security |
Enables the right to manage security permissions in the Management Client for all Transaction definitions. |
Through the MIP SDK, a third-party vendor can develop custom plug-ins for your system, for example, integration to external access control systems or similar functionality.
Device tab (roles)
Available functionality depends on the system you are using. See https://www.milestonesys.com/solutions/platform/product-index/ for more information.
The Device tab lets you specify which features users/groups with the selected role can use for each device (for example, a camera) or device group in XProtect Smart Client.
Remember to repeat for each device. You can also select a device group, and specify role rights for all the devices in the group in one go.
You can still select or clear such square-filled check boxes, but note that your choice in that case applies for all devices within the device group. Alternatively, select the individual devices in the device group to verify exactly which devices the relevant right applies for.
Camera-related rights
Specify the following rights for camera devices:
|
Name |
Description |
|---|---|
| Read |
The selected camera(s) will be visible in the clients. |
| View live |
Allows live viewing of video from the selected camera(s) in the clients. For XProtect Smart Client, it requires that the role has been granted the right to view the clients' Live tab. This right is granted as part of the application rights. Specify the time profile or leave the default value. |
| Playback > Within time profile |
Allows playback of recorded video from the selected camera(s) in the clients. Specify the time profile or leave the default value. |
| Playback > Limit playback to |
Allows playback of recorded video from the selected camera(s) in the clients. Specify a playback limit or apply no restrictions. |
| Read sequences |
Allows reading the sequence information related to, for example, the Sequence explorer in the clients. |
| Smart search |
Allows the user to use the Smart search function in the clients. |
| Export |
Allows the user to export recordings from the clients. |
| Start manual recording |
Allows starting manual recording of video from the selected camera(s) in the clients. |
| Stop manual recording |
Allows stopping manual recording of video from the selected camera(s) in the clients. |
| Read bookmarks |
Allows search for and read bookmark details in the clients. |
| Edit bookmarks |
Allows editing bookmarks in the clients. |
| Create bookmarks |
Allows adding bookmarks in the clients. |
| Delete bookmarks |
Allows deleting bookmarks in the clients. |
| AUX commands |
Allows the use of auxiliary commands from the clients. |
| Create and extend evidence locks |
Allows the client user to:
Requires user rights to all devices included in the evidence lock. |
| Delete and reduce evidence locks |
Allows the client user to:
Requires user rights to all devices included in the evidence lock. |
| Read evidence locks |
Allows the client user to search for and read evidence lock details. |
Microphone-related rights
Specify the following rights for microphone devices:
|
Name |
Description |
|---|---|
| Read |
The selected microphone(s) will be visible in the clients. |
| Live > Listen |
Allows listening to live audio from the selected microphones(s) in the clients. |
| Playback > Within time profile |
Allows playback of recorded audio from the selected microphone(s) in the clients. Specify the time profile or leave the default value. |
| Playback > Limit playback to |
Allows playback of recorded audio from the selected microphone(s) in the clients. Specify a playback limit or apply no restrictions. |
| Read sequences |
Allows reading the sequence information related to, for example, the Sequence explorer in the clients. |
| Export |
Allows the user to export recordings from the clients. |
| Start manual recording |
Allows starting manual recording of audio from the selected microphone(s) in the clients. |
| Stop manual recording |
Allows stopping manual recording of audio from the selected microphone(s) in the clients. |
| Read bookmarks |
Allows search for and read bookmark details in the clients. |
| Edit bookmarks |
Allows editing bookmarks in the clients. |
| Create bookmarks |
Allows adding bookmarks in the clients. |
| Delete bookmarks |
Allows deleting bookmarks in the clients. |
| Create and extend evidence locks |
Allows the client user to:
Requires user rights to all devices included in the evidence lock. |
| Delete and reduce evidence locks |
Allows the client user to:
Requires user rights to all devices included in the evidence lock. |
| Read evidence locks |
Allows the client user to search for and read evidence lock details. |
Speaker-related rights
Specify the following rights for speaker devices:
|
Name |
Description |
|---|---|
| Read |
The selected speaker(s) is visible in the clients. |
| Live > Listen |
Allows listening to live audio from the selected speaker(s) in the clients. |
| Playback > Within time profile |
Allows playback of recorded audio from the selected speaker(s) in the clients. Specify the time profile or leave the default value. |
| Playback > Limit playback to |
Allows playback of recorded audio from the selected speaker(s) in the clients. Specify a playback limit or apply no restrictions. |
| Read sequences |
Allows reading the sequence information related to, for example, the Sequence explorer in the clients. |
| Export |
Allows the user to export recordings from the clients. |
| Start manual recording |
Allows starting manual recording of audio from the selected speaker(s) in the clients. |
| Stop manual recording |
Allows stopping manual recording of audio from the selected speaker(s) in the clients. |
| Read bookmarks |
Allows search for and read bookmark details in the clients. |
| Edit bookmarks |
Allows editing bookmarks in the clients. |
| Create bookmarks |
Allows adding bookmarks in the clients. |
| Delete bookmarks |
Allows deleting bookmarks in the clients. |
| Create and extend evidence locks |
Allows the client user to:
Requires user rights to all devices included in the evidence lock. |
| Delete and reduce evidence locks |
Allows the client user to:
Requires user rights to all devices included in the evidence lock. |
| Read evidence locks |
Allows the client user to search for and read evidence lock details. |
Metadata-related rights
Specify the following rights for metadata devices:
|
Name |
Description |
|---|---|
| Read |
Enables the right to see metadata devices and retrieve data from them in the clients. |
| Edit |
Enables the right to edit metadata properties. It also allows users to enable or disable metadata devices in the Management Client and via the MIP SDK. |
| View Live |
Enables the right to view metadata from cameras in the clients. For XProtect Smart Client, it requires that the role has been granted the right to view the clients' Live tab. This right is granted as part of the application rights. |
| Playback |
Enables the right to play back recorded data from metadata devices in the clients. |
| Read sequences |
Enables the right to use the Sequences feature while browsing recorded data from metadata devices in the clients. |
| Export |
Enables the right to export recorded audio from metadata devices in the clients. |
| Create and extend evidence locks |
Enables the right to create and extend the evidence locks on metadata in the clients. |
| Read evidence locks |
Enables the right to view evidence locks on metadata in the clients. |
| Delete and reduce evidence locks |
Enables the right to delete or reduce evidence locks on metadata in the clients. |
| Start manual recording |
Enables the right to start manual recording of metadata in the clients. |
| Stop manual recording |
Enables the right to stop manual recording of metadata in the clients. |
Input-related rights
Specify the following rights for input devices:
|
Name |
Description |
|---|---|
| Read |
The selected input(s) will be visible in the clients. |
Output-related rights
Specify the following rights for output devices:
|
Name |
Description |
|---|---|
| Read |
The selected output(s) will be visible in the clients. If visible, the output will be selectable on a list in the clients. |
| Activate |
The selected output(s) can be activated from the Management Client and the clients. Specify the time profile or leave the default value. |
PTZ tab (roles)
You set up rights for pan-tilt-zoom (PTZ) cameras on the PTZ tab. You can specify the features users/groups can use in the clients. You can select individual PTZ cameras or device groups containing PTZ cameras.
Specify the following rights for PTZ:
|
Name |
Description |
|---|---|
| Manual PTZ |
Determines if the selected role can use PTZ functions and pause a patrolling on the selected camera. Specify a time profile, select Always, or leave the default value that follows the default time profile defined on the Info tab for that role. |
| Activate PTZ presets or patrolling profiles |
Determines if the selected role can move the selected camera to preset positions, start and stop patrolling profiles, and pause a patrolling. Specify a time profile, select Always, or leave the default value that follows the default time profile defined on the Info tab for that role. To allow this role to use other PTZ functions on the camera, enable the Manual PTZ right. |
| PTZ Priority |
Determines the priority of PTZ cameras. When several users on a surveillance system want to control the same PTZ camera at the same time, conflicts may occur. You can avoid such a situation by specifying a priority for use of the selected PTZ camera(s) by users/groups with the selected role. Specify a priority from 1 to 32,000, where 1 is the lowest priority. The default priority is 3,000. The role with the highest priority number is the one who can control the PTZ camera(s). |
| Manage PTZ presets or patrolling profiles |
Determines the right to add, edit and delete PTZ presets and patrolling profiles on the selected camera in both the Management Client and XProtect Smart Client. To allow this role to use other PTZ functions on the camera, enable the Manual PTZ right. |
| Lock/unlock PTZ presets |
Determines if the role can lock and unlock preset positions for the selected camera. |
| Reserve PTZ sessions |
Determines the right to set the selected camera in reserved PTZ session mode. In a reserved PTZ session other users or patrolling sessions with higher PTZ priority are not able to take over the control. To allow this role to use other PTZ functions on the camera, enable the Manual PTZ right. |
| Release PTZ sessions |
Determines if the selected role can release other users' PTZ sessions from the Management Client. You can always release your own PTZ sessions - without this permission. |
Speech tab (roles)
Relevant only if you use speakers on your system. Specify the following rights for speakers:
|
Name |
Description |
|---|---|
| Speak |
Determine if users should be allowed to talk through the selected speaker(s). Specify the time profile or leave the default value. |
| Speak priority |
When several client users want to talk through the same speaker at the same time, conflicts may occur. Solve the problem by specifying a priority for use of the selected speaker(s) by users/groups with the selected role. Specify a priority from Very low to Very high. The role with the highest priority is allowed use the speaker before other roles. Should two users with the same role want to speak at the same time, the first come, first served-principle applies. |
Remote Recordings tab (roles)
Specify the following rights for remote recordings:
|
Name |
Description |
|---|---|
| Retrieve remote recordings |
Enables the right to retrieve recordings in the clients from cameras, microphones, speakers, and metadata devices on remotes sites or from edge storages on cameras. |
Smart Wall tab (roles)
Through roles, you can grant your client users Smart Wall-related user rights for the Smart Wall feature:
|
Name |
Description |
|---|---|
| Read |
Allows users to view the selected Smart Wall in the clients. |
| Edit |
Allows users to edit the selected Smart Wall in the Management Client. |
| Delete |
Allows users to delete the selected Smart Wall in the Management Client. |
| Operate |
Allows users to apply layouts on the selected Smart Wall in the client and to activate the selected preset. |
| Playback |
Allows users to play back recorded data from the selected Smart Wall in the clients. |
External Event tab (roles)
Specify the following external event rights:
|
Name |
Description |
|---|---|
| Read |
Allows users to search for and view the selected external system event in the clients and the Management Client. |
| Edit |
Allows users to edit the selected external system event in the Management Client. |
| Delete |
Allows users to delete the selected external system event in the Management Client. |
| Trigger |
Allows users to trigger the selected external system event in the clients. |
View Group tab (roles)
On the View Group tab, you specify which view groups the users and user groups with the selected role can use in the clients.
Specify the following rights for view groups:
|
Name |
Description |
|---|---|
| Read |
Enables the right to view the View Groups in the clients and in the Management Client. View groups are created in the Management Client. |
| Edit |
Enables the right to edit properties on View Groups in the Management Client. |
| Delete |
Enables the right to delete View Groups in the Management Client. |
| Operate |
Enables the right to use View Groups in XProtect Smart Client, that is to create and delete subgroups and views. |
Servers tab (roles)
Specifying role rights on the Servers tab is only relevant if your system works in a Milestone Federated Architecture setup.
|
Name |
Description |
|---|---|
| Sites |
Enables the right to view the selected site in the Management Client. Connected sites are connected via Milestone Federated Architecture. To edit properties, you need Edit permissions on the Management Server on each site. |
See Configuring Milestone Federated Architecture for more information.
Matrix tab (roles)
If you have configured Matrix recipients on your system, you may configure Matrix role rights. From a client, you can send video to selected Matrix recipients. Select the users who can receive this on the Matrix tab.
The following rights are available:
|
Name |
Description |
|---|---|
| Read |
Determine if users and groups with the selected role can select and send video to the Matrix recipient from the clients. |
Alarms tab (roles)
If you use alarms in your system setup to provide central overview and control of your installation (including any other XProtect servers), you can use the Alarms tab to specify the alarm rights users/groups with the selected role should have, for example, how to handle alarms in the clients.
Specify the following rights for alarms:
|
Name |
Description |
|---|---|
| Manage |
Enables the right to manage alarms, for example changing priorities of alarms and re-delegate alarms to other users, acknowledge alarms and change the state, for example from New to Assigned, of several alarms at the same time. |
| View |
Enables the right to view alarms and print alarm reports. |
| Disable alarms |
Enables the right to disable alarms. |
| Receive notifications |
Enables the right to receive notifications about alarms in XProtect Mobile clients and XProtect Web Client. |
Access Control tab (roles)
When you add or edit basic users, Windows users or groups, specify access control settings:
|
Name |
Description |
|---|---|
| Use access control |
Allows the user to use any access control-related features in the clients. |
| View cardholders list |
Allows the user to view the cardholders list on the Access Control tab in the clients. |
| Receive notifications |
Allows the user to receive notifications about access requests in the clients. |
LPR tab (roles)
If your system runs with XProtect LPR, specify the following rights for the users:
|
Name |
Description |
|---|---|
| Use LPR |
Enables the right to use any LPR-related features in the clients. |
| Manage license plate match lists |
Enables the right to add, import, modify, export, and delete license plate match lists in the Management Client. |
| Read license plate match lists |
Enables the right to view license plate match lists. |
MIP tab (roles)
Through the MIP SDK, a third-party vendor can develop custom plug-ins for your system, for example, integration to external access control systems or similar functionality.
The settings you change depend on the actual plug-in. Find the custom settings for the plug-ins on the MIP tab.
Basic users (explained)
When you add a basic user to your system, you create a dedicated surveillance system user account with basic user name and password authentication for the individual user. This is in contrast to the Windows user, added through Active Directory.
When working with basic users, it is important to understand the difference between basic user and Windows user.
-
 Basic users are authenticated by a user name/password combination and are specific to a system. Even if basic users have the same name and password, a basic user created at one federated site does not have access to another federated site
 -
 Windows users are authenticated based on their Windows login and are specific to a machine
Create basic users
To create a basic user on your system:
- Expand Security > Basic Users.
- In the Basic Users pane, right-click and select Create Basic User.
- Specify a user name and a password, and repeat it to be sure you have specified it correctly.
- Click OK to create the basic user.
The password must meet the complexity requirements for the Windows operating system on the computer with the Management Server service installed.