

Site Navigation: Devices tabs
Info tab (devices)
Info tab (explained)
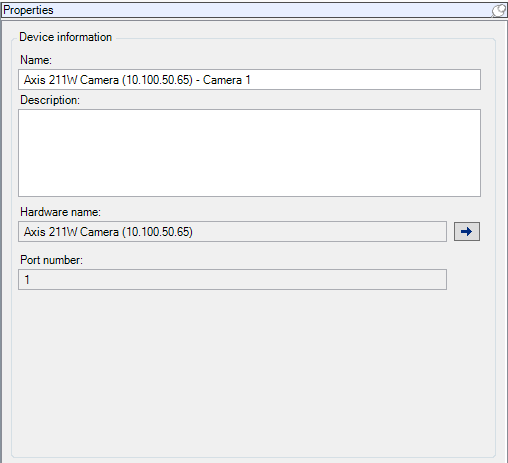
On the Info tab, you can view and edit basic information about a device in a number of fields.
All devices have an Info tab.
Info tab properties
|
Name |
Description |
|---|---|
| Name |
The name is used whenever the device is listed in the system and clients. When you rename a device, the name is changed globally in the Management Client. |
| Description |
Enter a description of the device (optional). The description appears in a number of listings within the system. For example, when you pause the mouse pointer over the name in the Overview pane. |
| Hardware name |
Displays the name of the hardware, with which the device is connected. The field is non-editable from here, but you can change it by clicking Go To next to it. This takes you to hardware information where you can change the name. |
| Port number |
Displays the port on which the device is attached on the hardware. For single-device hardware, the port number is typically 1. For multi-device hardware, such as video servers with several channels, the port number typically indicates the channel on which the device is attached, for example 3. |
| Short name |
To apply a short name for the camera, enter it here. The maximum length of characters is 128. If you are using smart map, automatically the short name is displayed with the camera on the smart map. Otherwise the full name is displayed. |
| Geo coordinates |
Enter the geographic location of the camera in the format latitude, longitude. The value you enter determines the position of the camera icon on the smart map in XProtect Smart Client. The field is mainly for smart map and third party integrations. |
| Direction |
Enter the viewing direction of the camera measured against a due north point on a vertical axis. The value you enter determines the direction of the camera icon on the smart map in XProtect Smart Client. The default value is 0.0. The field is mainly for smart map and third party integrations. |
| Field of view |
Enter the field of view in degrees. The value you enter determines the field of view of the camera icon on the smart map in XProtect Smart Client. The default value is 0.0. The field is mainly for smart map and third party integrations. |
| Depth |
Enter the depth of the camera in meters or feet. The value you enter determines the depth of the camera icon on the smart map in XProtect Smart Client. The default value is 0.0. The field is mainly for smart map and third party integrations. |
| Preview position in browser |
To verify that you have entered the correct geographic coordinates, click the button. Google Maps will open in your standard Internet browser on the position you specify. The field is mainly for smart map and third party integrations. |
Settings tab (devices)
Settings tab (explained)
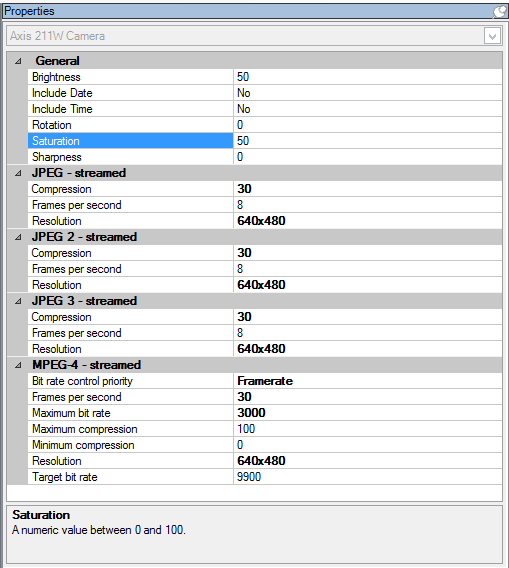
On the Settings tab, you can view and edit settings for a device in a number of fields.
All devices have a Settings tab.
The values appear in a table as changeable or read-only. When you change a setting to a non-default value, the value appears in bold.
The content of the table depends on the device driver.
Allowed ranges appear in the information box below the settings table:
Camera settings (explained)
You can view or edit settings, such as:
- Default frame rate
- Resolution
- Compression
- The maximum number of frames between keyframes
- On-screen date/time/text display for a selected camera, or for all cameras within a device group
The drivers for the cameras determine the content of the Settings tab. The drivers vary depending on the type of camera.
For cameras that support more than one type of stream, for example MJPEG and MPEG-4/H.264/H.265, you can use multi-streaming, see Multi-streaming (explained).
When you change a setting, you can quickly verify the effect of your change if you have the Preview pane enabled. You cannot use the Preview pane to judge the effect of frame rate changes because the Preview pane's thumbnail images use another frame rate defined in the Options dialog box.
If you change the settings for Max. frames between keyframes and Max. frames between keyframes mode, it may lower the performance of some functionalities in XProtect Smart Client. For example, XProtect Smart Client requires a keyframe to start up showing video, so a longer period between keyframes, prolongs the XProtect Smart Client start up.
Streams tab (devices)
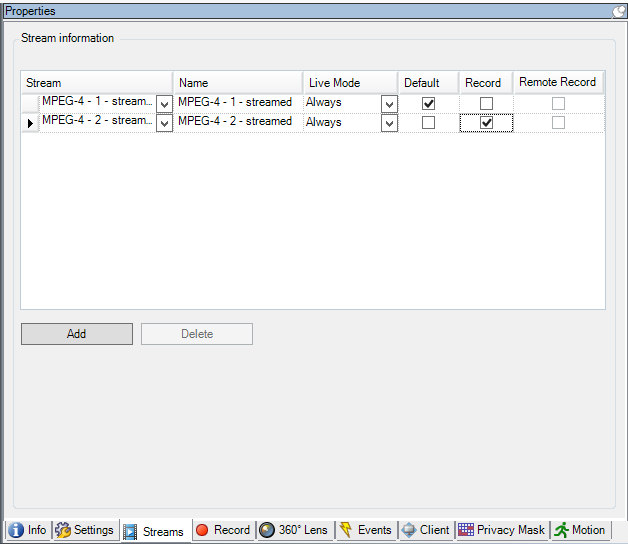
Streams tab (explained)
The following devices have a Streams tab:
- Cameras
The Streams tab lists by default a single stream. It is the selected camera's default stream, used for live and recorded video.
For live streaming, you can set up and use as many live streams as the camera supports, but you can only select one stream for recording at a time. To change which stream to use for recording, select the Record box for the stream to be recorded.
Multi-streaming (explained)
Viewing live video and playing back recorded video do not necessarily require the same video quality and frame rate. You can have either one stream for live viewing and another stream for playback purposes or multiple separate live streams with different resolution, encoding, and frame rate settings.
To manage streaming and limit unnecessary data transmission, streaming does not start when the following conditions are met:
- On the Streams tab, Live Mode is set to When needed
- On the Record tab, Recording is disabled
- On the Motion tab, Motion detection is disabled
If these conditions are met, video streams will only run when viewed by a client.
Example 1, live and recorded video:
- For viewing live video, your organization may prefer H.264 at a high frame rate
- For playing back recorded video, your organization may prefer MJPEG at a lower frame rate to preserve disk space
Example 2, local and remote live video:
- For viewing live video from a local connected operating point, your organization may prefer H.264 at a high frame rate to have the highest quality of video available
- For viewing live video from a remotely connected operating point, your organization may prefer MJPEG at a lower frame rate and quality to preserve network bandwidth
Example 3, adaptive streaming:
- For viewing live video and decreasing the load on the CPU and GPU of the XProtect Smart Client computer, your organization may prefer multiple high frame rate H.264/H.265 but with different resolutions to match the resolution requested by XProtect Smart Client when using adaptive streaming. For more information, see Smart Client profile properties.
If you enable Live multicast on the camera's Client tab, it only works on the default video stream.
Even when cameras support multi-streaming, individual multi-streaming capabilities may vary between different cameras. See the camera's documentation for more information.
To see if a camera offers different types of streams, see the Settings tab.
Add a stream
- On the Streams tab, click Add. This adds a second stream to the list.
- In the Name column, edit the name of the stream. The name appears in XProtect Smart Client.
- In the Live Mode column, select when live streaming is needed:
- Always: the stream runs even if no XProtect Smart Client users request the stream
- Never: the stream is off. Only use this for recording streams, for example, if you want recordings in high quality and need the bandwidth
- When needed: the stream starts when a user of XProtect Smart Client requests for it
- In the Default column, select which stream is default.
- In the Record column, select the check box if you want to record this stream or leave it cleared if you only want to use it for live video.
- Click Save.
If you set a stream to Default or Record, the stream is always running independent of the Live Mode setting. Selecting When needed and Always have the same effect in the system and if you select Never, the stream is running, but cannot be viewed live.
If you do not want the streams to run at all unless someone is viewing live video, you can modify the Default Start Feed Rule to start on request with the predefined Live Client Feed Requested event.
Record tab (devices)
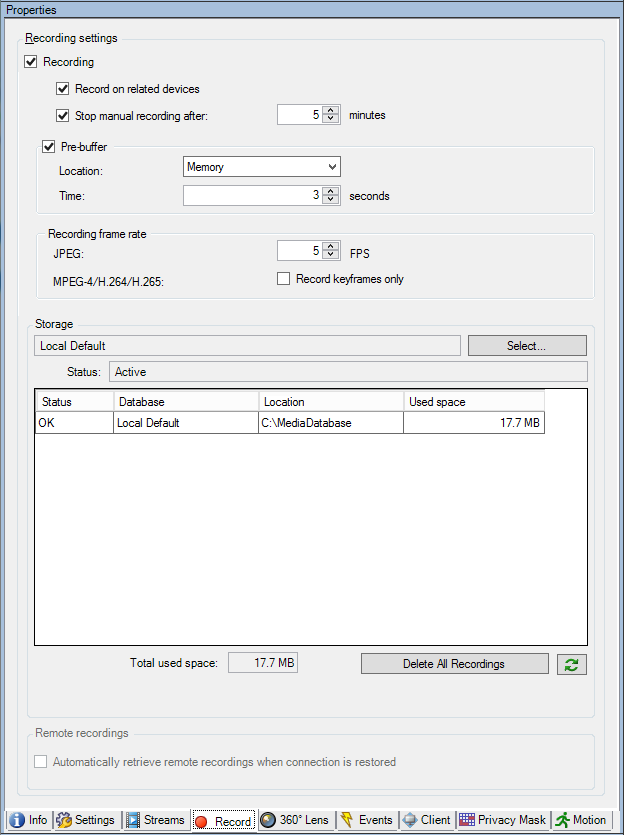
Record tab (explained)
The following devices have a Record tab:
- Cameras
- Microphones
- Speakers
- Metadata
Recordings from a device are only saved in the database when you have enabled recording and the recording-related rule criteria are met.
Parameters that cannot be configured for a device are grayed out.
Enable/disable recording
Recording is by default enabled. To enable/disable recording:
- In the Site Navigation pane, select Recording Servers.
- Select the relevant device in the Overview pane.
- On the Record tab, select or clear the Recording check box.
You must enable recording for the device before you can record data from the camera. A rule that specifies the circumstances for a device to record does not work if you have disabled recording for the device.
Enable recording on related devices
For camera devices, you can enable recording for related devices, for example, microphones that are connected to the same recording server. It means that the related devices record when the camera records.
Recording on related devices are enabled by default for new camera devices, but you can disable and enable as you want. For existing camera devices in the system, the check box is cleared by default.
- In the Site Navigation pane, select Recording Servers.
- Select the relevant camera device in the Overview pane.
- On the Record tab, select or clear the Record on related devices box.
- On the Client tab, specify the devices that relate to this camera.
If you want to enable recording on related devices that are connected to another recording server, you must create a rule.
Pre-buffering (explained)
Pre-buffering is the ability to record audio and video before the actual triggering event occurs. This is useful when you want to record the audio or video that leads up to an event that triggers recording, for example, opening a door.
Pre-buffering is possible because the system continuously receives audio and video streams from the connected devices and temporarily stores them for the defined pre-buffer period.
- If a recording rule is triggered, the temporary recordings are made permanent for the rule’s configured pre-recording time
- If no recording rule is triggered, the temporary recordings in the pre-buffer are automatically deleted after the defined pre-buffer time
To use the pre-buffer function, the devices must be enabled and sending a stream to the system.
Devices that support pre-buffering
Cameras, microphones and speakers support pre-buffering. For speakers, the streams are only sent when the XProtect Smart Client user uses the Talk to speaker function. This means that depending on how your speaker streams are triggered to be recorded there is little or no pre-buffering available.
In most cases, you set up speakers to record when the XProtect Smart Client user uses the Talk to speaker function. In such cases, no speaker pre-buffer is available.
Storage of the temporary pre-buffer recordings
You can choose the storage location of the temporary pre-buffer recordings:
- In the memory; the pre-buffer period is limited to 15 seconds.
- On the disk (in the media database); you can choose all values.
Storage to the memory instead of to disk improves system performance, but is only possible for shorter pre-buffer periods.
When recordings are stored in the memory, and you make some of the temporary recordings permanent, the remaining temporary recordings are deleted and cannot be restored. If you need to be able to keep the remaining recordings, store the recordings on the disk.
Manage pre-buffering
Enable and disable pre-bufferingPre-buffering is enabled by default with a pre-buffer size of three seconds and storage to the memory.
- To enable/disable pre-buffering, select/clear the Pre-buffer check box.
Temporary pre-buffer recordings are stored either in the memory or on the disk:
- For Location, select Memory or Disk and specify the number of seconds.
The number of seconds you specify must be sufficiently large to accommodate your requirements in the various recording rules you define.
If you require a pre-buffer period of more than 15 seconds, select Disk.
- If you change the location to Memory, the system reduced the period to 15 seconds automatically.
When you create rules that trigger recording, you can select that recordings should start some time before the actual event (pre-buffer).
Example: The below rule specifies that recording should start on the camera 5 seconds before motion is detected on the camera.

To use the pre-buffer recording function in the rule, you must enable pre-buffering on the device being recorded and you must set the pre-buffer length to at least the same length as specified in the rule.
Manage manual recording
Stop manual recording after is enabled by default with a recording time of five minutes. This is to ensure that the system automatically stops all recordings started by the XProtect Smart Client users.

- To enable and disable manual recording to be stopped automatically by the system, select/clear the Stop manual recording after check box.
- When you enable it, specify a recording time. The number of minutes you specify must be sufficiently large to accommodate the requirements of the various manual recordings without overloading the system.
Add to roles:
You must grant the right to start and stop manual recording to the client users on each camera in Roles on the Device tab.
Use in rules:
The events you can use when you create rules related to manual recording are:
- Manual Recording Started
- Manual Recording Stopped
Specify recording frame rate
You can specify the recording frame rate for JPEG.
- Select or enter the recording frame rate (in FPS, frames per second) in the Recording frame rate: (JPEG) box.

Enable keyframe recording
You can enable keyframe recording for MPEG-4/H.264/H.265 streams. It means that the system switches between recording keyframes only and recording all frames depending on your rule settings.
You can, for example, let the system record keyframes when there is no motion in the view and switch to all frames only in case of motion detection to save storage.
- Select the Record keyframes only box.

- Set up a rule that activates the function, see Actions and stop actions (explained).
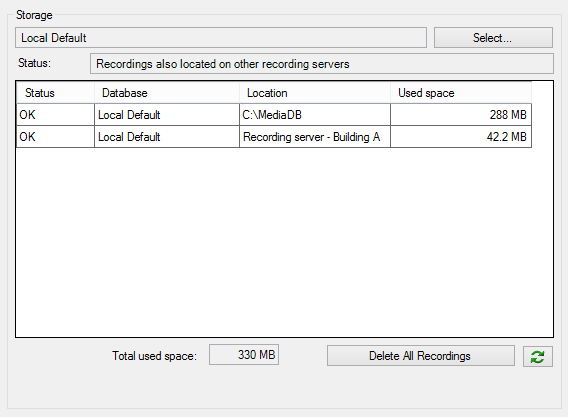
Storage (explained)
Under Storage, you can monitor and manage the databases for a device or a group of devices added to the same recording server.
Above the table, you can see the selected database and its status. In this example, the selected database is the default Local Default and the status is Recordings also located on other recording servers. The other server is the recording server in building A.
|
Name |
Description |
|---|---|
| Recordings also located on other recording servers |
The database is active and running and has recordings located in storages on other recording servers as well. |
| Archives also located in old storage |
The database is active and running and has archives located in other storages as well. |
| Active |
The database is active and running. |
| Data for some of the devices chosen is currently moving to another location |
The database is active and running and the system is moving data for one or more selected devices in a group from one location to another. |
| Data for the device is currently moving to another location |
The database is active and running and the system is moving data for the selected device from one location to another. |
| Information unavailable in failover mode |
The system cannot collect status information about the database when the database is in failover mode. |
Further down in the window, you can see the status of each database (OK, Offline or Old Storage), the location of each database and how much space each database uses.
If all servers are online, you can see the total spaced used for the entire storage in the Total used space field.
With the Delete All Recordings button, you can delete all recordings for the device or device group if you have added all devices in the group to the same server. Protected data is not deleted.
For information about configuration of storage, see Storage tab (recording server).
Moving devices from one storage to another
You can select a new storage location for your devices by selecting Select.... under Storage.
This way you can choose another recording storage for your devices to record in, and they will archive according to the configuration for that storage.
When you select a new location to store recordings, the existing recordings will not be moved. They will remain in the current location, with the conditions defined by the configuration of the storage they belong to.
Remote recording (explained)
The remote recording option is only available if the selected camera supports edge storage or is a camera in a Milestone Interconnect setup.
To ensure that all recordings are saved in case of network issues, select Automatically retrieve remote recordings when connection is restored. This enables automatic retrieval of recordings once connection is re-established.
The type of hardware selected determines where recordings are retrieved from:
- For a camera with local recording storage, recordings are retrieved from the camera's local recording storage
- For a Milestone Interconnect remote system, recordings are retrieved from the remote systems' recording servers
You can use the following functionality independently of the automatic retrieval:
- Manual recording
- The Retrieve and store remote recordings from <devices> rule
- The Retrieve and store remote recordings between <start and end time> from <devices> rule
Motion tab (devices)
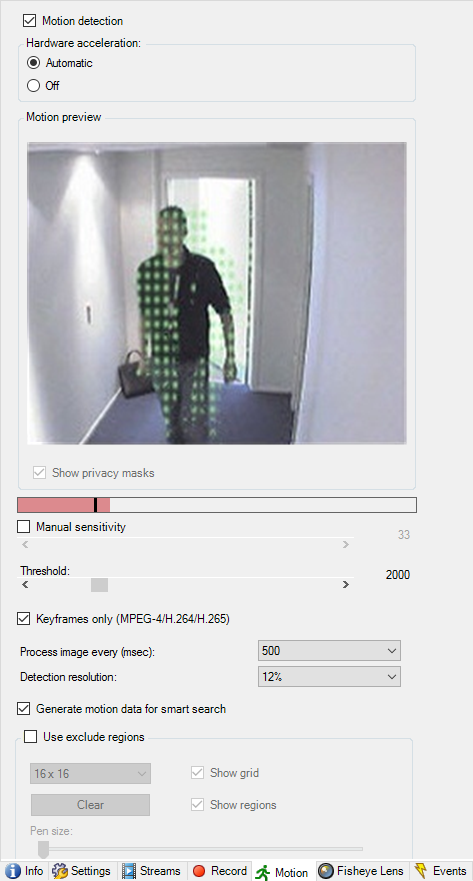
Motion tab (explained)
The following devices have a Motion tab:
- Cameras
On the Motion tab, you can enable and configure motion detection for the selected camera. Motion detection configuration is a key element in your system: Your motion detection configuration determines when the system generates motion events and typically also when video is recorded.
Time spent on finding the best possible motion detection configuration for each camera helps you later avoid, for example, unnecessary recordings. Depending on the physical location of the camera, it may be a good idea to test motion detection settings under different physical conditions such as day/night and windy/calm weather.
Before you configure motion detection for a camera, Milestone recommends that you have configured the camera's image quality settings, for example resolution, video codec and stream settings on the Settings tab. If you later change image quality settings, you should always test any motion detection configuration afterwards.
If you have defined areas with permanent privacy masks on the Privacy masking (see Privacy masking tab (devices)) tab, you can choose to display the privacy masks on the Motion tab by selecting the Show privacy masks check box.
There is no motion detection within areas covered by permanent privacy masks.
You can configure all the settings for a group of cameras, but you would typically set the exclude regions per camera.
Enable and disable motion detection
You specify the default setting of motion detection for cameras on the Tools > Options > General tab.
To enable or disable motion detection afterwards for a camera:
- Select or clear the Motion tab's Motion detection check box
When you disable motion detection for a camera, motion detection-related rules for the camera do not work.
Specify motion detection settings
You can specify settings related to the amount of changes required in a camera's view in order for the change to be regarded as motion. You can for example specify intervals between motion detection analysis and areas of a view in which motion should be ignored. You can also adjust the accuracy of the motion detection and thereby the load on system resources.
Hardware acceleration (explained)
Select Automatic to enable hardware accelerated video decoding for motion detection. This is the default setting when you add a camera. The recording server is now using GPU resources if they are available. This will reduce the CPU load during video motion analysis and improve the general performance of the recording server.
Hardware accelerated video decoding for motion detection uses GPU resources on:
- Intel CPUs that support Intel Quick Sync
- NVIDIA® display adapters connected to your recording server
The load balancing between the different resources is done automatically. In the System Monitor node you can verify if the current motion analysis load on the NVIDIA GPU resources is within the specified limits from the System Monitor Thresholds node. The NVIDIA GPU load indicators are:
- NVIDIA decoding
- NVIDIA memory
- NVIDIA rendering
If the load is too high, you can add GPU resources to your recording server by installing multiple NVIDIA display adapters. Milestone does not recommend the use of Scalable Link Interface (SLI) configuration of your NVIDIA display adapters.
NVIDIA products have different compute capabilities.
Hardware accelerated video decoding for motion detection using NVIDIA GPUs requires compute capability version 6.x (Pascal) or newer.
To find the compute capability version of your NVIDIA product, visit the NVIDIA website (https://developer.nvidia.com/cuda-gpus/).
To see if video motion detection is hardware accelerated for a specific camera, enable logging on the recoding server log file. Set level to Debug and diagnostics is logged to the DeviceHandling.log. The log follows the pattern:
[time] [274] DEBUG – [guid] [name] Configured decoding: Automatic: Actual decoding: Intel/NVIDIA
The OS version of the recording server and CPU generation may impact performance of hardware accelerated video motion detection. GPU memory allocation is often the bottleneck with older versions (typical limit is between 0.5 GB and 1.7 GB).
Systems based on Windows 10 / Server 2016 and 6th generation CPU (Skylake) or newer can allocate 50% of system memory to GPU and thereby removing or reducing this bottleneck.
6th generation Intel CPUs does provide hardware accelerated decoding of H.265, so the performance is comparable with H.264 for these versions of CPU.
Enable manual sensitivity
The sensitivity setting determines how much each pixel in the image must change before it is regarded as motion.
- Select the Motion tab's Manual Sensitivity check box.
- Drag the slider to the left for a higher sensitivity level, and to the right for a lower sensitivity level.
The higher the sensitivity level, the less change is allowed in each pixel before it is regarded as motion.
The lower the sensitivity level, the more change in each pixel is allowed before it is regarded as motion.
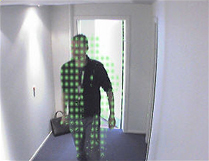
Pixels in which motion is detected are highlighted in green in the preview image.
- Select a slider position in which only detections you consider motion are highlighted.
You can compare and set the exact sensitivity setting between cameras by the number in the right side of the slider.
Specify threshold
The motion detection threshold determines how many pixels in the image must change before it is regarded as motion.
- Drag the slider to the left for a higher motion level, and to the right for a lower motion level.
- Select a slider position in which only detections that you consider motion are detected.
The black vertical line in the motion indication bar shows the motion detection threshold: When detected motion is above the selected detection threshold level, the bar changes color from green to red, indicating a positive detection.


Motion indication bar: changes color from green to red when above the threshold, indicating a positive motion detection.
Select keyframes settings
Determines if motion detection is done on keyframes only instead of on the entire video stream. Only applies to MPEG-4/H.264/H.265.
Motion detection on keyframes reduces the amount of processing power used to carry out the analysis.
Select Keyframes only (MPEG-4/H.264/H.265) box to do motion detection on keyframes only.
Select image processing interval
You can select how often the system performs the motion detection analysis.
From the Process image every (msec) list:
- Select the interval. For example, every 1000 milliseconds are once every second. Default value is every 500 milliseconds.
The interval is applied if the actual frame rate is higher than the interval you set here.
Specify detection resolution
Lets you optimize motion detection performance by analyzing only a selected percentage of the image, for example 25%. By analyzing 25%, only every fourth pixel in the image is analyzed instead of all pixels.
Using optimized detection reduces the amount of processing power used to carry out the analysis, but also means a less accurate motion detection.
- In the Detection resolution list, select the wanted detection resolution.
Generating motion data for smart search
With Generate motion data for smart search enabled, the system generates motion data for the images used for motion detection. For example, if you select motion detection on keyframes only, the motion data is also produced for keyframes only.
The extra motion data enables the client user, via the smart search function, to quickly search for relevant recordings based on motion in the selected area of the image. The system does not generate motion data within areas covered by permanent privacy masks, but only for areas with liftable privacy masks (see Privacy masking tab (devices)).
Motion detection threshold and exclude regions do not influence the generated motion data.
You specify the default setting of generating smart search data for cameras on the Tools > Options > General tab.
Specify exclude regions
You can exclude motion detection from specific areas of a camera view.
Areas with permanent privacy masks, are also excluded from motion detection. Select the Show privacy masks check box to display them.
Excluding motion detection from specific areas helps you avoid detection of irrelevant motion, for example if the camera covers an area where a tree is swaying in the wind or where cars regularly pass by in the background.
When you use exclude regions with PTZ cameras and you pan-tilt-zoom the camera, the excluded area does not move accordingly because the area is locked to the camera image, and not the object.
- To use exclude regions, select the Use exclude regions check box.
A grid divides the preview image into selectable sections.
- To define exclude regions, drag the mouse pointer over the required areas in the preview image while you press the left mouse button. Right mouse button clears a grid section.
You can define as many exclude regions as needed. Excluded regions appear in blue:
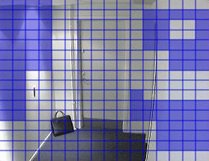
The blue exclude areas only appear in the preview image on the Motion tab, not in any other preview images in the Management Client or access clients.
Presets tab (devices)
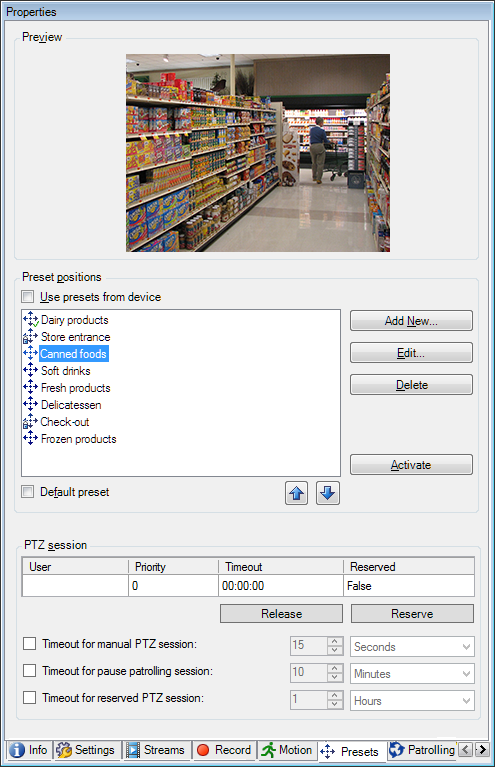
Presets tab (explained)
The following devices have a Presets tab:
- PTZ cameras that support preset positions
On the Presets tab, you can create or import preset positions, for example:
- In rules for making a PTZ (pan-tilt-zoom) camera move to a specific preset position when an event occurs
- In patrolling, for the automatic movement of a PTZ camera between a number of preset positions
- For manual activation by the XProtect Smart Client users
You can lock a preset position if you want to prevent users in XProtect Smart Client or users with limited security rights from updating this preset. Locked presets are indicated with this icon  .
.
Administrators with security rights to run a reserved PTZ session (see Reserved PTZ sessions (explained)) can run the PTZ camera in this mode. This prevents other users from taking control over the camera. With sufficient rights, you can release other users' reserved PTZ sessions (see Release PTZ session).
You assign PTZ permission to roles on the Overall Security tab (see Overall Security tab (roles)) or the PTZ tab (see PTZ tab (roles)).
You can monitor if the system is currently patrolling or a user has taken control, in the PTZ session area. (see PTZ session properties)
You also change the PTZ session timeouts for the camera.
Add a preset position (type 1)
To add a preset position for the camera:
- Click Add New. The Add Preset window appears:

- The Add Preset window displays a live preview image from the camera. Use the navigation buttons and/or sliders to move the camera to the required position.
- Specify a name for the preset position in the Name field.
- Optionally, enter a description of the preset position in the Description field.
- Select Locked if you want to lock the preset position. Only users with sufficient rights can unlock the position afterwards.
- Click Add to specify presets. Keep adding until you have the presets you want.
- Click OK. The Add Preset window closes, and adds the position to the Presets tab's list of available preset positions for the camera.
Use preset positions from the camera (type 2)
As an alternative to specifying preset positions in the system, you can specify preset positions for some PTZ cameras on the camera itself. You can typically do this by accessing a product-specific configuration web page.
- Import the presets into the system by selecting Use presets from device.
Any presets you have previously defined for the camera are deleted and affect any defined rules and patrolling schedules as well as remove the presets available for the XProtect Smart Client users.
- Click Delete to delete presets that your users do not need.
- Click Edit if you want to change the display name of the preset (see Rename a preset position (type 2 only)).
- If you later want to edit such device-defined presets, edit on the camera and then re-import.
Assign a default preset position
If required, you can assign one of a PTZ camera's preset positions as the camera's default preset position.
It can be useful to have a default preset position because it allows you to define rules that specify that the PTZ camera should go to the default preset position under particular circumstances, for example after you have operated the PTZ camera manually.
- To assign a preset position as the default, select the preset in your list of defined preset positions.
- Select the Default preset check box below the list.
You can only define one preset position as the default preset position.
Edit a preset position (type 1 only)
To edit an existing preset position defined in the system:
- Select the preset position in the Presets tab's list of available preset positions for the camera.
- Click Edit. This opens the Edit Preset window:
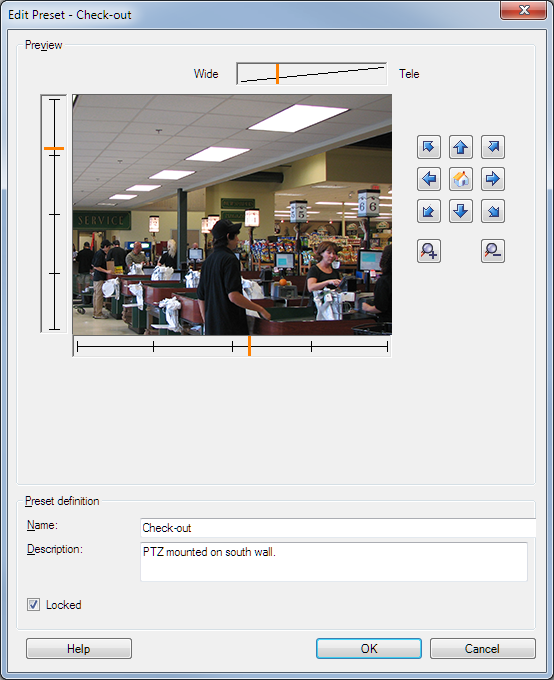
- The Edit Preset window displays live video from the preset position. Use the navigation buttons and/or sliders to change the preset position as required.
- Change the name/number and description of the preset position if needed.
- Select Locked if you want to lock the preset position. Only users with sufficient rights can unlock the position afterwards.
- Click OK.
Rename a preset position (type 2 only)
To edit the name of a preset position defined in the camera:
- Select the preset position in the Presets tab's list of available presets for the camera.
- Click Edit. This opens the Edit Preset window:
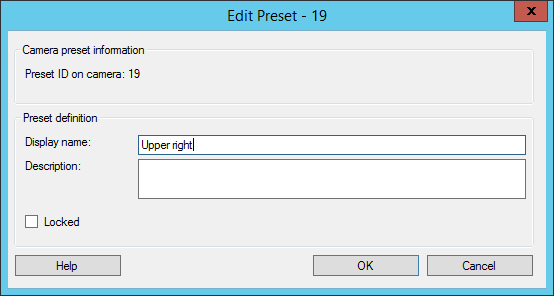
- Change the name and add a description of the preset position if needed.
- Select Locked if you want to lock the preset name. You can lock a preset name if you want to prevent users in XProtect Smart Client or users with limited security rights from updating the preset name or deleting the preset. Locked presets are indicated with this icon . Only users with sufficient rights can unlock the preset name afterwards.
- Click OK.
Lock a preset position
You can lock a preset position if you want to prevent users in XProtect Smart Client or users with limited security rights from updating or deleting a preset. Locked presets are indicated with this icon .
You lock presets as part of adding (see Add a preset position (type 1)) and editing (see Edit a preset position (type 1 only)).
Test a preset position (type 1 only)
- Select the preset position in the Presets tab's list of available preset positions for the camera.
- Click Activate.
- The camera moves to the selected preset position.
Reserved PTZ sessions (explained)
Depending on your surveillance system, you can reserve PTZ sessions.
Administrators with security rights to run a reserved PTZ session can run the PTZ camera in this mode. This prevents other users from taking control over the camera. In a reserved PTZ session, the standard PTZ priority system is disregarded to avoid that users with a higher PTZ priority interrupt the session.
You can operate the camera in a reserved PTZ session both from XProtect Smart Client and the Management Client.
To reserve a PTZ session can be useful, if you need to make urgent updates or maintenance to a PTZ camera or its presets without being interrupted by other users.
You cannot start a reserved PTZ session, if a user with a higher priority than yours controls the camera or if another user has already reserved the camera.
Release PTZ session
The Release button allows you to release your current PTZ session so another user can control the camera. When you click Release, the PTZ session ends immediately and will be available for the first user to operate the camera.
Administrators assigned with the security permission Release PTZ session has the rights to release other users' reserved PTZ session at any time. This can, for example, be useful in occasions where you need to maintain the PTZ camera or its presets, or if other users have accidentally blocked the camera in urgent situations.
Specify PTZ session timeouts
Management Client and XProtect Smart Client users with the necessary user rights can manually interrupt the patrolling of PTZ cameras.
You can specify how much time should pass before regular patrolling is resumed for all PTZ cameras on your system:
- Select Tools > Options.
- On the Options window's General tab, select the amount of time in the:
- Timeout for manual PTZ sessions list (default is 15 seconds).
- Timeout for pause patrolling sessions list (default is 10 minutes).
- Timeout for reserved PTZ sessions list (default is 1 hour).
The settings apply for all PTZ cameras on your system.
You can change the timeouts individually for each camera.
- In the Site Navigation pane, click Camera.
- In the Overview pane, select the camera.
- On the Presets tab, select the amount of time in the:
- Timeout for manual PTZ session list (default is 15 seconds).
- Timeout for pause patrolling session list (default is 10 minutes).
- Timeout for reserved PTZ session list (default is 1 hour).
The settings apply for this camera only.
PTZ session properties
The PTZ session table shows the current status of the PTZ camera.
|
Name |
Description |
|---|---|
| User |
Displays the user that has pressed the Reserved button and currently controls the PTZ camera. If a patrolling session is activated by the system, it displays Patrolling. |
| Priority |
Displays the user's PTZ priority. You can only take over PTZ sessions from users with a lower priority than you. |
| Timeout |
Displays the remaining time of the current PTZ session. |
| Reserved |
Indicates if the current session is a reserved PTZ session or not:
|
You can change the following timeouts for each PTZ camera.
|
Name |
Description |
|---|---|
| Timeout for manual PTZ session |
Specify the timeout period for manual PTZ sessions on this camera if you want the timeout to be different from the default period. You specify the default period in the Tools menu under Options. |
| Timeout for pause patrolling PTZ session |
Specify the timeout period for pause patrolling PTZ sessions on this camera if you want the timeout to be different from the default period. You specify the default period in the Tools menu under Options. |
| Timeout for reserved PTZ session |
Specify the timeout period for reserved PTZ sessions on this camera if you want the timeout to be different from the default period. You specify the default period in the Tools menu under Options. |
Patrolling tab (devices)
Patrolling tab (explained)
The following devices have a Patrolling tab:
- PTZ cameras
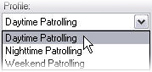
On the Patrolling tab, you can create patrolling profiles - the automatic movement of a PTZ (pan-tilt-zoom) camera between a number of preset positions.
Before you can work with patrolling, you must specify at least two preset positions for the camera in the Presets tab.
Patrolling profiles are the definitions of how patrolling should take place. This includes the order in which the camera should move between preset positions and how long it should remain at each position. You can create an unrestricted number of patrolling profiles and use them in your rules. For example, you may create a rule specifying that one patrolling profile should be used during daytime opening hours and another during nights.
Before you apply a patrolling profile in a rule, for example, you can test the patrolling profile with manual patrolling. You can also use manual patrolling to take over patrolling from another user or from a rule-activated patrolling, provided that you have a higher PTZ priority.
You can monitor if the system is currently patrolling or a user has taken control, in the Manual patrolling area.
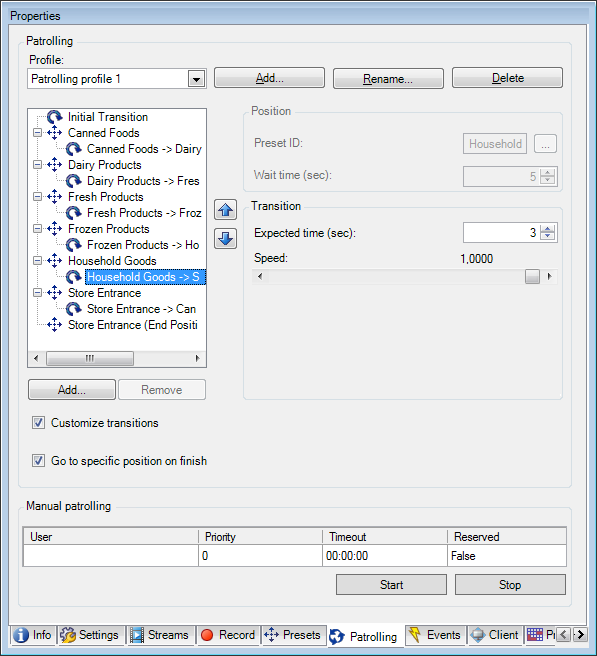
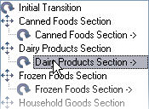
Patrolling tab, displaying a patrolling profile with customized transitions.
Specify manual PTZ session timeout (see Presets tab (devices))
Add a patrolling profile
Add a profile that you want to use in a rule:
- Click Add. The Add Profile dialog box appears.
- In the Add Profile dialog box, specify a name for the patrolling profile.
- Click OK. The button is disabled if the name is not unique.
The new patrolling profile is added to the Profile list. You can now specify the preset positions and other settings for the patrolling profile.
Specify preset positions in a patrolling profile
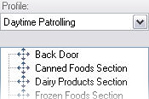
- Select the patrolling profile in the Profile list:
- Click Add.
- In the Select Preset dialog box, select the preset positions for your patrolling profile:
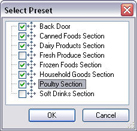
- Click OK. The selected preset positions are added to the list of preset positions for the patrolling profile:
- The camera uses the preset position at the top of the list as the first stop when it patrols according to the patrolling profile. The preset position in the second position from the top is the second stop, and so forth.
Specify the time at each preset position
When patrolling, the PTZ camera by default remains for 5 seconds at each preset position specified in the patrolling profile.
To change the number of seconds:
- Select the patrolling profile in the Profile list.
- Select the preset position for which you want to change the time:

- Specify the time in the Time on position (sec) field:
- If required, repeat for other preset positions.
Customize transitions (PTZ)
By default, the time required for moving the camera from one preset position to another, known as transition, is estimated to be three seconds. During this time, motion detection is by default disabled on the camera, because irrelevant motion is otherwise likely to be detected while the camera moves between the preset positions.
You can only customize speed for transitions if your camera supports PTZ scanning and is of the type where preset positions are configured and stored on your system's server (type 1 PTZ camera). Otherwise the Speed slider is grayed out.
You can customize the following:
- The estimated transition time
- The speed with which the camera moves during a transition
To customize transitions between the different preset positions:
- Select the patrolling profile in the Profile list.
- Select the Customize transitions check box.

Transition indications are added to the list of preset positions.
- In the list, select the transition.
- Specify the estimated transition time (in number of seconds) in the Expected time (sec) field.

- Use the Speed slider to specify the transition speed. When the slider is in its rightmost position, the camera moves with its default speed. The more you move the slider to the left, the slower the camera moves during the selected transition.
- Repeat as required for other transitions.
Specify an end position
You can specify that the camera should move to a specific preset position when patrolling according to the selected patrolling profile ends.
- Select the patrolling profile in the Profile list.
- Select the Go to specific position on finish check box. This opens the Select preset dialog box.
- Select the end position, and click OK.
- The selected end position is added to the profile list.
When patrolling according to the selected patrolling profile ends, the camera moves to the specified end position.
You can select any of the camera's preset positions as the end position, you are not limited to the preset positions used in the patrolling profile.
Manual patrolling (explained)
When you have designed a patrolling profile, you can test it with manual patrolling before you apply it in the system. Use the Start and Stop buttons to initiate and stop manual patrolling.
If the camera is already patrolling or controlled by another user, you can only start manual patrolling if you have a higher priority.
If you start a manual patrolling while the camera runs a rule-activated system patrolling, the system resumes this patrolling when you stop your manual patrolling. If another user runs a manual patrolling, but you have a higher priority and start your manual patrolling, the other user's manual patrolling is not resumed.
If you do not stop your manual patrolling yourself, it will continue until a rule-based patrolling or a user with a higher priority takes over. When the rule-based system patrolling stops, the system resumes your manual patrolling. If another user starts a manual patrolling, your manual patrolling stops, and will not be resumed.
When you stop your manual patrolling and you have defined an end position for your patrolling profile with Go to specific position on finish, the camera returns to this position.
Manual patrolling properties
The Manual patrolling table shows the current status of the PTZ camera.
|
Name |
Description |
|---|---|
| User |
Displays the user who has either reserved the PTZ session or started a manual patrolling and currently controls the camera. If a patrolling session is activated by the system, it displays Patrolling. |
| Priority |
Displays the user's PTZ priority. You can only take over PTZ sessions from users or patrolling profiles with a lower priority than yours. |
| Timeout |
Displays the remaining time of the current reserved or manual PTZ sessions. |
| Reserved |
Indicates if the current session is a reserved PTZ session or not.
|
Fisheye lens tab (devices)
Fisheye Lens tab (explained)
The following devices have a Fisheye Lens tab:
- Fixed cameras with a fisheye lens
On the Fisheye Lens tab, you can enable and configure fisheye lens support for the selected camera.

Enable and disable fisheye lens support
The fisheye lens support is disabled by default.
To enable or disable it, select or clear the Fisheye Lens tab's Enable fisheye lens support check box.
Specify fisheye lens settings
When you enable the fisheye lens support:
- Select the lens type.
- Specify the physical position/orientation of the camera from the Camera position/orientation list.
- Select a Registered Panomorph Lens (RPL) number from the ImmerVision Enables® panomorph RPL number list.
This ensures the identification and correct configuration of the lens used with the camera. You usually find the RPL number on the lens itself or on the box it came in. For details of ImmerVision, panomorph lenses, and RPLs, see the Immervision website (https://www.immervisionenables.com/).
Events tab (devices)
Events tab (explained)
The following devices have an Events tab:
- Cameras
- Microphones
- Inputs
In addition to the system's event, some devices can be configured to trigger events. You can use these events when creating event-based rules in the system. Technically, they occur on the actual hardware/device rather than on the surveillance system.
Event tab, example from camera.
When you delete an event, it affects all rules that use the event.
Add an event
- In the Overview pane, select a device.
- Select the Events tab and click Add. This opens the Select Driver Event window.
- Select an event. You can only select one event at a time.
- If you want to see an entire list of all events, allowing you to add events that have already been added, select Show already added events.
- Click OK.
- In the toolbar, click Save.
Specify event properties
You can specify properties for each event you have added. The number of properties depends on the device and the event. In order for the event to work as intended, you must specify some or all of the properties identically on the device as well as on this tab.
Use several instances of an event
To be able to specify different properties for different instances of an event, you can add an event more than once.
The following example is specific to cameras.
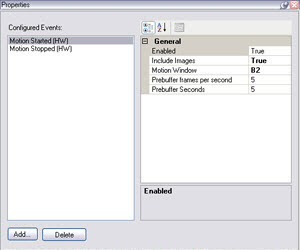
Example: You have configured the camera with two motion windows, called A1, and A2. You have added two instances of the Motion Started (HW) event. In the properties of one instance, you have specified the use of motion window A1. In the properties of the other instance, you have specified the use of motion window A2.
When you use the event in a rule, you can specify that the event should be based on motion detected in a specific motion window for the rule to be triggered:
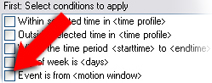
Event tab (properties)
|
Name |
Description |
|---|---|
| Configured events |
Which events you may select and add in the Configured events list is determined entirely by the device and its configuration. For some types of devices, the list is empty. |
| General |
The list of properties depends on the device and the event. In order for the event to work as intended, you must specify some or all of the properties identically on the device as well as on this tab. |
Client tab (devices)
Client tab (explained)
The following devices have a Client tab:
- Cameras
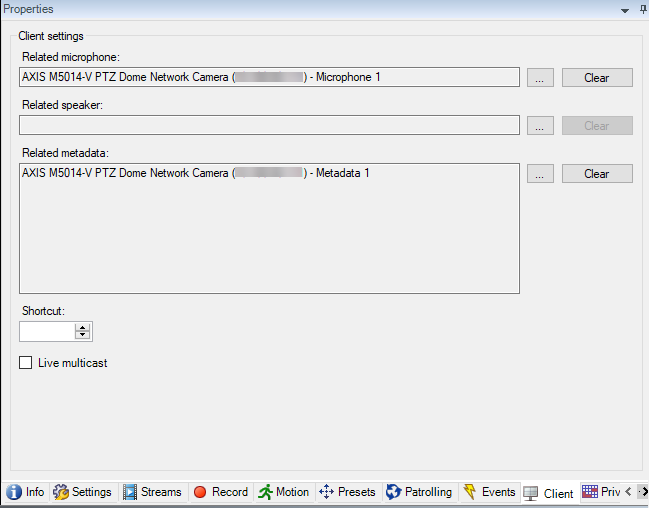
On the Client tab you can specify which other devices are viewed and heard when you use the camera in XProtect Smart Client.
The related devices also record when the camera records, see Enable recording on related devices.
You can also enable Live multicast on the camera. It means that the camera multicasts live streams to the clients via the recording server.
Multicast streams are not encrypted, even if the recording server uses encryption.
See also:
Client tab properties
|
Name |
Description |
|---|---|
| Related microphone |
Specify the microphone on the camera that XProtect Smart Client users by default listen to audio. The XProtect Smart Client user can manually select to listen to another microphone if needed. Specify the microphone that is related to the video push camera for streaming video with audio. The related microphones record when the camera records. |
| Related speaker |
Specify through which speakers on the camera, that XProtect Smart Client users speak by default. The XProtect Smart Client user can manually select another speaker if needed. The related speakers record when the camera records. |
| Related metadata |
Specify one or more metadata devices on the camera, that XProtect Smart Client users receive data from. The related metadata devices record when the camera records. |
| Shortcut |
To ease the selection of cameras for the XProtect Smart Client users, define keyboard shortcuts to the camera.
|
| Live multicast |
The system supports multicast of live streams from the recording server to XProtect Smart Client. To enable multicast of live streams from the camera, select the check box. Live multicasting only works on the stream that you have specified as the camera's default stream on the Streams tab. You must also configure multicasting for the recording server. See Multicast tab (recording server). Multicast streams are not encrypted, even if the recording server uses encryption. |
Privacy masking tab (devices)
Available functionality depends on the system you are using. See https://www.milestonesys.com/solutions/platform/product-index/ for more information.
XProtect Essential+ 2018 R1 and onwards does not support privacy masking, so if you upgrade from a system with privacy masks applied, the masks will be removed.
Privacy masking tab (explained)
The following devices have a Privacy masking tab:
- Cameras
On the Privacy masking tab, you can enable and configure privacy protection for the selected camera.
Privacy masks are applied and locked to an area of the camera image, so the covered area does not follow the pan-til-zoom movements, but constantly cover the same area of the camera image. On some PTZ cameras, you can enable position based privacy masking on the camera itself.
In a Milestone Interconnect setup, the central site disregards privacy masks defined in a remote site. If you want to apply the same privacy masks, you must redefine it on the central site.
Privacy masking (explained)
With privacy masking, you can define which areas of the video from a camera you want to cover with privacy masks when shown in the clients. For example, if a surveillance camera covers a street, you can cover certain areas of a building (could be windows and doors) with privacy masks, to protect the privacy of residents. In some countries, this is a legal requirement.
You can specify privacy masks as either solid or blurred. The masks cover both live, recorded, and exported video.
There are two types of privacy masks:
- Permanent privacy mask: Areas with this type of mask are always covered in the clients. Can be used to cover areas of the video that never requires surveillance, like public areas, or areas where surveillance is not allowed. Motion detection is excluded from areas with permanent privacy masks
- Liftable privacy mask: Areas with this type of mask can be temporarily uncovered in XProtect Smart Client by users with permission to lift privacy masks. If the logged in XProtect Smart Client user does not have the right to lift privacy masks, the system asks for an authorized user to approve of the lift.
Privacy masks are lifted until timeout or the user reapply them. Be aware that privacy masks are lifted on video from all cameras that the user has access to
If you upgrade from a 2017 R3 system or older with privacy masks applied, the masks will be converted to liftable masks.
When a user exports or playbacks recorded video from a client, the video includes the privacy masks configured at the time of recording, even if you have changed or removed the privacy masks later. If privacy protection is lifted when exporting, the exported video does not include the liftable privacy masks.
If you change privacy masking settings very often, for example once a week, your system can potentially be overloaded.
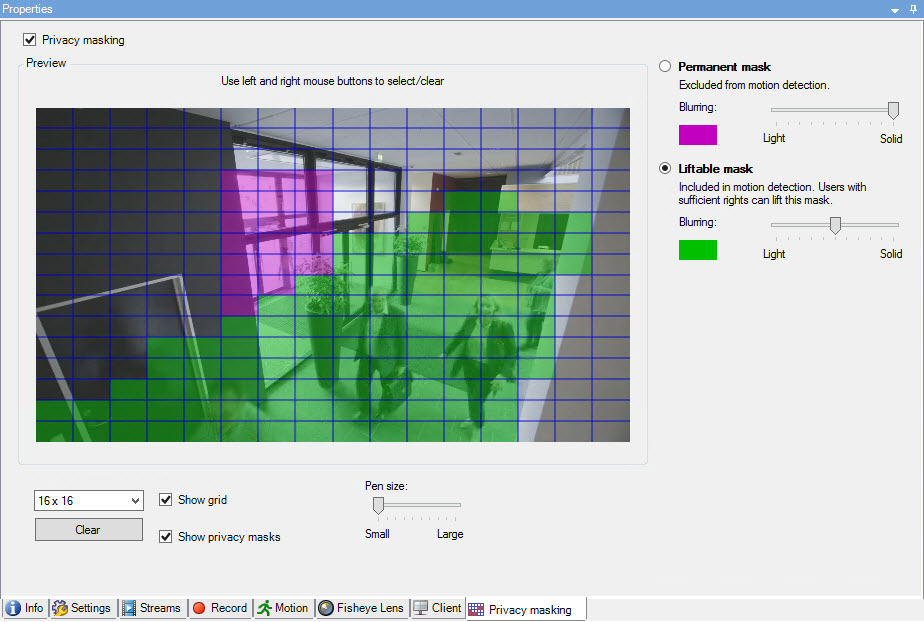
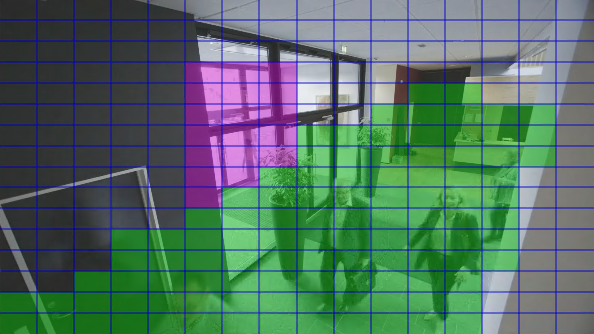
Example of the Privacy masking tab with privacy masks configured:
And this is how they appear in the clients:
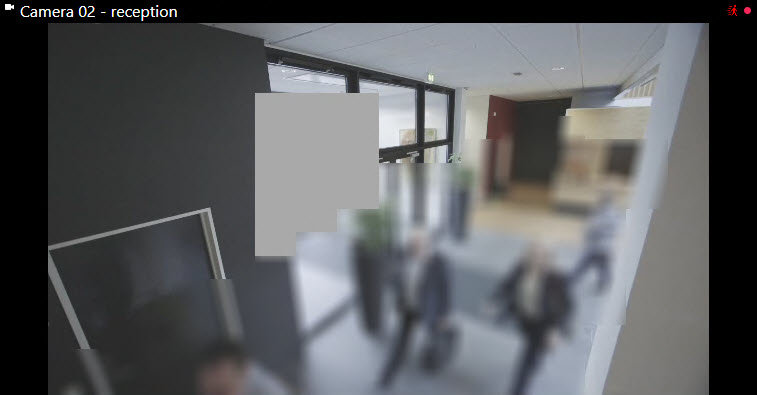
You can inform the client users about the settings of permanent and liftable privacy masks.
Enable/disable privacy masking
The privacy masking feature is disabled by default.
To enable/disable the privacy masking feature for a camera:
- On the Privacy masking tab, select or clear Privacy masking check box
Define privacy masks
When you enable the privacy masking feature on the Privacy masking tab, a grid is applied to the camera preview.
- To cover an area with a privacy mask, first select if you want a permanent or liftable privacy mask.
- Drag the mouse pointer over the preview. Press down the left mouse button to select a grid cell. Press down the right mouse button to clear a grid cell.
- You can define as many privacy mask areas as needed. Areas with permanent privacy masks appear in purple and areas with liftable privacy masks in green.
- Define how the covering of the areas should appear in the video when shown in the clients. Use the sliders to go from a light blurring to a full nontransparent mask.
Permanent privacy masks also appear on the Motion tab.
- In XProtect Smart Client, check that the privacy masks appear as you defined.
Give users permission to lift privacy masks
By default, no users have permissions to lift privacy masks in XProtect Smart Client.
To enable/disable the permission:
- Under Roles, select the role that you want to give permission to lift privacy masks.
- On the Overall Security tab, select Cameras.
- Select the Allow check box for the Lift privacy masks permission.
Users that you assign to this role, can lift privacy masks configured as liftable masks for himself/herself as well as authorize the lift for other XProtect Smart Client users.
Change the timeout for lifted privacy masks
By default, privacy masks are lifted for 30 minutes in XProtect Smart Client and afterwards applied automatically, but you can change that.
When you change the timeout, remember to do it for the Smart Client profile associated with the role that has the permission to lift privacy masks.
To change the timeout:
- Under Smart Client Profiles, select the relevant Smart Client profile.
- On the General tab, locate Lift privacy masks timeout.
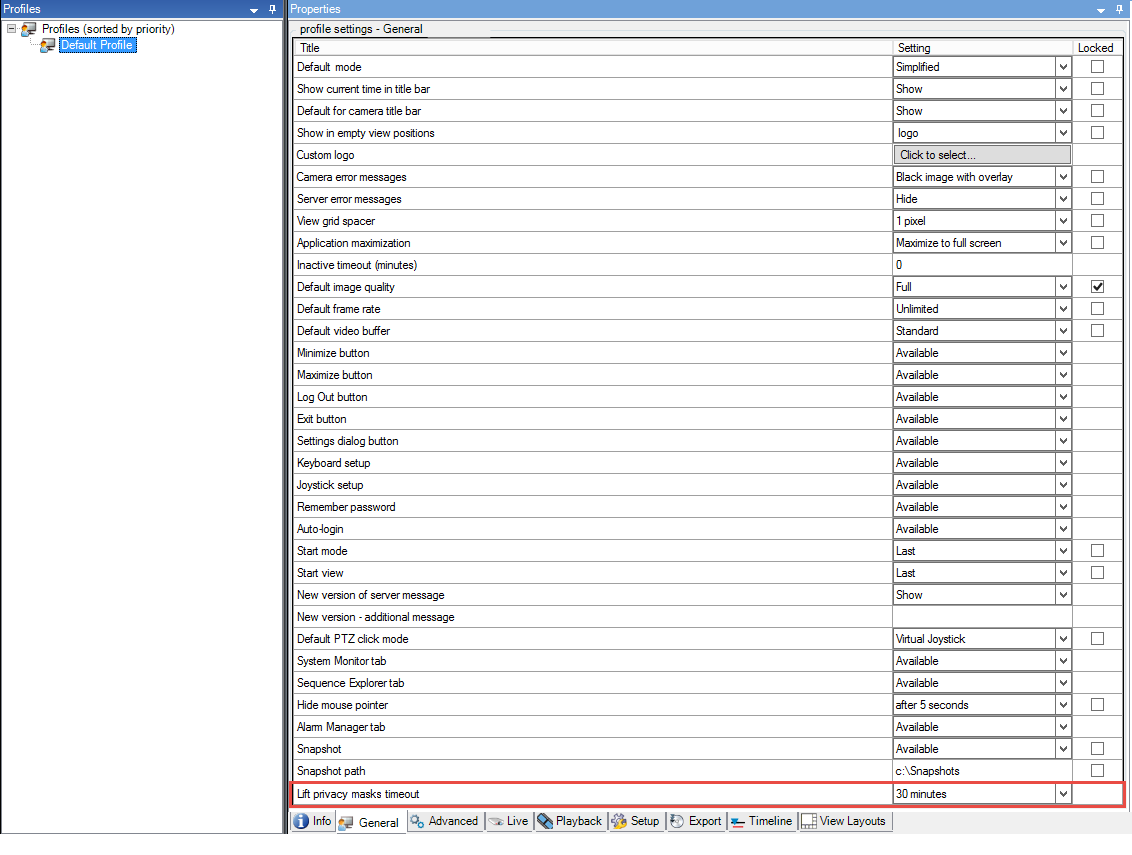
- Select between the values:
- 2 minutes
- 10 minutes
- 30 minutes
- 1 hour
- 2 hours
- Until logged out
- Click Save.
Create a report of your privacy masking configuration
The devices report include information about your cameras' current privacy masking settings.
To configure a report:
- Under Configuration Reports, select the Devices report.
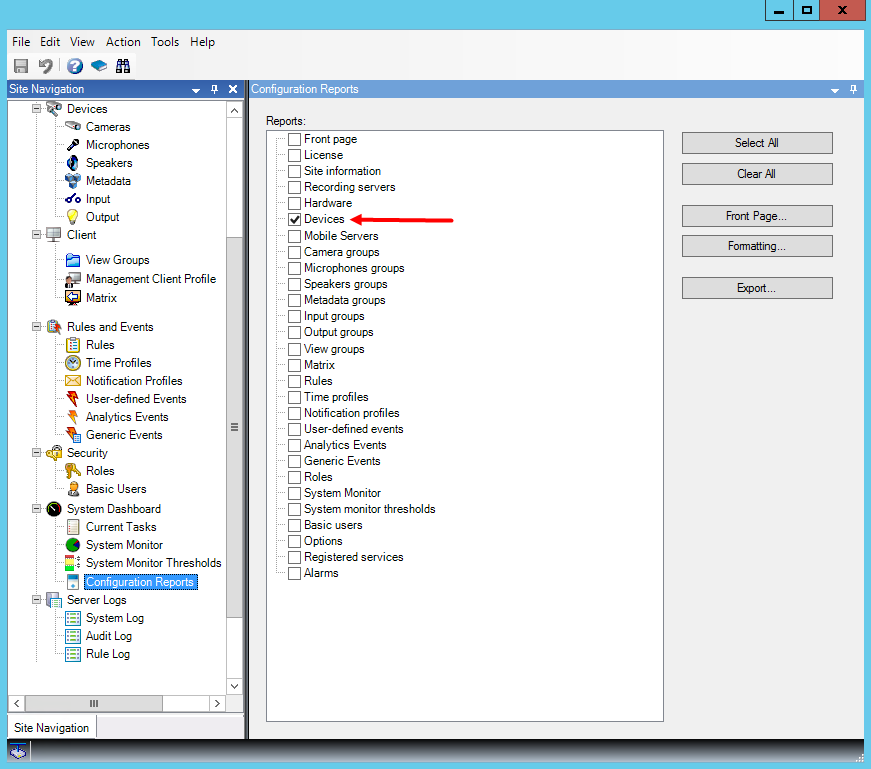
- If you want to modify the report, you can change the front page and the formatting.
- Click Export, and the system creates the report as a PDF file.
For more information about reports, see Configuration reports (explained).
Privacy masking tab (properties)
|
Name |
Description |
|---|---|
| Grid size |
The selected grid size determines the density of the grid, regardless whether the grid is visible in the preview or not. Select between the values 8×8, 16×16, 32×32 or 64×64. |
| Clear |
Clears all privacy masks you have specified. |
| Show grid |
Select the Show grid check box to make the grid visible. |
| Show privacy masks |
When you select the Show privacy masks check box (default), permanent privacy masks appear in purple in the preview and liftable privacy masks in green. Milestone recommends that you keep the Show privacy masks box selected so that you and your colleagues can see the current privacy protection configuration. |
| Pen size |
Use the Pen size slider to indicate the size of the selections you wish to make when you click and drag the grid to select regions. Default is set to small, which is equivalent to one square in the grid. |
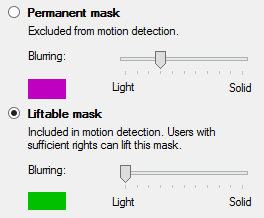
| Permanent mask |
Appears in purple in the preview on this tab and on the Motion tab. Permanent privacy masks are always visible in XProtect Smart Client and cannot be lifted. Can be used to cover areas of the video that never requires surveillance, like public areas, where surveillance is not allowed. Motion detection is excluded from permanent masks. You specify the coverage of privacy masks as either solid or some level of blurred. The coverage settings apply to both live and recorded video. |
| Liftable mask |
Appears in green in the preview on this tab. Liftable privacy masks can be lifted in XProtect Smart Client by users with sufficient user rights. By default, the privacy masks are lifted for 30 minutes, or until the user apply them again. Be aware that the privacy masks are lifted on video from all the cameras that the user has access to. If the XProtect Smart Client user does not have the right to lift privacy masks, the system asks for a user with permission to authorize the lift. You specify the coverage of privacy masks as either solid or a level of blurred. The coverage settings apply to both live and recorded video. |
| Blurring |
Use the slider to select the blurring level of the privacy masks in the clients or set the coverage to solid. By default, the coverage of areas with permanent privacy masks are solid (nontransparent). By default, liftable privacy masks are medium blurred. You can inform the client users about the appearance of permanent and liftable privacy masks, so they are able to distinguish. |