

Export the video
After you locate the video evidence, you can export it. The first illustration shows you how to export video on the Playback tab. The second illustration shows you how to export on the Search tab.
Start the export on the Playback tab
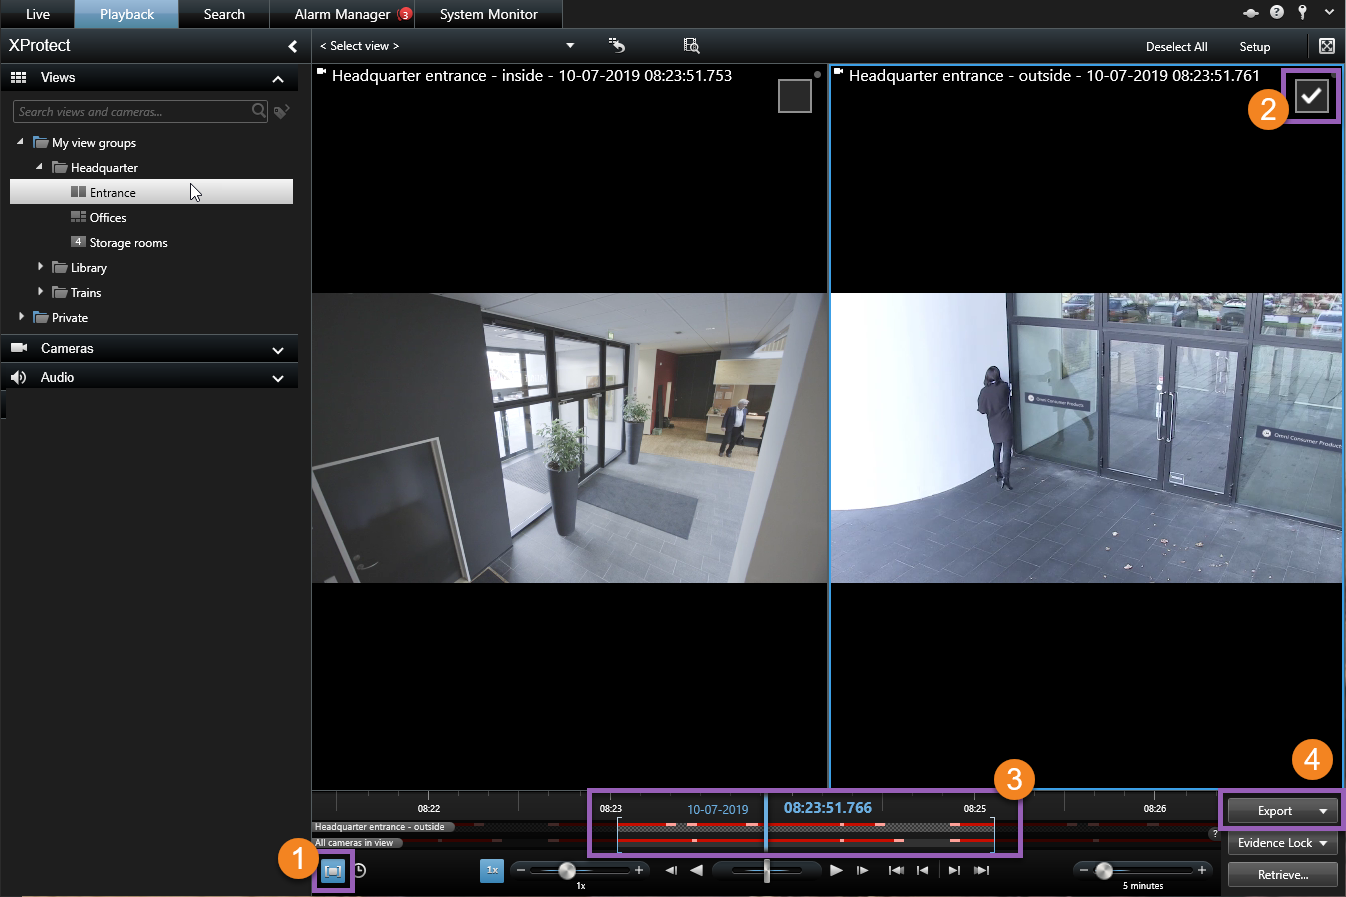
- Click to turn on time selection mode
 .
. - Select the cameras you want to include in the export
 .
. - Drag the square brackets to select a start and end time for the export
 .
. - Click Export > Export to open the export window
 .
.
Start the export on the Search tab
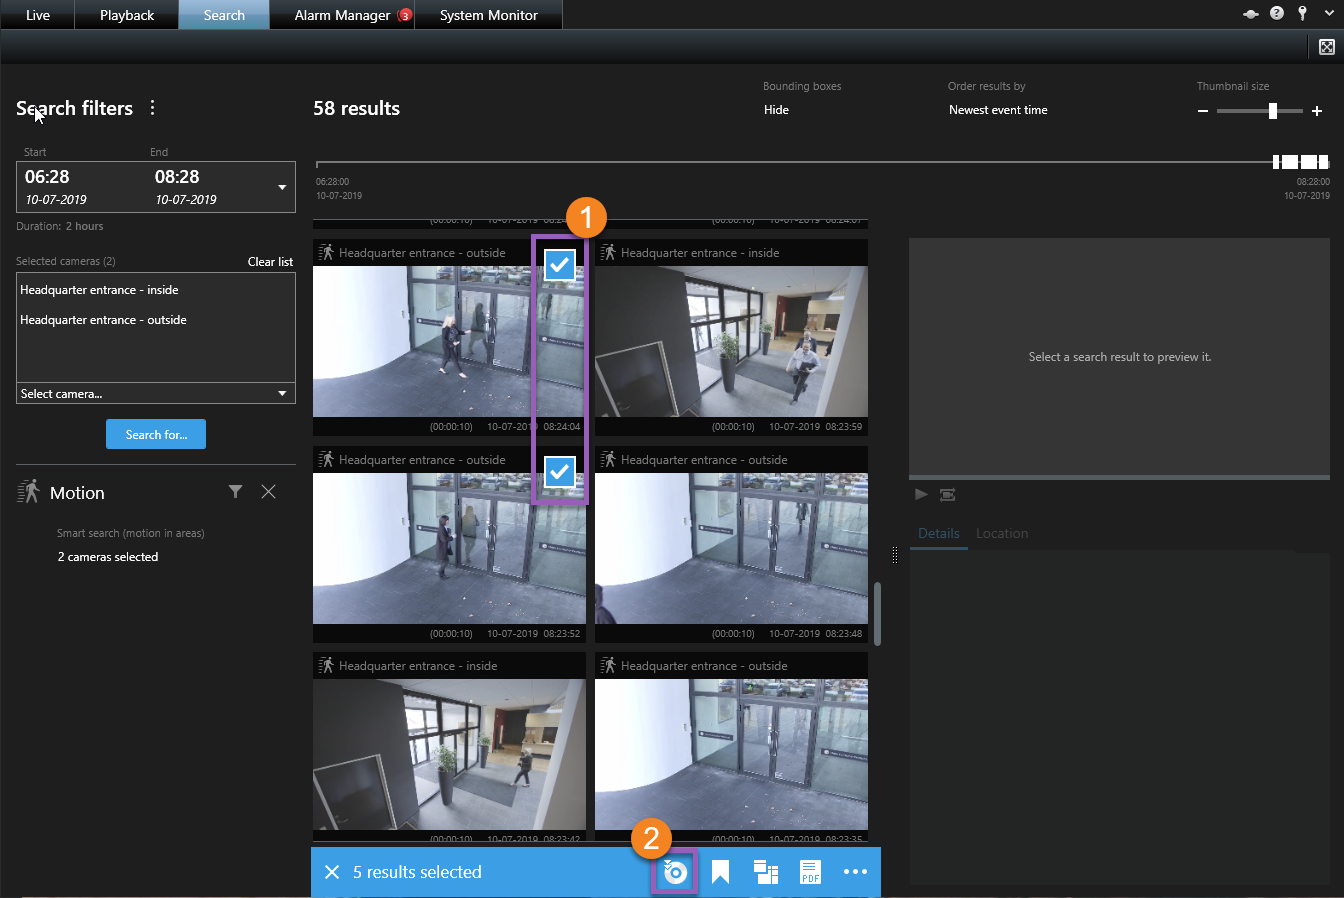
- For each search result you want to export, hover over it and select the blue check box that appears .
- In the action bar, select the export icon .
Specify the export settings
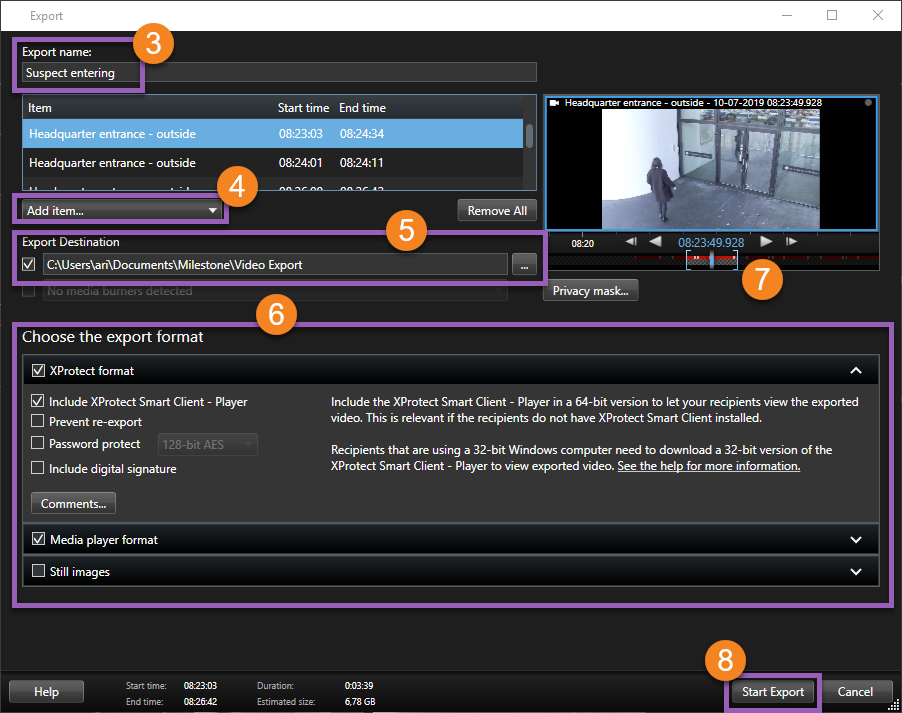
- Enter a name for the export file .
- If needed, add more cameras .
- Specify the export destination
 .
. - Select a format for the export
 .
. - To adjust the start and end time, use the square brackets
 .
. - Click Start Export to start the export
 .
.
For details about the export settings, see Export settings.
To access the export, click Details in the upper-right corner when the export is completed:

Export settings
|
Setting |
Description |
|---|---|
|
XProtect |
Export video from multiple cameras at the same time, and with digital zoom capability. This option requires the following:
|
|
Media player |
Export video from multiple cameras as separate video clips that you can view by using a standard media player. For example, Windows Media Player. |
|
Still image |
Export still images. |
| Privacy mask | You can hide areas of the video content by adding privacy masks on areas in the image. For example, privacy masks are useful when you do not want viewers to see sensitive content. |
| Comments | You can display important instructions or guidelines by adding comments to your export file. |