Activating licenses
This section describes how licenses are activated in Milestone Customer Dashboard and used in XProtect VMS installations.
After you purchase an XProtect VMS product, you receive an email that includes a software license code (SLC) and a software license file (.lic). Here is how each is used in Milestone Customer Dashboard:
- Software license codes (SLCs) identify purchases of Milestone XProtect VMS solutions. Each SLC can be assigned to exactly one customer
- Software license (.lic) files are associated with SLCs and are used to activate and configure XProtect VMS installations
You must activate licenses after you:
- Install an XProtect VMS product with a registered software license (.lic) file
- Add hardware devices in Management Client
- Add or modify XProtect VMS plug-ins and add-ons
- Add Milestone Interconnect™ sites
- Upgrade to a newer version of your XProtect VMS product, including service releases
Depending on whether your system is connected to the internet, use the online activation or offline activation process to activate licenses:
- Online activation is the recommended method if the system can access the internet. Online activation automates the process of activating hardware device licenses (see Use online activation)
- Offline activation lets you activate licenses if the system cannot access the internet. Offline activation requires additional steps to activate licenses (see Use offline activation)
Get a software license (.lic) file in Milestone Customer Dashboard
If a software license code (SLC) is registered in Milestone Customer Dashboard, you can get the associated software license (.lic) file that is used when installing a VMS system.
To get a software license (.lic) file:
- Log in to Milestone Customer Dashboard (https://online.milestonesys.com/).
- Select Customers or Licenses in the main menu.
- On the Customers tab, double-click a customer, then double-click an associated License (SLC). Alternatively, double-click an SLC on the Licenses tab.
-
Select Download initial .lic file to download the license file directly, or select Email initial .lic file to open the Email initial license file dialog to send an email containing the license file to one or more recipients.
The license (SLC) must be associated with a product version 8.1 or newer and must not be a plug-in license in order to provide a software license (.lic) file.
Install a VMS system with a registered software license (.lic) file
If you are installing an XProtect VMS system for the first time, and you have purchased and registered a software license code (SLC), you can import your software license (.lic) file in the XProtect VMS product installer.
A software license code (SLC) must first be registered during point-of-sale or in Milestone Customer Dashboard to import the associated license (.lic) file in the XProtect VMS product installer.
To import a software license (.lic) file:
- Find the downloaded license file on your computer. Alternatively, find the email with the software license file attached and copy the license file to your computer.
- Run the XProtect VMS product installer.
-
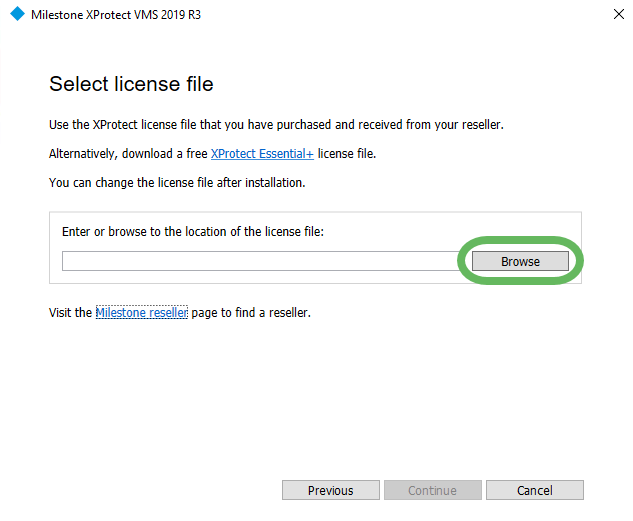
In the Select license file window, select Browse, locate the software license file, then select Continue.
After you add devices, you must activate hardware device licenses for them. Depending on whether the system is connected to the internet, follow the steps for Use online activation or Use offline activation.
About the grace period and changes without activation
After the system is licensed using a license (.lic) file, you can add devices and use them for 30 days without activating hardware device licenses for them. To continue to use the devices after 30 days, you must activate the hardware device licenses.
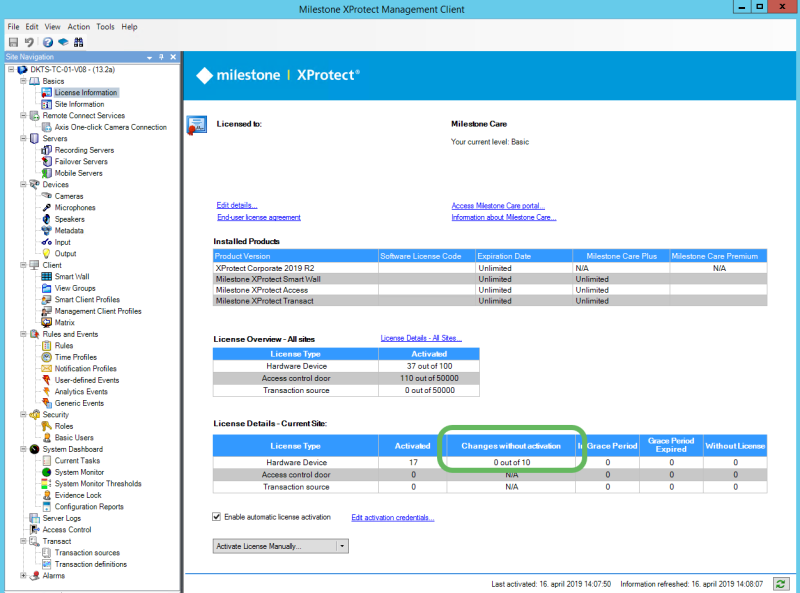
You can change a certain number of cameras without having to activate device licenses again, called Changes without activation. The number of changes that you can make is refreshed annually and is based on usage conditions, such as your XProtect VMS product and the number of device licenses that you have purchased.
See the current list of variable values on the Milestone device calculation web page (https://www.milestonesys.com/device-change-calculation/). You can learn more about changes without activation in the Management Client help system.
To view your changes without activation:
- Open Management Client.
- Select License Information.
- In the License Details - Current Site section, the number is shown under Changes without activation.
Use online activation
If your system has access to the internet, you can turn on automatic license activation in Management Client. The system can be set to activate device licenses whenever it detects a change, for example, after you add devices, or only after you manually start the online activation process.
When adding devices for the first time, you must manually start online activation. After you start online activation, you can turn on automatic license activation in Management Client.
Start online activation manually
- In Management Client, in the Site Navigation pane, expand Basics, and select License Information.
-
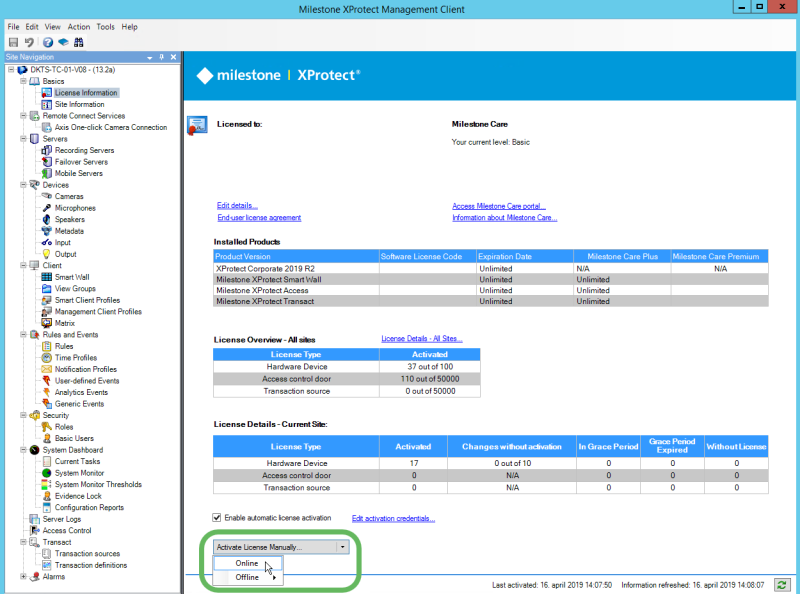
Select Activate License Manually, then select Online.
- Enter the user name and password for your My Milestone account, then select Next.
- Select Finish to activate the licenses.
Enable automatic license activation
To set up automatic license activation, in Management Client, in the Site Navigation pane, expand Basics, and select License Information. Select the Enable automatic license activation check box and enter the user name and password for your My Milestone account.
After you add a device, automatic license activation might take a few minutes to reflect the changes.
Use offline activation
After you import your software license file and add devices in Management Client, if your XProtect VMS product is not connected to the internet, you can use offline activation to activate hardware device licenses.
To prepare for offline activation, you need a portable storage device, such as a USB flash drive, and a computer with access to the internet.
To use offline activation:
- Export a license request (.lrq) file from Management Client.
- Activate the license request file in Milestone Customer Dashboard.
- Receive an activated license (.lic) file in an email, and then import the file into Management Client.
Export a license request (.lrq) file from Management Client
The license request file contains information about your XProtect VMS system. For example, it contains the number of hardware devices for which to activate licenses.
To export a license request (.lrq) file:
- In Management Client, in the Site Navigation pane, expand Basics, and select License Information.
-
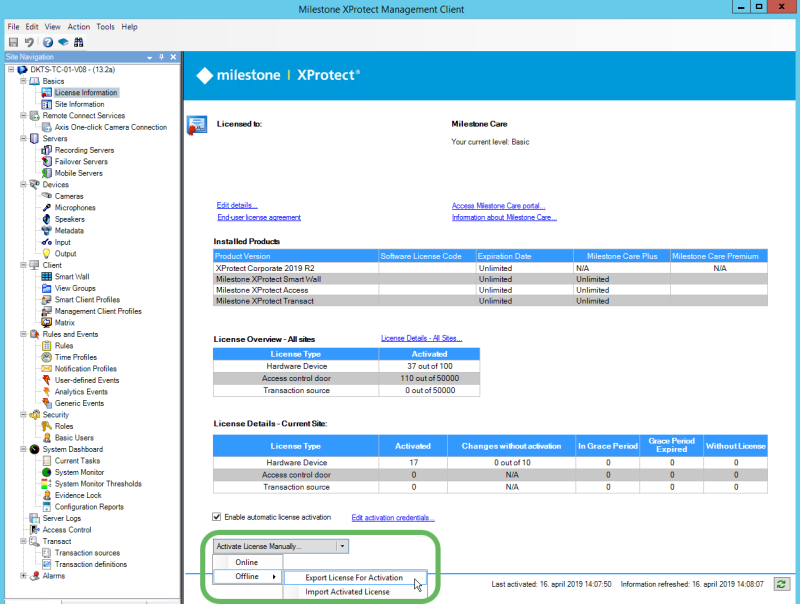
At the bottom left-hand side of the main workspace, select Activate License Manually > Offline > Export License For Activation.
- Save the license request (.lrq) file to a portable storage device.
- Connect the portable storage device to a computer with internet access.
Activate a license request (.lrq) file in Milestone Customer Dashboard
- Log in to Milestone Customer Dashboard.
-
Select Customers & Licenses, then select Activate .lrq file.
- Select Activate .lrq file, and then find the license request (.lrq) file that you saved on the portable storage device.
- Optional: By default, the activated license file is sent to the email address that was specified when the software license was purchased. To add more email recipients for the activated license file, enter the recipients' email addresses in the Enter additional recipients (optional) field and select Add.
- Select Upload.
Receive an activated license (.lic) file in an email and import the file into Management Client
After you receive an activated license file, import the file into Management Client to update your software license information.
To import the activated license file:
- Copy the activated license file from the email to your portable storage device, and then connect the portable storage device to the computer where Management Client is installed.
- In Management Client, in the Site Navigation pane, expand Basics, and select License Information.
-
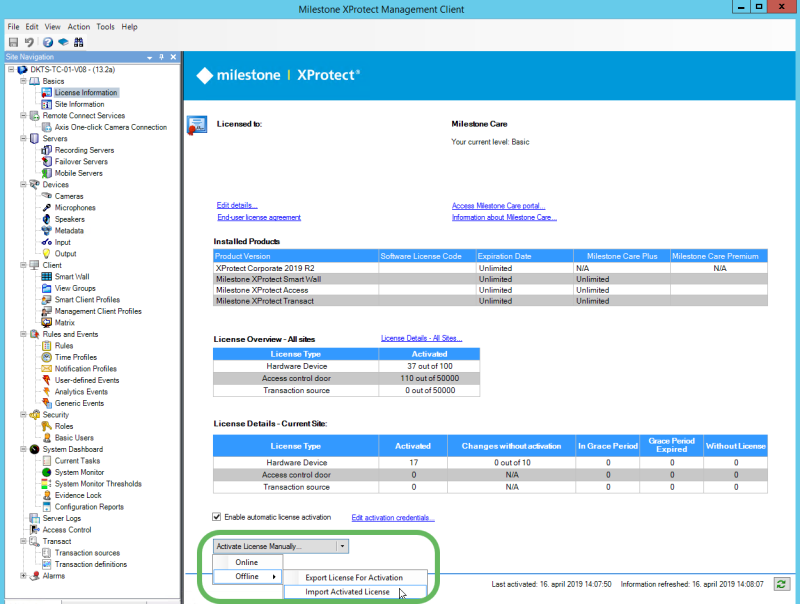
Select Activate License Manually > Offline > Import Activated License.
- Find the activated license file on the portable storage device and select Open.


