

Configuring smart map
This section describes how to configure smart maps for Google Maps and Bing Maps.
Acquire API key for Google Maps or Bing Maps
Google Maps
To embed Google Maps into your smart map, you need a Maps Static API key from Google. To get the API key, first you must create a Google Cloud billing account. You are billed in accordance with the volume of map loads per month.
Once you have the API key, you must enter it in XProtect Management Client. See Enable Bing Maps or Google Maps in Management Client.
For more information, see:
- Google Maps Platform - get started: https://cloud.google.com/maps-platform/
- Guide to Google Maps Platform billing: https://developers.google.com/maps/billing/gmp-billing
- Developer guide for Maps Static API: https://developers.google.com/maps/documentation/maps-static/dev-guide
Bing Maps
To embed Bing Maps into your smart map, you need a Basic Key or an Enterprise Key. The difference is that basic keys are free, but allow a limited number of transactions before the transactions become billable or access to the map service is denied. The enterprise key is not free, but allow unlimited transactions.
For more information about Bing Maps, see (https://www.microsoft.com/en-us/maps/licensing/).
Once you have the API key, you must enter it in XProtect Management Client. See Enable Bing Maps or Google Maps in Management Client.
Enable Bing Maps or Google Maps in Management Client
You can make a key available to multiple users by entering it for a Smart Client profile in Management Client. All users who are assigned to the profile will use this key.
Steps:
- In Management Client, on the Site Navigation pane, click Smart Client Profiles.
- In the Smart Client Profiles pane, select the relevant Smart Client profile.
- In the Properties pane, click the Smart Map tab:
- For Bing Maps, enter your Basic Key or Enterprise Key in the Bing Maps key field
- For Google Maps, enter your Maps Static API key in the Private key for Google Maps field
- To prevent XProtect Smart Client operators from using a different key, select the Locked check box.
Enable Bing Maps or Google Maps key in XProtect Smart Client
To allow XProtect Smart Client operators to use a different key than the key from the Smart Client profile, you must enter the key in the settings in XProtect Smart Client.
Steps:
-
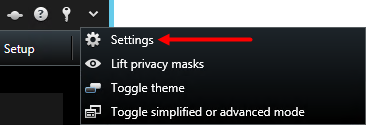
In XProtect Smart Client, open the Settings window.
- Click Smart map.
- Depending on the map service you want to use, do one of the following:
- For Bing Maps, enter your key in the Bing Maps key field
- For Google Maps, enter your key in the Private key for Google Maps field
Cached smart map files (explained)
The files that you use for your geographic background are retrieved from a tile server. The time that the files are stored in the cache folder depends on the value selected in the Removed cached smart map files list in the Options dialog in XProtect Smart Client. The files are stored either:
- Indefinitely (Never)
- For 30 days if the file is not used (When not used for 30 days)
- When the operator exits XProtect Smart Client (On exit)
When you change the tile server address, automatically a new cache folder is created. The previous map files are retained in the associated cache folder on your local computer.
Enable smart map editing
Operators can edit smart maps in XProtect Smart Client in setup mode only if editing is enabled in Management Client. If not already enabled, you need to enable editing for each relevant Smart Client profile.
Steps:
- In the Site Navigation pane, expand the Client node.
- Click Smart Client Profiles.
- In the overview pane, select the relevant Smart Client profile.
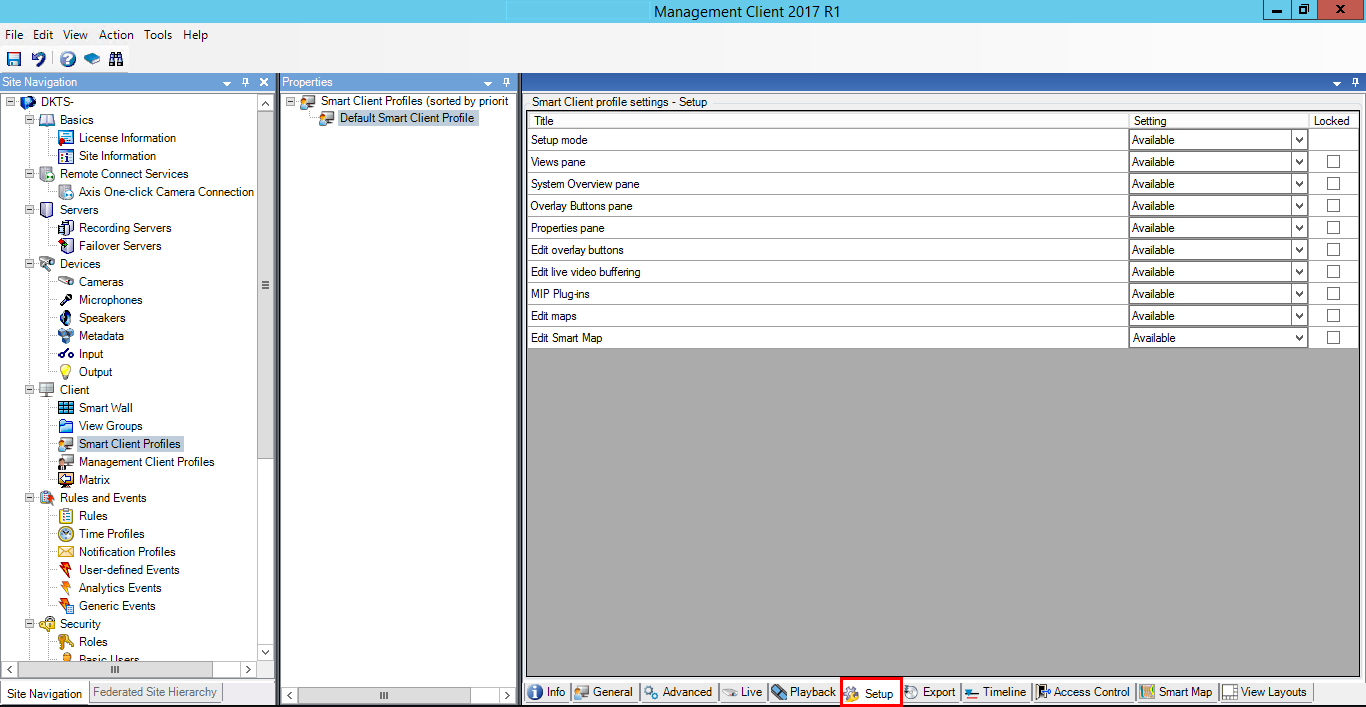
- In the Properties pane, click the Setup tab.
- In the Edit smart map list, select Available.
- Repeat these steps for each relevant Smart Client profile.
- Save your changes. Next time users assigned to the Smart Client profile you selected log into XProtect Smart Client, they will be able to edit smart maps.
To disable editing, in Edit smart map list, select Unavailable.
Enable editing of cameras on smart map
To allow operators to position a camera on the smart map, adjust the field of view, and direction, you must enable editing of cameras per role.
Requirements
Before you start, make sure that Smart map editing has been enabled (see Enable smart map editing). You do this on the Smart Client profile that the role of the operator is associated with.
Steps:
- Expand the Security node > Roles.
- In the Roles pane, select the role that your operator is associated with.
- To give the role editing rights:
- Click the Overall Security tab, and select Cameras in the Role Settings pane
- In the Allow column, select the Full control or Edit check box
- Save the changes.
The steps above gives the role the right to edit all cameras. To enable editing for individual cameras, go to the Device tab and select the relevant camera.
Setting up geographic backgrounds
The Basic world map is the default geographic background, and does not require any setup. You can also use OpenStreetMaps out-of-the-box without additional steps if your system can access the Internet. For information about the other types of backgrounds, see Types of geographic backgrounds (explained).
Requirements for using Bing Maps and Google Maps:
- Your system administrator must enter your Bing Maps key, or your Google Maps private cryptographic key and client ID in Management Client for a Smart Client profile. Bing Maps and Google Maps geographic backgrounds are available in XProtect Smart Client only after your administrator does this.
- Use your Google Maps or Bing Maps account to create or purchase a key for Bing Maps, or a client ID and private key for the Google Maps API. For more information, see Acquire API key for Google Maps or Bing Maps.
If you want to prevent users from using OpenStreetMaps as a geographic background, click  Settings, and select Unavailable for the OpenStreetMap geographic background option. Then XProtect Smart Client does not display it as an option for a smart map.
Types of geographic backgrounds (explained)
After you add a smart map to a view, you can choose one of the following geographic backgrounds:
- Basic world map - use the standard geographic background provided in XProtect Smart Client. This map is intended for use as a general reference, and does not contain features such as country boundaries, cities, or other details. However, like the other geographic backgrounds, it does contain geo-reference data
- Bing Maps - connect to Bing Maps
- Google Maps - connect to Google Maps
The Bing Maps and Google Maps options require access to the Internet, and you must purchase a key from Microsoft or Google.
- OpenStreetMap - connect to the OpenStreetMap (https://www.openstreetmap.org/) (OSM) open source mapping project. This option requires access to the Internet. The map data for OSM is provided under the organization's Open Database License (https://www.openstreetmap.org/copyright/)
- None - this hides the geographic background. However, the geo-reference data is still there. For more information, see Working with layers on smart map
By default, Bing Maps and Google Maps display satellite imagery (Satellite). You can change the imagery, for example to aerial or terrain, to see different details. For more information, see Change the geographic background on smart map.
Changing OpenStreetMap tile server
If you use OpenStreetMap as the geographic background for your smart map, you can change the location where the tiled images are retrieved. The tiled images make up the map. You do this by changing the tile server address. This allows you to use a local tile server, for example if your organization has its own maps for areas such as airports or harbors. Using a local server means that XProtect Smart Client can retrieve the map images without Internet access.
You can also use a commercial tile server. Milestone does not provide a tile server solution for OpenStreetMap.
The tile server address can be specified in two ways:
- In Management Client - you set the tile server address on the Smart Client profiles (see Set an alternative OpenStreetMap tile server). The server address applies to all Smart Client users assigned to the individual Smart Client profiles
- In XProtect Smart Client - you set the tile server address in the Settings window. The server address applies only to that Smart Client installation
Set an alternative OpenStreetMap tile server
For the smart map feature, you can specify an alternative OpenStreetMap tile server, where the VMS retrieves the map files for the geographic background. The server you specify is associated with a Smart Client profile, so that users assigned to the Smart Client profile view the same OpenStreetMap in XProtect Smart Client.
Steps:
- In the Site Navigation pane, expand the Client node and click Smart Client Profiles.
- In the overview pane, select the relevant Smart Client profile.
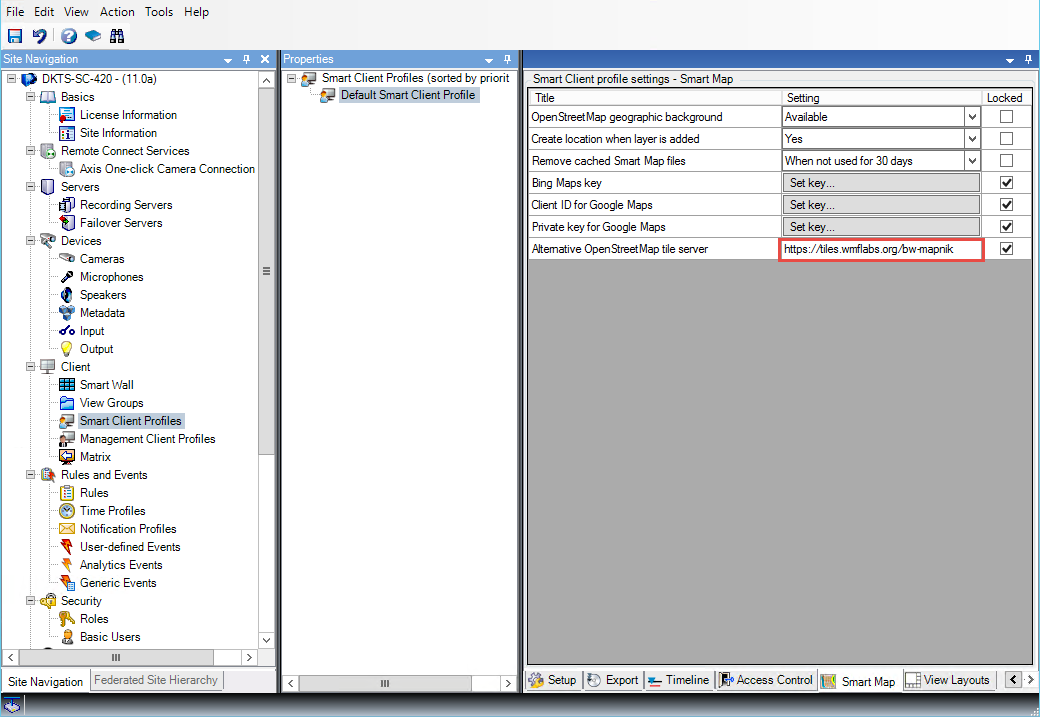
- In the Properties pane, click the Smart map tab.
- In the Alternative OpenStreetMap tile server field, enter the address of the tile server.
- If you want to prevent XProtect Smart Client users from changing the setting, select the Locked check box.
- Save the changes.
Set camera position, direction, field of view, and depth (smart map)
To ensure that a camera is positioned correctly on the smart map, you can set the GPS coordinates, the direction of the camera, the field of view, and the viewing depth. In doing so, automatically the camera is added to the smart map next time an operator loads it in XProtect Smart Client.
Steps:
- In Management Client, expand the Devices node and select Cameras.
- In the Devices pane, select the relevant camera group and camera.
- On the Info tab, scroll down to Positioning information.
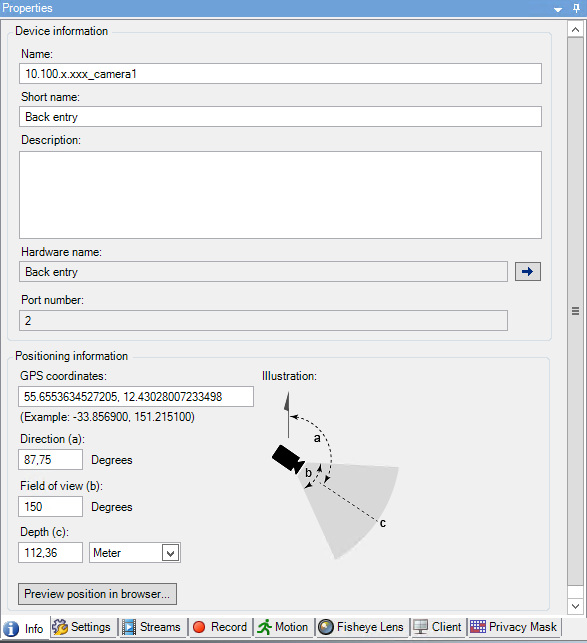
- Specify the latitude and the longitude in the GPS coordinates field, in that order. Use a period as decimal separator and a comma to separate the values.
- In the Direction field, enter a value in the range of 0 and 360 degrees.
- In the Field of view field, enter a value in the range of 0 and 360 degrees.
- In the Depth field, enter the viewing depth, either in meters or feet.
- Save the changes.
You can also set the properties on the recording servers.
Setting up smart map with Milestone Federated Architecture
When you use smart map in a Milestone Federated Architecture, all the cameras from the connected sites appear on the smart map. The overall steps in this topic describes how to set up smart map in a federated architecture.
For general information about Milestone Federated Architecture, see Configuring Milestone Federated Architecture.
- Before connecting the top site with child sites, make sure that GPS coordinates have been specified on all cameras on all sites. GPS coordinates are added automatically when a camera is positioned on the smart map through XProtect Smart Client, but you can also add them manually in Management Client in the camera properties. For more information, see Set camera position, direction, field of view, and depth (see Set camera position, direction, field of view, and depth (smart map)).
- You must add the Smart Client operators as Windows users on the parent site and all the federated sites. At least on the top site, the Windows users must have smart map editing rights. This allows them to edit the smart map for the top site and all child sites. Next, you need to determine whether the Windows users on the child sites need smart map editing rights. In Management Client, first you create the Windows users under Roles, and then you enable smart map editing. For more information, see Enable smart map editing.
- On the top site, add the child sites as Windows users to a role with administrator rights. When you specify the object type, select the Computers check box.
- On each child site, add the top site as a Windows user to the same administrator role that is used on the top site. When you specify the object type, select the Computers check box.
- On the top site, make sure that you can view the Federated Site Hierarchy window. In Management Client, go to View and select Federated Site Hierarchy. Add each of the child sites to the top site. For more information, see Add site to hierarchy.
- Now you can test that it works in XProtect Smart Client. Log into the top site as administrator or as an operator, and open a view that contains the smart map. If the setup has been done correctly, all cameras from the top site and the child sites appear on the smart map. If you log into one of the child sites, you will see only the cameras from that site and its child sites.
To edit cameras on a smart map, for example the camera position and angle, users need camera editing rights.
Troubleshooting (smart map)
Error when adding camera to smart map
ErrorIf an operator tries to add cameras to a smart map manually, because the cameras were not added automatically when loading the smart map, the following error may be displayed: Cannot save the map. Cannot perform the operation.
What may cause the error is that the operator is running version 2017 R1 of XProtect Smart Client against an XProtect Corporate 2017 R2 installation. XProtect Smart Client looks for the GPS position of the camera on the event server, but in version 2017 R2 or newer of XProtect Corporate, the GPS position is stored on the management server.
SolutionUpgrade XProtect Smart Client to version 2017 R2 or newer.
Was this article helpful?
Thanks for your feedback!